User manual Refrigerator ZKR1516 ZKR1506 ZKR1526
Contents Safety information _ _ _ _ _ _ _ _ _ _ _ _ _ _ _ _ _ Operation _ _ _ _ _ _ _ _ _ _ _ _ _ _ _ _ _ _ _ _ _ First use _ _ _ _ _ _ _ _ _ _ _ _ _ _ _ _ _ _ _ _ _ _ Daily use _ _ _ _ _ _ _ _ _ _ _ _ _ _ _ _ _ _ _ _ _ _ Helpful hints and tips _ _ _ _ _ _ _ _ _ _ _ _ _ _ _ _ 2 4 4 4 5 Care and cleaning _ _ _ _ _ _ _ _ _ _ _ _ _ _ _ _ _ 6 What to do if… _ _ _ _ _ _ _ _ _ _ _ _ _ _ _ _ _ _ _ 7 Technical data _ _ _ _ _ _ _ _ _ _ _ _ _ _ _ _ _ _ _ 9 Installation _ _ _ _ _ _ _ _ _ _ _ _ _ _ _ _ _ _ _ _ _ 9 En
squashed or damaged power plug may overheat and cause a fire. 3. Make sure that you can come to the mains plug of the appliance. 4. Do not pull the mains cable. 5. If the power plug socket is loose, do not insert the power plug. There is a risk of electric shock or fire. 6. You must not operate the appliance without the lamp cover1) of interior lighting. • This appliance is heavy. Care should be taken when moving it.
Environment Protection This appliance does not contain gasses which could damage the ozone layer, in either its refrigerant circuit or insulation materials. The appliance shall not be discarded together with the urban refuse and rubbish. The insulation foam contains flammable gases: the appliance shall be disposed according to the applicable regulations to obtain from your local authorities. Avoid damaging the cooling unit, especially at the rear near the heat exchanger.
Ice-cube production This appliance is equipped with one or more trays for the production of ice-cubes. Fill these trays with water, then put them in the freezer compartment. Important! Do not use metallic instruments to remove the trays from the freezer. Positioning the door shelves To permit storage of food packages of various sizes, the door shelves can be placed at different heights.
Hints for freezing To help you make the most of the freezing process, here are some important hints: • the maximum quantity of food which can be frozen in 24 hrs. is shown on the rating plate; • the freezing process takes 24 hours.
It is important to periodically clean the defrost water drain hole in the middle of the refrigerator compartment channel to prevent the water overflowing and dripping onto the food inside. Use the special cleaner provided, which you will find already inserted into the drain hole. 5. Switch on the appliance. 6. Set the temperature regulator to obtain the maximum coldness and run the appliance for two or three hours using this setting. 7. Reload the previously removed food into the compartment.
Problem Possible cause Solution The appliance has no power. There Connect a different electrical appliis no voltage in the mains socket. ance to the mains socket. Contact a qualified electrician. The lamp does not work. The compressor operates continually. The lamp is in stand-by. Close and open the door. The lamp is defective. Refer to "Replacing the lamp". The temperature is not set correctly. Set a higher temperature. The door is not closed correctly. Refer to "Closing the door".
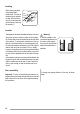
Problem Possible cause Solution The temperature regulator is not set Set a higher temperature. correctly. Replacing the bulb If you want to replace the bulb, do these steps: 1. Break the circuit of the appliance. 2. Unscrew the lamp cover securing screw. 3. Unhook the moving part by pressing it as shown in the figure. 4. Replace the bulb with one of the same power (the maximum power is shown on the light bulb cover) 5. Fix the lamp cover in place. 6. Screw the lamp cover securing screw. 7.
Levelling When placing the appliance ensure that it stands level. This can be achieved by two adjustable feet at the bottom in front (2). If necessary adjust the feet by removing the spacer (1). 1 2 Location Door reversibility Important! To carry out the following operations, we suggest that this be made with another person that will keep a firm hold on the doors of the appliance during the operations. 10 15 mm min.
1. Remove the plug from the power socket. 2. Tilt back the appliance carefully so that the compressor cannot touch the floor. 3. Unscrew both adjustable feet. 4. Unscrew the screws of the door bottom hinge. Remove the hinge. Put over the pin in the direction of the arrow. 5. Unscrew and install the screw on the opposite side. 6. Install the hinge on the opposite side. 7. Screw both adjustable feet. 8. Unscrew both screws on the rear side. 9. Push back the top and lift it from the fixing elements. 10.
Reversibility of the freezer door 180˚ Electrical connection Before plugging in, ensure that the voltage and frequency shown on the rating plate correspond to your domestic power supply. The appliance must be earthed. The power supply cable plug is provided with a contact for this purpose. If the domestic power supply socket is not earthed, con- nect the appliance to a separate earth in compliance with current regulations, consulting a qualified electrician.
www.electrolux.