
Operation Manual


58
Digital Effects
56
Change the voice for the Harmony/Echo effect
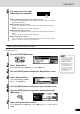
2
Select “Digital Effect.”
Use the data dial, the [+/YES] button or the [-/NO] button.
3
Press the [NEXT] button to display the Digital Effect screen.
4
Select “Harmony/Echo.”
Use the data dial, the [+/YES] button or the [-/NO] button.
5
Press the [NEXT] button to display the Type selection screen.
6
Press the [NEXT] button to display the Harmony/Echo VOL-
UME screen.
7
Press the [NEXT] button to display the HARMONY PART
setting screen.
● Auto .......... Harmony/Echo notes are automatically assigned to the R1 and R2
parts, in that order or priority.
● R1............. Harmony/Echo is only applied to the Voice R1.
If Voice R1 is off, there will be no Harmony/Echo effect.
● R2............. Harmony/Echo is only applied to the Voice R2.
If Voice R2 is off, there will be no Harmony/Echo effect.
This allows you to select the voice which is used for the harmony or echo effect.
1
Press the [FUNCTION] button.
8
Set the part.
Use the data dial, the [+/YES] button or the [-/NO] button.
BACK NEXT
• When the Voice Set function
is on (page 136), the
Harmony/Echo part setting
may change according to the
selected R1 panel voice.