
User Manual


4. Screens
MMP1 Operation Manual 16
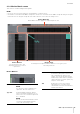
4-1-3b. Monitor section
Here you can adjust the input source and Send levels.
NOTE
Control the sources and outputs of the format selected in the
“Monitor Matrix” tab of the “Scene” tab on the Settings screen.
4-1-3c. Oscillator section
Here you can select signals to output from the oscillator,
and adjust their output levels.
NOTE
Click the or of the meter to turn the oscillator on or off.
Monitor Source
Trim
Drag or use the mouse wheel to adjust
Monitor Source levels. Double click to enter
a value. Out-of-range values entered will be
corrected to the maximum or minimum
value allowed. To return the setting to 0 dB,
simultaneously hold down the <Ctrl> key
(Windows) or the <command> key (Mac)
and click on the control.
Cue Source Trim
Drag or use the mouse wheel to adjust Cue
Source levels. Double click to enter a value.
Out-of-range values entered will be
corrected to the maximum or minimum
value allowed. To return the setting to 0 dB,
simultaneously hold down the <Ctrl> key
(Windows) or the <command> key (Mac)
and click on the control.
Cue Output Trim
Drag or use the mouse wheel to adjust Cue
output levels. Double click to enter a value.
Out-of-range values entered will be
corrected to the maximum or minimum
value allowed. To return the setting to 0 dB,
simultaneously hold down the <Ctrl> key
(Windows) or the <command> key (Mac)
and click on the control. Click “MUTE” to
mute.
Studio Speaker
Output Trim
Drag or use the mouse wheel to adjusts
studio speaker output levels. Double click
to enter a value. Out-of-range values
entered will be corrected to the maximum or
minimum value allowed. To return the
setting to 0 dB, simultaneously hold down
the <Ctrl> key (Windows) or the
<command> key (Mac) and click on the
control. Click “MUTE” to mute.
Lip Sync Delay
Drag or use the mouse wheel to set the lip
sync delay. Double click to enter a value.
Out-of-range values entered will be
corrected to the maximum or minimum
value allowed. To return the setting to 0 ms,
simultaneously hold down the <Ctrl> key
(Windows) or the <command> key (Mac)
and click on the control.
LFE Trim
Click to turn the LFE Trim on (green) or off.
Turn this on to add an LFE Trim Level to all
channels where the CH Type has been set
to “LFE” in the “Speaker Matrix” tab of the
“Scene” tab on the Settings screen.
NOTE
• You can set the CH Type in the “Speaker
Matrix” tab of the “Scene” tab on the
Settings screen.
• You can set the LFE Trim Level in the
“MISC” tab of the “Scene” tab on the
Settings screen.
LFE Filter
Click to turn the LFE Filter on (green) or off.
Turn this off to change the crossover filter
for LFE channels in the following ways.
FIR THRU
IIR (Bypass)
THRU THRU (Unchanged)
NOTE
Note that while filters will not be applied
when the crossover filter is set to “THRU,”
the same delay as that applied to the main
channel will be added.