Operation Manual
Table Of Contents
- Disklavier E3 Classic Operation manual
- SPECIAL MESSAGE SECTION
- IMPORTANT SAFETY INSTRUCTIONS
- Mounting the Control Unit to the Grand Piano
- Mounting an Optional USB Floppy Disk Drive to the Grand Piano
- Welcome to the Yamaha Disklavier™!
- Important Precautions
- Table of Contents
- Quick Reference
- Chapter 1 Introduction
- Chapter 2 Getting Started
- Connecting the Control Unit
- Connecting the AC Power Cable
- Using the Remote Control
- Turning On the Disklavier
- Setting the Internal Calendar
- Turning Off the Disklavier (Standby Mode)
- Shutting Down the Disklavier
- Compatible Media Format for the Removable Media
- Compatible File Format
- Basic Precautions for Using CDs
- Chapter 3 Basic Song Playback
- Chapter 4 Advanced Song Playback
- Changing the Playback Tempo
- Playing Back Songs in a Different Key (Transposition)
- Repeating Song Playback
- Repeating a Specific Section of a Song (A-B Repeat)
- Playing Back Only the Desired Piano Part
- Adjusting the Volume Balance among the Keyboard Playing, Ensemble Sound, and Software Playback
- Adjusting the Pitch of Audio
- Adjusting the L/R Balance of Audio
- Using the Timer Play
- Skipping the Blank Part at the Beginning of a Song
- Video Synchronized Playback
- Adding Disklavier Accompaniment to Commercial CD Songs (PianoSmart™ Playback)
- SmartKey™ Playback
- Chapter 5 Advanced Piano Playing
- Chapter 6 Basic Recording
- Chapter 7 Advanced Recording
- Chapter 8 Media Management
- Managing Albums
- Making Copies of Albums
- Deleting Albums
- Creating a New Album
- Renaming an Album
- Rearranging the Order of Albums
- Managing Songs
- Making Copies of Songs
- Deleting Songs
- Renaming a Song
- Rearranging the Order of Songs
- Converting Song Format
- Changing the Counter Display
- Converting MIDI Data to a Standard Form (Strip XP)
- Managing Playlists
- Adding Songs/Albums to the Playlist
- Deleting a Playlist
- Creating a New Playlist
- Renaming a Playlist
- Managing Media
- Making Copies of the Entire Contents in a Medium
- Deleting the Entire Contents in a Medium
- Copying Song File from a Personal Computer to the Disklavier
- Refreshing the Contents in [FromToPC]
- Formatting the Floppy Disk (Optional)
- Making Backups of Songs
- Restoring the Backups
- Chapter 9 Internet Direct Connection (IDC)
- What is Internet Direct Connection (IDC)?
- Obtaining an ID and Password for the IDC Service (IDC Registration)
- Connecting the Disklavier to the Internet
- Accessing the Internet
- Checking Your Account Information
- Updating the Disklavier Using the Internet
- Setting the Disklavier for the Internet Connection
- Initializing Internet Settings
- Chapter 10 Enhancing the Disklavier by Hooking Up Other Devices
- Chapter 11 Other Settings
- Tuning the Tone Generator (TG Master Tune)
- Assigning Frequently-used Functions to the Number Keypad on the Remote Control
- Setting the Passcode to Prevent Unauthorized Access
- Adjusting the Brightness of the Display
- Switching the Languages for the Screen
- Resetting the Disklavier
- Diagnosing the Disklavier (Maintenance Mode)
- Updating the Disklavier
- Chapter 12 Internal Tone Generator Voices
- Chapter 13 Troubleshooting
- Chapter 14 Error Messages
- Chapter 15 Glossary
- Chapter 16 Specifications
- Software License Notice
- MIDI Data Format
- MIDI IMPLEMENTATION CHART

Advanced Recording
English
7
Chapter
55
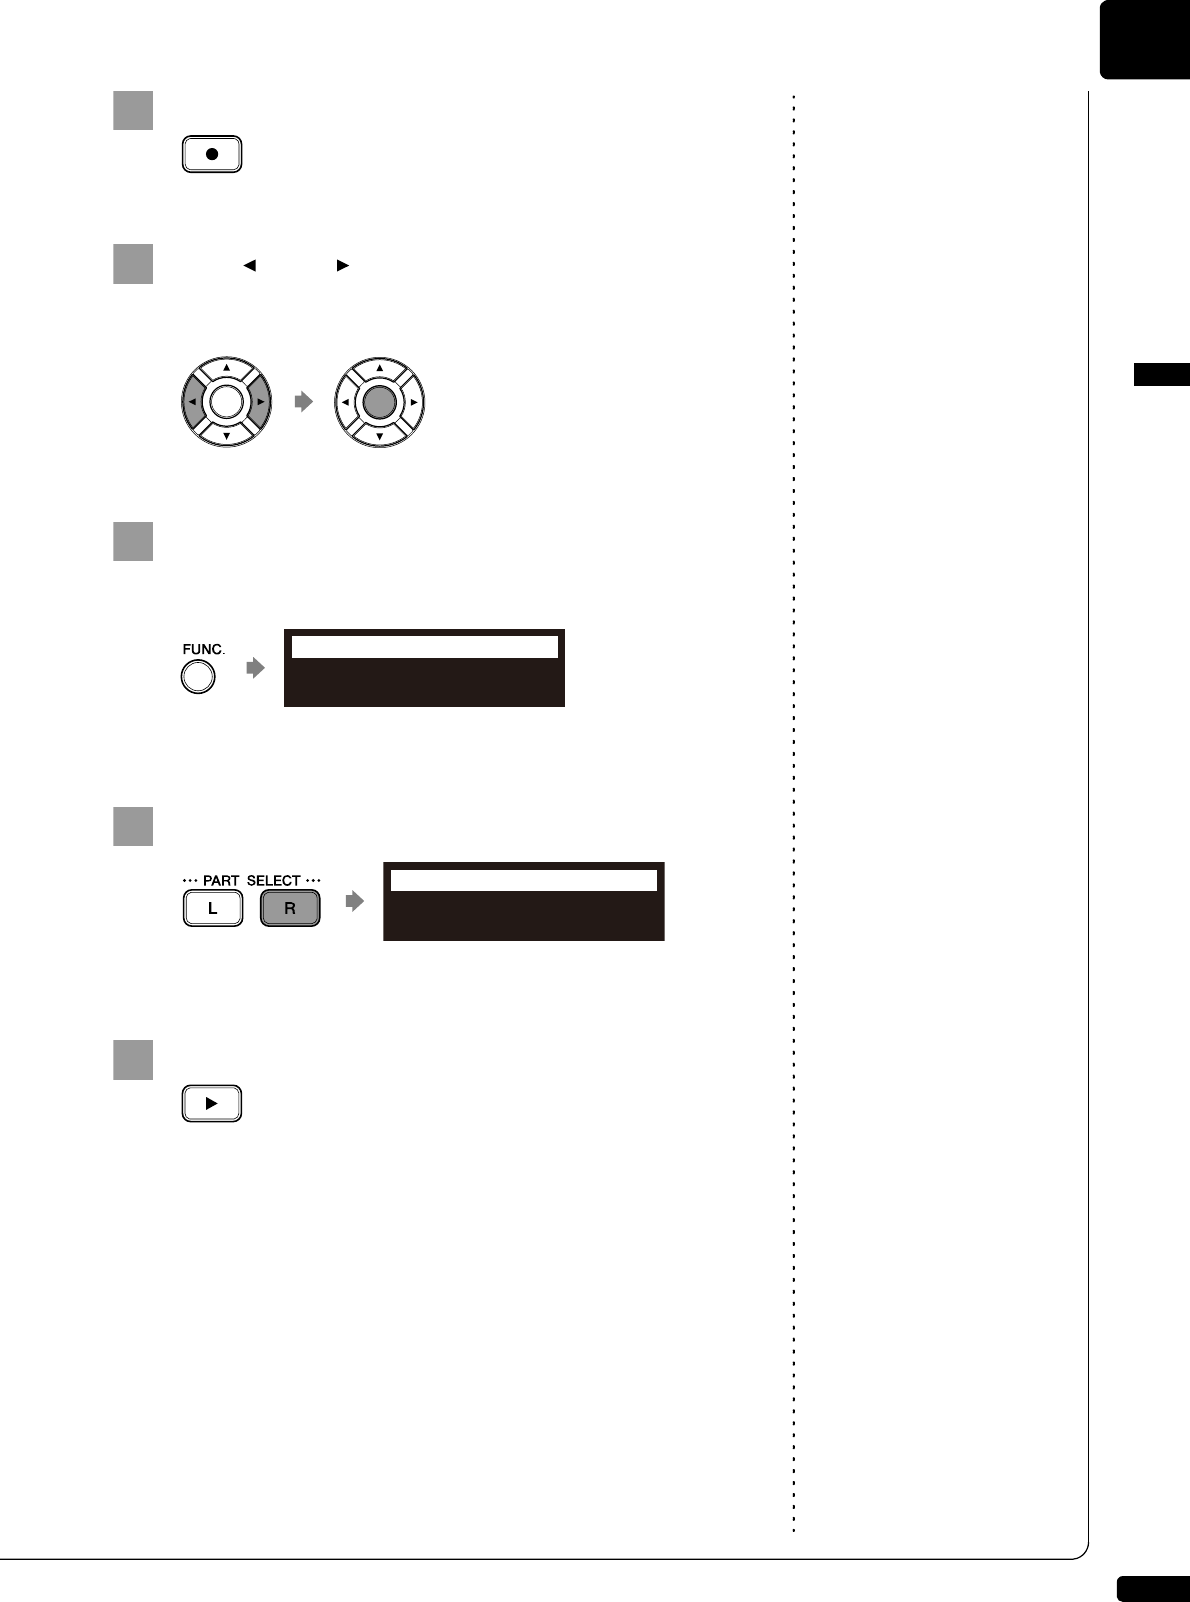
Press [RECORD].
Press [ ] and [ ] to select the L/R song with the left-
hand part that you have just recorded, then press
[ENTER].
Press [FUNC.] in the recording standby screen.
The part selection screen appears.
The part that has already been recorded is displayed as “L=PLY.”
Press [PART SELECT R] to record the right-hand part.
The part set to “REC” will be recorded.
Press [PLAY].
Playback of the left-hand recorded part starts immediately, so be
sure that you are ready to play the right-hand part along with it.
7
8
9
L=PLY R=OFF
=Memory=
LR
10
L=PLY R=REC
=Memory=
LR
11


