
User Manual


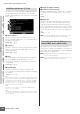


Table Of Contents
- Introduction
- How to use the manual
- Accessories
- Main Features
- Contents
- The Controls & Connectors
- Start Guide
- Step 1: Setting Up
- Resetting the User Memory to the Initial Factory Settings
- Step 2: Selecting and Playing a Voice
- Step 3: Selecting and Playing a Performance
- Step 4: Creating Your Original Song
- Step 5: Creating a Pattern
- Using a Computer
- Basic Section
- Reference
- Playing the Keyboard in the Voice Play Mode
- Selecting a Voice
- Select a Voice using the Category Search function
- Grouping your most-used Voices together-Favorite Category
- Using Knobs and Control Sliders
- Keyboard MIDI transmit channel setting
- Keyboard Octave setting
- Using the Arpeggio function
- The Voice Play display
- Voice information-[SF6] INFO (Information)
- Portamento settings-[F2] Porta
- Changing tonal color-[F3] EG/EQ
- Arpeggio settings-[F4] Arpeggio
- Editing a Normal Voice
- Common Edit and Element Edit
- Editing Normal Voices
- Convenient functions for editing Voices
- Common Edit parameters
- Element Edit parameters
- Selected Element display/ Four-Element display
- Setting the Waveform and Note range of the Element-[F1] Oscillator
- Pitch Settings-[F2] Pitch
- Adjust the brightness using the Filter-[F3] Filter
- Output Level settings-[F4] Amplitude
- Modulating the Voice-[F5] Elm LFO (Element LFO)
- Equalizer (EQ) Settings-[F6] EQ
- Editing a Drum Voice
- Voice Job-Convenient Functions
- Playing in the Performance Mode
- Selecting a Performance
- Switching a Part on/off
- Using the Arpeggio Function
- Using Knobs
- Using Sliders
- The Performance Play display
- Performance information-[SF6] INFO (Information)
- Parameters for the Voice assigned to each Part-[F2] Voice
- Changing the tonal characteristics- [F3] EG (Envelope Generator)
- Arpeggio settings-[F4] Arpeggio
- Recording your keyboard performance in the Performance mode
- Editing a Performance
- Performance Job-Convenient Functions
- Creating a Voice/Performance by Using the Sampling Function
- Song Playback
- Song Recording
- Editing MIDI Events (Song Edit)
- Song Job
- Pattern Playback
- Pattern Playback Procedure
- Playback types
- Mixing Setup for each track
- Knobs and Control Sliders
- Pattern Playback-[F1] Play
- Changing the rhythmic “feel” of the Pattern-[F2] Play FX (Play Effect)
- Track Settings-[F3] Track
- Pattern Creating-[F4] Patch
- Pattern Chain-[F5] Chain (Pattern Chain)
- Dividing the Pattern data to create a new Pattern-[F6] Remix
- Pattern Recording
- Editing MIDI Events (Pattern Edit)
- Pattern Jobs
- Multi-timbral Tone Generator Settings for Song/Pattern Playback (Mixing mode)
- Audio Recording to Song/Pattern (Sampling mode)
- Using as a Master Keyboard (Master mode)
- System Settings (Utility mode, etc.)
- Basic Procedure in the Utility mode
- System Information-[SF6] INFO
- General Settings-[F1] General
- Audio In/Out Settings-[F2] I/O (Input/Output)
- System Settings for the Voice mode-[F3] Voice
- Audio Input Settings in the Voice mode-[F4] VoiceAudio
- Remote Control and MIDI settings -[F5] Control
- Resetting the User Memory to the Initial Factory Settings-[JOB] (Factory Set)
- Sequencer Settings-[SEQ SETUP]
- File Management (File mode)
- Playing the Keyboard in the Voice Play Mode
- Appendix

MOTIF XS Owner’s Manual
Using as a Master Keyboard (Master mode)
257
Voice mode
Song mode
Pattern mode
Mixing mode
Master mode
Utility mode
File mode
Performance
mode
Sampling
mode 1
Sampling
mode 2
Reference
4 Volume
Determines the Volume settings for each Zone in the
selected Master. The MIDI messages of the Volume are
transmitted to an external/internal tone generator when the
Master is selected.
Settings: 000 – 127
5 Pan
Determines the Pan settings for each Zone in the selected
Master. The MIDI messages of the Pan are transmitted to
an external/internal tone generator when the Master is
selected.
Settings: L64 – C – R63
6 [F6] MIDI Send
When set to “on,” changing the value in this display
transmits the corresponding MIDI messages to an external/
internal tone generator.
From this display, you can determine which Control
Change numbers are transmitted to an external/internal
tone generator when you use the Knobs and Sliders for
each Zone.
n This parameter is available only when the Knob Control Assign
parameter is set to “zone” in the Other display (page 254) of
the Common Edit. In other words, this parameter is available
only when all the lamps of the [SELECTED PART CONTROL]
and [MULTI PART CONTROL] are turned off.
1 Control Knob No.
Determines which Control Change numbers are
transmitted when you use the Knobs for each Zone. The
function name is automatically shown below the number
you select.
Settings: 0 – 95
2 Control Slider No.
Determines which Control Change numbers are
transmitted when you use the Control Sliders for each
Zone. The function name is automatically shown below the
number you select.
Settings: 0 – 95
Master Job
The Master Job mode features convenient data initialization and archiving tools. To enter the Master Job mode, press the
[JOB] button in the Master mode. Press the [EXIT] button to return to the original display.
1 In the Master mode, press the [JOB] button to
enter the Master Job mode.
2 Select the Job you wish to execute by pressing
the [F1] or [F4] button.
3 Set the parameters for executing the Job.
4 Press the [ENTER] button. (The display
prompts you for confirmation.)
To cancel the Job, press the [DEC/NO] button.
5 Press the [INC/YES] button to execute the Job.
After the Job has been completed, a “Completed”
message appears and operation returns to the original
display.
6 Press the [MASTER] button to return to the
Master Play display.
Knob and Slider Settings—[F5] KnobSlider
1
2
Master Job Procedure