
User Manual


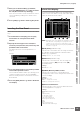


Table Of Contents
- Introduction
- How to use the manual
- Accessories
- Main Features
- Contents
- The Controls & Connectors
- Start Guide
- Step 1: Setting Up
- Resetting the User Memory to the Initial Factory Settings
- Step 2: Selecting and Playing a Voice
- Step 3: Selecting and Playing a Performance
- Step 4: Creating Your Original Song
- Step 5: Creating a Pattern
- Using a Computer
- Basic Section
- Reference
- Playing the Keyboard in the Voice Play Mode
- Selecting a Voice
- Select a Voice using the Category Search function
- Grouping your most-used Voices together-Favorite Category
- Using Knobs and Control Sliders
- Keyboard MIDI transmit channel setting
- Keyboard Octave setting
- Using the Arpeggio function
- The Voice Play display
- Voice information-[SF6] INFO (Information)
- Portamento settings-[F2] Porta
- Changing tonal color-[F3] EG/EQ
- Arpeggio settings-[F4] Arpeggio
- Editing a Normal Voice
- Common Edit and Element Edit
- Editing Normal Voices
- Convenient functions for editing Voices
- Common Edit parameters
- Element Edit parameters
- Selected Element display/ Four-Element display
- Setting the Waveform and Note range of the Element-[F1] Oscillator
- Pitch Settings-[F2] Pitch
- Adjust the brightness using the Filter-[F3] Filter
- Output Level settings-[F4] Amplitude
- Modulating the Voice-[F5] Elm LFO (Element LFO)
- Equalizer (EQ) Settings-[F6] EQ
- Editing a Drum Voice
- Voice Job-Convenient Functions
- Playing in the Performance Mode
- Selecting a Performance
- Switching a Part on/off
- Using the Arpeggio Function
- Using Knobs
- Using Sliders
- The Performance Play display
- Performance information-[SF6] INFO (Information)
- Parameters for the Voice assigned to each Part-[F2] Voice
- Changing the tonal characteristics- [F3] EG (Envelope Generator)
- Arpeggio settings-[F4] Arpeggio
- Recording your keyboard performance in the Performance mode
- Editing a Performance
- Performance Job-Convenient Functions
- Creating a Voice/Performance by Using the Sampling Function
- Song Playback
- Song Recording
- Editing MIDI Events (Song Edit)
- Song Job
- Pattern Playback
- Pattern Playback Procedure
- Playback types
- Mixing Setup for each track
- Knobs and Control Sliders
- Pattern Playback-[F1] Play
- Changing the rhythmic “feel” of the Pattern-[F2] Play FX (Play Effect)
- Track Settings-[F3] Track
- Pattern Creating-[F4] Patch
- Pattern Chain-[F5] Chain (Pattern Chain)
- Dividing the Pattern data to create a new Pattern-[F6] Remix
- Pattern Recording
- Editing MIDI Events (Pattern Edit)
- Pattern Jobs
- Multi-timbral Tone Generator Settings for Song/Pattern Playback (Mixing mode)
- Audio Recording to Song/Pattern (Sampling mode)
- Using as a Master Keyboard (Master mode)
- System Settings (Utility mode, etc.)
- Basic Procedure in the Utility mode
- System Information-[SF6] INFO
- General Settings-[F1] General
- Audio In/Out Settings-[F2] I/O (Input/Output)
- System Settings for the Voice mode-[F3] Voice
- Audio Input Settings in the Voice mode-[F4] VoiceAudio
- Remote Control and MIDI settings -[F5] Control
- Resetting the User Memory to the Initial Factory Settings-[JOB] (Factory Set)
- Sequencer Settings-[SEQ SETUP]
- File Management (File mode)
- Playing the Keyboard in the Voice Play Mode
- Appendix

MOTIF XS Owner’s Manual
192
Voice mode Song mode Pattern mode Mixing mode Master mode Utility mode File mode
Performance
mode
Sampling
mode 1
Sampling
mode 2
Reference
Editing MIDI Events (Song Edit)
The Song Edit mode lets you edit the already recorded Songs or insert the new data to the Songs. It can be used to correct
mistakes as well as add dynamics or effects such as vibrato to refine and finish the Song. Press the [EDIT] button from the
Song Play mode to go to the Song Edit mode.
n The Song Edit mode gives you comprehensive, detailed controls for editing the MIDI events of individual Song tracks. MIDI events are
messages (such as note on/off, note number, program change number, etc.) that make up the data of a recorded track.
The Song Edit mode consists of the Event List display and
the Insert Event window. The Event List display lets you
correct or delete already inserted MIDI events and the
Insert Event window lets you insert new events to the Song.
Press the [EDIT] button from the Song Play mode to go to
the Event List display. Press the [F5] button to call up the
Insert Event window.
Event List display
The Event List display lets you correct or delete existing
events.
Insert Event window
The Insert Event window lets you insert new events to the
Song.
Pressing the [F5] button on the Event List display calls up
the Insert Event window. To return back to the Event List
display, press the [EXIT] button.
Editing the recorded data
This section shows how to correct or delete previously
recorded events.
1 Press the [EDIT] button from the Song Play
display to call up the Event List display
(page 193).
2 Select the track to be edited.
Pressing the [F4] Track Sel button switches the
Recording track among Tracks 1 – 16, the Scene track
and the Tempo track. When “1 – 16 tracks” is selected,
you can select the track to be edited by pressing any of
the Number buttons [1] – [16].
3 Move the cursor to the event or parameter to
be edited.
Use the [L]/[M] (Cursor Up/Down) button to move the
cursor to the desired timing. Press the [G] (Rewind)/
[H] (Fast Forward) button to move the cursor by
single measures. Use the [<]/[>] (Cursor Left/Right)
button to move the cursor to the parameter to be
edited.
n For details about each event and parameter, see page 76.
n The Event List window may have an overwhelming
number of events, and it may be difficult to find a specific
desired event. To help narrow down your search, use the
View Filter function. This conveniently lets you specify
which classes of events will be displayed and which will
not, making it much easier and faster to find desired
events. For information about the View Filter display, see
page 194.
4 Change the parameter settings or location of
the event.
Edit the value by using the [INC/YES], [DEC/NO]
buttons and the data dial. The edited event will flash on
the display.
Change the event location by editing the MEAS
(measure), BEAT, and CLOCK. Press the [F6] button to
delete the event at the cursor location.
n When “NUM” is indicated in the tab corresponding to the
[SF6] button, you can use the [F1] – [F6] buttons and the
[SF1] – [SF5] buttons as numeric key pads by pressing
the [SF6] NUM button.
n The note and velocity can be edited also by pressing the
desired note on the keyboard, even though the [KBD] icon
is not shown.
Event List display and Insert Event
window
F5
EXIT
Event List display
Insert Event window