Instrukcja obsługi www.whirlpool.
INSTRUKCJA OBSŁUGI DZIĘKUJEMY ZA ZAKUP PRODUKTU WHIRLPOOL. W celu uzyskania kompleksowej pomocy prosimy zarejestrować urządzenie na stronie www.whirlpool.eu/register. SPIS TREŚCI INSTRUKCJA BEZPIECZEŃSTWA . . . . . . . . . . . . . . . . . . . . . . . . . . . . . . . . . . . . . . . . . . . . . . . . . . . . . . . . . . . 3 Wskazówki dotyczące bezpieczeństwa. . . . . . . . . . . . . . . . . . . . . . . . . . . . . . . .
PL Instrukcja bezpieczeństwa WSKAZÓWKI DOTYCZĄCE BEZPIECZEŃSTWA PRZECZYTAĆ I ŚCIŚLE PRZESTRZEGAĆ Przed przystąpieniem do użytkowania urządzenia należy zapoznać się instrukcjami bezpieczeństwa. Przechowywać w podręcznym miejscu w celu korzystania w przyszłości. W niniejszej instrukcji oraz na samym urządzeniu znajdują się ważne ostrzeżenia dotyczące bezpieczeństwa, które należy zawsze uwzględniać.
Instrukcja bezpieczeństwa Jeśli urządzenie nie zostało zainstalowane nad zasilania – ryzyko porażenia prądem; Nigdy nie piekarnikiem, w szafce pod urządzeniem należy należy stosować urządzeń czyszczących parą – zamontować panel oddzielający (brak w zestawie). ryzyko porażenia prądem. Nie należy używać środków ściernych, żrących, OSTRZEŻENIA DOTYCZĄCE ELEKTRYCZNOŚCI środków na bazie chloru ani środków do szorowania.
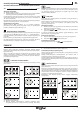
PL Instrukcja użytkowania i konserwacji OPIS PRODUKTU 1. Płyta 2. Panel sterowania 1 2 OFF Min 18 P Max Med OFF Min Med 18 P Max OFF Min Med 18 P Max OFF Min Med 18 P Max PANEL STEROWANIA 2 3 45 6 4 7 8 4 9 10 9 4 11 OK OFF Min Med 1 12 18 Max P OFF Min 13 18 Max Med 14 P OFF 15 16 Min Med 17 18 Max P OFF Min Med 18 Max P 13 Przykład strefy grzania OFF 1. 2. 3. 4. 5. 6.
Instrukcja użytkowania i konserwacji AKCESORIA GARNKI I PATELNIE Należy używać wyłącznie naczyń do gotowania z TAK NIE materiałów ferromagnetycznych, odpowiednich do płyt indukcyjnych. Aby ustalić, czy dane naczynie nadaje się do płyt indukcyjnych, należy sprawdzić symbol (zazwyczaj wytłoczony na spodzie). Można również użyć magnesu. Jakość naczyń może mieć wpływ na wyniki gotowania.
PL Instrukcja użytkowania i konserwacji AKTYWACJA/DEZAKTYWACJA STREF GRZANIA I REGULACJA MOCY 18 P OFF Aktywacja stref grzania: 1. Włączyć płytę grzewczą. 2. Ustawić żądany poziom mocy, przesuwając palec poziomo wzdłuż klawiatury przesuwnej (SLIDER) w żądanej strefie grzania. Ponad klawiaturą przesuwną pojawi się odnośny poziom mocy. Każda strefa grzania oferuje różne poziomy mocy, od „1” (moc minimalna) do „18” (moc maksymalna).
Instrukcja użytkowania i konserwacji FUNKCJE SPECJALNE Min Med 18 Max P OFF Min Med 18 Max P 6th SENSE Przycisk 6th sense umożliwia aktywację funkcji specjalnych. 1. Umieścić garnek, włączyć płytę i wybrać żądaną strefę grzania, dotykając przesuwnej klawiatury. 2. Wcisnąć przycisk “6th Sense”. Na wyświetlaczu strefy grzania pojawi się „A” (automatycznie). 3. Włączy się wskaźnik pierwszej funkcji specjalnej dostępnej w wybranej strefie grzania. 4.
PL Instrukcja użytkowania i konserwacji Jeśli przygotowywana potrawa jest cieńsza lub chce się uzyskać mocniejsze przypieczenie, zaleca się skorzystanie z grillowania z 2 kropkami. Po osiągnięciu temperatury idealnej do nałożenia potrawy, przycisk zaświeci się i pojawi się sygnał dźwiękowy. Płyta stabilizuje wówczas uzyskaną temperaturę i utrzymuje ją na stałym poziomie. Wciskając przycisk potwierdzamy nasz zamiar umieszczenia gotowanego jedzenia w garnku, a specjalna funkcja przechodzi do etapu gotowania.
Instrukcja użytkowania i konserwacji KONSERWACJA I CZYSZCZENIE ! OSTRZEŻENIE • Nie wolno stosować urządzeń czyszczących parą. • Przed czyszczeniem należy upewnić się, że pola grzewcze są wyłączone oraz że nie wyświetla się wskaźnik ciepła resztkowego („H”). Ważne: • Nie używać gąbek ściernych ani myjek, gdyż mogą one uszkodzić szklaną powierzchnię. • Po każdym użyciu należy oczyścić płytę (gdy jest zimna), aby usunąć osady i plamy powstałe od resztek żywności.
PL Instrukcja użytkowania i konserwacji SPRAWDZONE DZIAŁANIE Poniżej znajduje się tabela stworzona w celu ułatwienia korzystania z naszych produktów. Sprawdzone działanie Sprawdzone pozycje działania Dystrybucja ciepła, „Naleśniki" test według EN 50304/EN 60350 §7.3 Moc nagrzewania, „Frytki" test według EN 60350/50304 §7.
590 mm 4 mm R = Min. 6.5mm Max. 8mm 510 mm 53 mm 476 mm R = 11.5mm 0 Min. 480 mm Max. 492 mm 593 + 2 mm 560 513 0 +2 0 +2 mm mm R = Min. 11.5 mm Min. 50 mm 0 560 + 2 mm Min. 480 mm Max. 492 mm R = Min. 6.5 mm Max. 8 mm 650 mm 4 mm R = Min. 6.5mm Max. 8mm 510 mm 53 mm 476 mm R = 11.5mm 6mm 553 mm 553 mm 6mm Min. 480 mm Max. 492 mm 0 653 + 2 mm 560+ 20 mm 0 513 + 2 mm R = Min. 11.5 mm Min. 50 mm 0 560 + 2 mm Min. 480 mm Max. 492 mm 770 mm 4 mm R = Min. 6.5mm Max.
65mm min. 45mm min. 20mm 60mm 100mm 15mm min. 5mm min. 550mm min. 20mm 60mm min. 20mm min. 5mm min. 45mm min. 550mm min.
x4 1 2 x4 2mm 3 2 1 x4 14 90°C
380-415 V 3 N ~ 380-415 V 2 N ~ 220-240V 220-240V AU-UK-IRL 220-240V3 BE 230V 2 Phase 2N NL R black-nero-negro-preto-μαύροσ-must-melns-juodas-czarny-schwarz-noir-zwart-negru-черноцрн-črna-crno-черный-чорний-қара-černá-čierna-fekete-svart-musta-svart-sort-siyah-dubh S brown-marrone-marrón-marrom-καφέ-pruun-brūns-rudas-brązowy-braunen-brun-bruin-maroкафяв-браон-rjava-smeđ-коричневый-коричневий-қоңыр-hnědý-hnedý-barna-brunt-ruskeabrunt-brun-kahverengi-donn T blue (gray)-blu (grigio)-azul (gris)-azul