HLC HLC HLC HLC 9.8 ASH X/HA 9.5S AT X/HA 9.B LSHE X/HA 6.
Nederlands Gebruiksaanwijzing AFZUIGKAP Inhoud Gebruiksaanwijzing,2 Attentie,16 Service,22 Installatie,52 CHIMNEY-LUCE bediening,53 Onderhoud en verzorging,56 Storingen en oplossingen,57 Polski Instrukcja obsługi OKAP Spis treści Instrukcja obsługi,2 Ostrzeżenia,17 Serwis Techniczny,22 Instalacja,58 Elementy sterownicze CHIMNEY-LUCE,59 Konserwacja i pielęgnacja,62 Usterki i środki zaradcze,63 Türkçe Kullanım talimatları OCAK DAVLUMBAZ İçindekiler Kullanım talimatları,2 Uyarılar,19 Teknik Servis,22 Kur
6x Ø 8 x 40 6x 1x Ø 5 x 45 4x Ø 3,5 x 9,5 2x 2 3 4 5 ø 150-125mm ø 150mm 1x 1x 1x 3
min.
2 3 = = = x6 = 55 0m 65 m 0 m m 4 5 Ø 8 mm x6 x6 7 5 m m 6 x2 5
8 9 1 2 x2 3 10 11 x2 12 6 ø 120 ø 150 13
14 15 ø 150 16 x2 ø 3,5 x 9,5 17 7
18 19 B A 8
Avvertenze ! E’ importante conservare questo manuale per poterlo consultare in ogni momento. In caso di vendita, di cessione o di trasloco, assicurarsi che resti insieme al prodotto. ! Leggere attentamente le istruzioni: ci sono importanti informazioni sull’installazione, sull’uso e sulla sicurezza. ! Non effettuare variazioni elettriche o meccaniche sul prodotto o sulle condotte di scarico.
• E’ severamente vietato cucinare cibi a fiamma libera sotto la cappa; l’impiego di fiamma libera è dannoso ai filtri e può dar luogo ad incendi, pertanto deve essere evitato in ogni caso. • Si consiglia di tenere sotto costante controllo la cottura di cibi tramite frittura, al fine di evitare che l’olio surriscaldato prenda fuoco.
• Before cleaning or servicing the unit, disconnect it from the mains by pulling the power plug or disconnecting the main circuit breaker. • Strictly observe all local regulations in relation to the technical and safety measures to be employed in fumes extraction. • Always wear work gloves when installing and servicing the unit. • Clean the product frequently, inside and out (AT LEAST ONCE A MONTH, and in observance of the maintenance instruction given in this manual).
Sécurité générale • La distance minimale entre la surface où sont posés les récipients de cuisson et la partie la plus basse de la hotte de cuisine doit être d’au moins : 65 cm si la hotte est installée au-dessus d'une table de cuisson à gaz 55 cm si la hotte est installée au-dessus d'une table de cuisson électrique. Si la notice d'installation de la table de cuisson à gaz préconise une distance plus grande, veuillez en tenir compte.
• Il est conseillé de nettoyer fréquemment l'appareil, aussi bien à l'intérieur qu'à l'intérieur (AU MOINS UNE FOIS PAR MOIS, en respectant dans tous les cas ce qui est expressément indiqué dans les instructions d'entretien présentes dans ce manuel). • Le non-respect des règles de nettoyage de la hotte et de remplacement et nettoyage des filtres peut être à l'origine de risques d'incendie.
• No dejar que los niños jueguen con el aparato. • No utilizar el aparato sin el filtro de grasas instalado correctamente. • La campana NUNCA se deberá utilizar como plano de apoyo, a no ser que esto sea expresamente indicado. • El local debe disponer de suficiente ventilación cuando la campana se utiliza simultáneamente con otros aparatos que empleen gas u otros combustibles.
55 cm se o exaustor for instalado sobre uma placa de cozedura eléctrica. Se as instruções de instalação do dispositivo de cozedura a gás especificam um distância maior, é necessário considerá-la. • O exaustor dispõe de buchas de fixação adequadas à maioria das paredes/ tectos. Ainda assim, é necessário contactar um técnico qualificado para assegurar a idoneidade dos materiais consoante o tipo de parede/tecto, que deve ser suficientemente robusto para suportar o peso do exaustor.
• Não utilizar ou deixar o exaustor sem lâmpadas correctamente montadas, por possível risco de choque eléctrico. • Declina-se qualquer responsabilidade por eventuais inconvenientes, danos ou incêndios provocados pelo aparelho derivados do incumprimento das instruções presentes neste manual. • Atenção! As partes acessíveis podem ficar muito quentes se utilizadas com aparelhos de cozedura. Attentie ! Het is belangrijk dat u deze handleiding bewaart zodat u hem te allen tijde kunt raadplegen.
• De afgezogen lucht mag niet worden gekanaliseerd in een afvoerleiding die gebruikt wordt voor afvoergassen van gasapparaten of apparaten die andere brandstoffen gebruiken. • Houdt u aan de wetgeving betreffende de luchtafvoer. • Het is ten strengste verboden onder de kap gerechten te bereiden op een open vuur. Het gebruik van open vuur kan de filters beschadigen en brand veroorzaken, en dient daarom absoluut te worden vermeden.
• Okap wyposażony jest w rozporowe kołki mocujące, które są odpowiednie do większości ścian/sufitów. Należy jednak skonsultować się z wykwalifikowanym technikiem, w celu potwierdzenia, czy materiały są odpowiednie do danego rodzaju ściany/sufitu, które muszą utrzymać ciężar okapu. • Uwaga! Nie podłączać urządzenia do sieci elektrycznej, dopóki instalacja nie zostanie w pełni zakończona.
• Nie korzystać z okapu bez prawidłowo zamontowanych lamp, ani też nie pozostawiać go w takim stanie w związku z możliwym niebezpieczeństwem porażenia prądem elektrycznym. Davlumbaz bir elektrikli set üstü ocağın üzerine kurulmuşsa 55 cm Gazlı ocağın kurulum talimatlarında daha fazla bir mesafe belirtilmişse o mesafeye uyulmalıdır.
• Davlumbaz gaz veya diğer yakıtlarla çalışan başka bir ekipmanla aynı anda kullanılıyorsa oda yeterince havalandırılmalıdır. • Çekilen gaz, gazlı veya diğer yakıtlı ekipmanların yanma gazlarını tahliye etmek için kullanılan bir kanala verilmemelidir. • Hava çekme ile ilgili tüm talimatlara uyun. • Davlumbazın aşağısında alev olacak biçimde asla yemek PİŞİRMEYİN; alev filtrelere hasar verebilir ya da yangına neden olabilir. Bunu asla yapmayın.
Assistenza Asistencia ! Non ricorrere mai a tecnici non autorizzati. ! No llame nunca a técnicos no autorizados. Comunicare: • Il tipo di anomalia; • Il modello della macchina (Mod.) • Il numero di serie (S/N) Queste ultime informazioni si trovano sulla targhetta caratteristiche posta sull’apparecchio Comunique: • El tipo de anomalía; • El modelo de la máquina (Mod.) • El número de serie (S/N) Esta información se encuentra en la placa de características colocada en el aparato.
Service ! Wendt u nooit tot niet erkende monteurs. Dit dient u door te geven: • Het soort storing; • Het model apparaat (Mod.) • Het serienummer (S/N) Deze laatste informatie bevindt zich op het typeplaatje op het apparaat Serwis Techniczny ! Nigdy nie korzystać z usług nieautoryzowanych techników. Podać: • Rodzaj usterki; • Model urządzenia (Mod.) • Numer seryjny (S/N) Te ostatnie informacje można znaleźć na tabliczce znamionowej umieszczonej na urządzeniu.
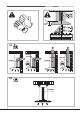
Installazione Per la corretta installazione del prodotto vedere le figure disponibili nelle prime pagine di questo libretto. L’installazione va effettuata da personale qualificato. Collegamento elettrico La tensione di rete deve corrispondere alla tensione riportata sull’etichetta caratteristiche situata all’interno della cappa. Se provvista di spina, allacciare la cappa ad una presa conforme alle norme vigenti posta in zona accessibile.
IT Comandi CHIMNEY-LUCE Modelli con Pulsantiera Touch control glass (basic) HLC 9.5S AT X/HA - HLC 6.8 AT X/HA Spegnimento cappa La cappa può essere spenta manualmente premendo il tasto T1 (ON/OFF). Nel caso di impostazione del timer la cappa si spegne automaticamente alla fine del conteggio. Modelli con Pulsantiera Touch control glass + display (medium) (Presente solo in alcuni modelli) T1 T2 T3 T4 T5 T6 T7 T8 T1 ON/OFF motore Premendo il pulsante a cappa spenta, si imposta la prima velocità.
Segnalazione filtro antigrasso e odori Dopo un certo numero di ore di utilizzo è necessario provvedere alla pulizia/sostituzione dei filtri antigrasso (A) e/o odori (B) - quest’ultimo solo per le cappe filtranti. L’accensione della spia I1 indica la saturazione del filtro antigrasso, mentre l’accensione della spia I2 indica la saturazione del filtro odori (solo per le cappe in modalità filtrante). Per resettare il contatore, premere per 3 secondi T5 + T4 mentre la cappa è accesa.
IT Procedura di calibrazione del sensore automatico - Calibrazione: affinché la procedura di calibrazione sia efficace questa deve essere effettuata in condizioni di ambiente pulito, quindi durante la calibrazione il piano cottura deve essere spento. Durante la procedura di calibrazione il tasto AUTO è acceso e la scritta AUTO lampeggia sul display. La calibrazione del sensore può essere automatica o manuale (“su richiesta”).
Montaggio: Agganciare il filtro a carboni attivi prima posteriormente sulle linguette metalliche della cappa, poi anteriormente premendo le due leve. Manutenzione e cura Attenzione! Prima di qualsiasi operazione di pulizia o manutenzione, disinserire la cappa dalla rete elettrica togliendo la spina o staccando l’interruttore generale dell’abitazione.
IT SMALTIMENTO Questo apparecchio è contrassegnato in conformità alla Direttiva Europea 2012/19/EC, Waste Electrical and Electronic Equipment (WEEE). Assicurandosi che questo prodotto sia smaltito in modo corretto, l’utente contribuisce a prevenire le potenziali conseguenze negative per l’ambiente e la salute.
Installation The installation procedure is illustrated in the first pages of this manual. The installation must be done by a qualified technician. Electrical hook up The mains voltage must match that given on the ratings label inside the hood itself. If the hood has a power plug, connect the hood to an easily accessible regulatory power socket.
GB CHIMNEY-LUCE controls Models with Touch control glass (basic) HLC 9.5S AT X/HA - HLC 6.8 AT X/HA T1 T2 T3 T4 Hood off The hood can be turned off manually by pressing the T1 button (ON/OFF). If the timer is set, the hood turns off automatically when the set time runs out. Models with Touch control glass + display (medium) (Only available in certain models) T5 T6 T7 T8 T1 motor ON/OFF When the button is pressed with the hood off, the first speed is set.
Antigrease and odour filter signal The antigrease (A) and/or odour (B) filters need cleaning/ replacing after a certain number of hours of use (the latter for filtering hoods only). The indicator light I1 on indicates that the antigrease filter is saturated, while the indicator light I2 on indicates that the odour filter is saturated (for hoods in filtering mode only). Press T5 + T4 for 3 seconds with the hood on to reset the counter.
GB - Manual calibration: (or upon request) is set in the configuration menu. This procedure is advised, and may be started, in case of malfunctioning of the sensor (which, for example, may occur in case of blackout while cooking or after a long time since the use).
Servicing the grease filter (A) The grease filter retains the particles of grease produced during cooking; it must be cleaned at least once a month with a non-aggressive detergent, either by hand or with a low temperature, short A dishwasher cycle. To extract the grease filter, pull the spring loaded handle. If washed in a dishwasher, the metal filter may change colour, but this does not affect its performance.
FR Installation Pour bien installer le produit, consultez les figures situées sur les premières pages de ce mode d'emploi. L’installation doit être effectuée par du personnel qualifié. Raccordement électrique La tension du réseau doit correspondre à la tension indiquée sur l'étiquette signalétique située à l'intérieur de la hotte. Si elle est dotée d'une prise, branchez la hotte sur une prise électrique conforme aux normes en vigueur et située dans un endroit accessible.
Commandes CHIMNEY-LUCE Modèles avec Touch control glass (basic) HLC 9.5S AT X/HA - HLC 6.8 AT X/HA T1 T2 T3 T4 T5 T6 T7 T8 T1 Marche/Arrêt moteur Lorsque l’on appuie sur ce bouton alors que la hotte est éteinte, on active la première vitesse. Lorsque l’on appuie sur ce bouton pendant le fonctionnement, la hotte s’éteint. T2 Vitesse 1 Lorsque l’on appuie sur ce bouton, la hotte passe de l’état précédent à la vitesse 1.
I1 D1 FR D2 I5 Modèles avec Touch control glass + display (high) HLC 9.8 ASH X/HA - HLC 9.
I1 D1 I2 D2 I5 I4 D1: Chiffre Vitesse D2: Groupe de 2 chiffres Temps I1: Indicateur Filtre à graisses I2 : Indicateur Filtre Charbon I4 : Indicateur Menu I5 : Indicateur Minuterie Avertissement relatif aux filtres à graisse et à odeurs Au bout d’un certain nombre d’heures de fonctionnement, il faut procéder au nettoyage ou au remplacement des filtres à graisse (A) et à odeurs (B) - ce dernier uniquement pour les hottes à recyclage.
FR Légende configuration Code Sens Explication réglage Minuterie filtre à R e m i s e à z é r o d e l a C1 graisse minuterie du filtre à graisse Minuterie filtre à R e m i s e à z é r o d e l a C2 odeurs minuterie du filtre à odeurs Modification du type de plan Type de plans de pour le capteur AUTO.
Remplacement des ampoules LED * La hotte est équipée d’un système d’éclairage à technologie LED. Les Led assurent un éclairage optimal, une plus longue durée de vie et une consommation d’énergie réduite par rapport aux lampes traditionnelles. Pour leur remplacement, s’adresser au service d’assistance technique. Câble électrique Si le câble d'alimentation est endommagé, il peut être remplacé par le fabricant ou par son service d'assistance technique afin d'éviter tout danger.
ES Instalación Para la instalación correcta del aparato consultar las figuras de las primeras páginas de este manual. La instalación debe ser realizada por personal cualificado. Conexión eléctrica La tensión de red tiene que coincidir con el valor de tensión indicado en la etiqueta de características que se encuentra en el interior de la campana. Si el aparato tiene clavija, conectarla a una toma conforme a las normas vigentes, situada en una zona accesible.
Mandos CHIMNEY-LUCE Modelos con Touch control glass (basic) HLC 9.5S AT X/HA - HLC 6.8 AT X/HA T1 T2 T3 T4 T5 T6 T7 T8 cambiar el tipo de instalación pulsando la tecla T7, con la consiguiente alternancia de los colores de los LED. Apagado de la campana La campana se puede apagar manualmente pulsando la tecla T1 (ON/OFF). Si se ha programado el timer, la campana se apaga automáticamente al finalizar el tiempo programado.
ES Señal de filtro de grasas y olores Después de un determinado número de horas de uso, es necesario limpiar/cambiar los filtros de grasas (A) y el filtro de olores (B); este último sólo en las campanas filtrantes. El encendido del testigo I1 indica la saturación del filtro de grasas, mientras que el encendido del testigo I2 indica la saturación del filtro de olores (sólo en las campanas filtrantes). Para poner el contador en cero, pulsar 3 segundos T5 + T4 con la campana encendida.
Procedimiento de calibración del sensor automático - Calibración: para que la calibración sea eficaz, es necesario realizarla en un ambiente limpio; por lo tanto, durante la calibración, la placa de cocción debe estar apagada. Durante la calibración, la tecla AUTO está encendida y en el display parpadea la indicación AUTO. La calibración del sensor puede ser automática o manual (“a pedido”).
ES Montaje: Enganchar el filtro de carbones activos primero por detrás en las pestañas metálicas de la campana; luego por delante presionando las dos palancas. Mantenimiento y cuidados ¡Atención! Antes de realizar cualquier operación de limpieza o mantenimiento, desconectar la campana de la red eléctrica mediante la clavija o el interruptor general de la vivienda.
Anomalías y soluciones ES En caso de defectos de funcionamiento, antes de llamar al Servicio de Asistencia realizar los siguientes controles: Si la campana no funciona: Comprobar que: • no se haya producido un corte de corriente. • se haya seleccionado una velocidad. Si el rendimiento de la campana es escaso: Comprobar que: • La velocidad seleccionada sea suficiente para la cantidad de humos y vapores producidos. • La cocina esté aireada lo suficiente para permitir el recambio de aire.
PT Instalação Para a instalação correcta do produto, ver as figuras disponíveis nas primeiras páginas deste manual. A instalação deve ser efectuada por pessoal qualificado. Ligação eléctrica A tensão de rede deve corresponder à tensão indicada na etiqueta de características situada dentro do exaustor. Se tiver uma ficha, ligue o exaustor a uma tomada com conformidade com as normas em vigor, situada numa zona acessível.
Comandos CHIMNEY-LUCE Modelos com Touch Control Glass (básico) HLC 9.5S AT X/HA - HLC 6.8 AT X/HA T1 T2 T3 T4 T5 T6 T7 T8 ciclicamente a tecla T7, alternando as cores dos LEDs. PT Desligamento do exaustor O exaustor pode ser desligado manualmente pressionando a tecla T1 (ON/OFF). No caso da configuração do temporizador, o exaustor desliga-se automaticamente no final da contagem.
PT Aviso filtro anti-gordura e cheiros Após um certo número de horas de utilização, é necessário proceder à limpeza/substituição dos filtros anti-gorduras (A) e de cheiros (B) - este último apenas para os exaustores filtrantes. Quando o indicador I1 se acende, indica que o filtro antigordura está saturado; quando o indicador I2 se acende, indica que o filtro de cheiros está saturado (apenas para exaustores em modalidade filtrante).
Procedimento de calibragem do sensor automático - Calibragem: para que o procedimento de calibragem seja eficaz, esta deve ser feita em condições de ambiente limpo; a placa de cozedura deve estar desligada. Durante o procedimento de calibragem, a tecla AUTO acende-se e a mensagem AUTO ilumina-se no ecrã. A calibragem do sensor pode ser automática ou manual (“a pedido”).
PT Manutenção e cuidado B Atenção! Antes de qualquer operação de limpeza ou manutenção, desligue o exaustor da rede eléctrica retirando a ficha da tomada ou desligando o interruptor geral da casa.
ELIMINAÇÃO Este aparelho está em conformidade com a Directiva Europeia 2012/19/EC, Resíduos de Equipamentos Eléctricos e Electrónicos (REEE). Ao assegurar que este produto é eliminado correctamente, o utilizador contribui para prevenir as potenciais consequências negativas para o ambiente e a saúde.
NL Installatie Voor een correcte installatie van het apparaat kunt u de afbeeldingen raadplegen in de eerste pagina’s van deze handleiding. De installatie moet worden uitgevoerd door gekwalificeerde monteurs. Elektrische aansluiting De netspanning moet overeenkomen met de spanning die staat aangegeven op het typeplaatje aan de binnenkant van de afzuigkap.
CHIMNEY-LUCE bediening Modellen met Toch control glass (basic) HLC 9.5S AT X/HA - HLC 6.8 AT X/HA T1 T2 T3 T4 T5 T6 T7 T8 T1 ON/OFF motor Als u op de knop drukt terwijl de afzuigkap uit is, wordt eerste snelheid ingesteld. Als u op de knop drukt terwijl de afzuigkap aan is, gaat deze in de OFF stand. T2 Snelheid 1 Als u op de knop drukt, schakelt de afzuigkap van de voorgaande stand over op snelheid 1. T3 Snelheid 2 Als u op de knop drukt, schakelt de afzuigkap van de voorgaande stand over op snelheid 2.
I1 D1 NL D2 I5 Modellen met Toch control glass + display (high) HLC 9.8 ASH X/HA - HLC 9.B LSHE X/HA I2 I4 D1: DGT Snelheid D2: Groep van 2 DGT Tijd I1: Aanwijzer Vetfilter I2: Aanwijzer Koolstoffilter I4: Aanwijzer Menu I5: Aanwijzer Timer Signalering vet- en geurfilter Na een bepaald aantal gebruiksuren moeten het vetfilter (A) en/of het geurfilter (B) (dit alleen voor filterversies) gereinigd/ vervangen worden.
I1 D1 I2 D2 I5 I4 D1: DGT Snelheid D2: Groep van 2 DGT Tijd I1: Aanwijzer Vetfilter I2: Aanwijzer Koolstoffilter I4: Aanwijzer Menu I5: Aanwijzer Timer Signalering vet- en geurfilter Na een bepaald aantal gebruiksuren moeten het vetfilter (A) en het geurfilter (B) (dit alleen voor filterversies) gereinigd/vervangen worden.
NL Legenda voor configuratie Instellingscode Betekenis C1 Timer vetfilter C2 Timer geurfilter C3 Type kookplaat C4 IJking van de sensor C5 Geluidsniveaus C5 Type kap C6 Reset to Factory default uitleg Zet de timer van het vetfilter op nul Zet de timer van het geurfilter op nul Wijzigt het type kookplaat voor de AUTO-sensor Keuze tussen elektrische-, inductie of gaskookplaat. Dient om de sensor te ijken.
De lampen vervangen Schakel het apparaat los van het lichtnet en verwijder de vetfilters. Belangrijk! Voor u de lampen aanraakt moet u zich ervan verzekeren dat ze zijn afgekoeld. 1. Verwijder de bescherming m.b.v. een kleine platte schroevendraaier of dergelijk gereedschap. 2. Vervang de beschadigde lamp. Gebruik alleen lampen met dezelfde eigenschappen (voor meer details zie de technische gegevens in deze handleiding). 3. Doe de bescherming weer dicht (bevestiging met klik).
PL Instalacja Prawidłowy sposób instalacji urządzeniu przedstawiono na rysunkach na pierwszych stronach niniejszej instrukcji. Instalacja musi zostać przeprowadzona przez wykwalifikowany personel. Podłączenie do sieci elektrycznej Napięcie sieciowe musi odpowiadać napięciu wskazanemu na etykiecie umieszczonej w wewnętrznej części okapu. Jeśli okap jest wyposażony we wtyczkę, należy ją podłączyć do gniazdka zgodnego z obowiązującymi normami i umieszczonego w łatwo dostępnym miejscu.
Elementy sterownicze CHIMNEY-LUCE Modele z Touch control glass (basic) HLC 9.5S AT X/HA - HLC 6.8 AT X/HA T1 T2 T3 T4 T5 T6 T7 T8 T1 ON/OFF silnika Naciśnięcie przycisku przy wyłączonym okapie, powoduje ustawienie pierwszej prędkości. Naciśnięcie przycisku podczas pracy okapu powoduje jego przejście w stan OFF. T2 Prędkość 1 Naciśnięcie przycisku powoduje przejście okapu z poprzedniego stanu do prędkości 1. T3 Prędkość 2 Naciśnięcie przycisku powoduje przejście okapu z poprzedniego stanu do prędkości 2.
I1 D1 PL D2 I5 Modele z Touch control glass + wyświetlacz (high) HLC 9.8 ASH X/HA - HLC 9.B LSHE X/HA I2 I4 D1: Poz.
I1 D1 D2 I2 I5 I4 D1: Poz. prędkości D2: Zespół 2 pozycji czasu I1: Wskaźnik filtra przeciwtłuszczowego I2: Wskaźnik filtra węglowego I4: Wskaźnik menu I5: Wskaźnik timera Sygnalizacja filtra przeciwtłuszczowego i przeciwzapachowego Po upływie pewnej ilości godzin użytkowania, konieczne jest wyczyszczenie/wymiana filtra przeciwtłuszczowego (A) i filtra przeciwzapachowego (B); drugi z filtrów jedynie w przypadku okapów filtrujących.
PL Legenda konfiguracji Kod Znaczenie regulacji Timer filtra C1 przeciwtłuszczowego Timer filtra C2 przeciwzapachowego C3 C4 C5 C5 C6 Wyjaśnienie Zeruje timer filtra przeciwtłuszczowego Zeruje timer filtra przeciwzapachowego Zmienia rodzaj płyty dla czujnika AUTO. Może być gazowa, Rodzaj płyt elektryczna lub indukcyjna S ł u ż y d o przeprowadzenia kalibracji czujnika.
Wymiana żarówek Odłączyć urządzenie od sieci zasilania elektrycznego i wyjąć filtry przeciwtłuszczowe. Uwaga! Przed dotknięciem żarówek, należy upewnić się, że są zimne. 1. Zdjąć osłonę podważając ją małym, płaskim śrubokrętem lub podobnym narzędziem. 2. Wymienić uszkodzoną żarówkę. Stosować wyłącznie żarówki o takich samych parametrach technicznych jak uszkodzone żarówki (szczegółowe informacje w danych technicznych podanych w instrukcji). 3. Zamknąć osłonę (mocowanie zatrzaskowe).
TR Kurulum Kurulum prosedürü, bu kılavuzun ilk sayfalarında çizimle gösterilmiştir. Kurulum kalifiye bir teknisyen tarafından yapılmalıdır. Elektrik bağlantısı Şebeke gerilimi, davlumbazın iç kısmındaki derecelendirme etiketlerinde gösterilen değerlere uygun olmalıdır. Davlumbazın fişi varsa, bu fişi kolay erişilebilen bir prize takın.
CHIMNEY-LUCE kumandaları Dokunmatik kumanda camlı modeller (temel) HLC 9.5S AT X/HA - HLC 6.8 AT X/HA T1 T2 T3 T4 T5 T6 T7 T8 T1 Motor AÇIK/KAPALI Davlumbaz kapalıyken düğmeye basılınca, birinci hız ayarlanır. Çalışma sırasında düğmeye basılınca davlumbaz KAPANIR. T2 Hız 1 Düğmeye basılınca davlumbaz önceki konumdan 1. hıza geçiş yapar. T3 Hız 2 Düğmeye basılınca davlumbaz önceki konumdan 2. hıza geçiş yapar. T4 Hız 3 Düğmeye basılınca davlumbaz önceki konumdan 3. hıza geçiş yapar.
I1 D1 TR D2 I5 Dokunmatik kumanda camlı + ekranlı modeller (yüksek) HLC 9.8 ASH X/HA - HLC 9.B LSHE X/HA I2 I4 D1: DGT Hızı D2: 2 DGT Saati Grubu I1: Gres Filtresi Göstergesi I2: Karbon Filtresi Göstergesi I4: Menü Göstergesi I5: Zamanlayıcı Göstergesi Yağ ve koku filtresi sinyali Yağ (A) ve/veya koku (B) filtreleri belli bir kullanım süresinden sonra temizlenmeli veya değiştirilmelidir (koku filtreleri sadece filtreleme yapan davlumbazlar için temizlenmeli/değiştirilmelidir).
I1 D1 I2 D2 I5 Ocak ızgarası türünün seçilmesi: davlumbazın altındaki ocak ızgarasının türü (elektrikli, endüksiyonlu veya gazlı) kurulumdan sonra seçilir. Bu tür seçildikten hemen sonra eksiksiz bir otomatik kalibrasyon işlemi gerçekleştirilir. I4 Önemli: otomatik olarak devreye gireceğinden, ocak ızgarası türünü seçtikten sonra “isteğe bağlı” kalibrasyonu seçmeyin.
TR Konfigürasyon tablosu Yönetmelik Anlamı kodu Yağ filtresi C1 zamanlayıcısı Koku filtresi C2 zamanlayıcısı C3 Ocak ızgarası türü C4 S e n s ö r kalibrasyonu C5 Ses seviyeleri C5 C6 Davlumbaz türü F a b r i k a ayarlarına sıfırla Açıklaması Yağ filtresi zamanlayıcısını sıfırlar Koku filtresi zamanlayıcısını sıfırlar OTOMATİK sensör için ocak ızgarası türünü değiştirir. Gazlı, elektrikli veya endüksiyonlu ocak türü seçilebilir. Sensörü kalibre eder.
Lambaların değiştirilmesi LED * Davlumbaz, LED teknolojili bir aydınlatma sistemiyle donatılmıştır. LED lambalar konvansiyonel lambalara göre daha uzun hizmet ömrü, daha iyi aydınlatma ve daha az elektrik sarfiyatı sunar. Bunların değiştirilmesi için lütfen Teknik Destek Servisine başvurun. Elektrik kablosu Elektrik kablosu hasar görmüşse, olası risklerin önlenmesi için sadece üretici veya yetkili teknik servis tarafından değiştirilmelidir.
TR 70
TR 71
195111018.