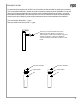
FAUCET SPECIFICATIONS Vessel Bathroom Faucet Model VG03009 MODEL VG03009 FEATURES Solid brass construction Single hole construction Ceramic disk cartridge Single lever faucet Standard plumbing connections Finish resist corrosion and tarnishing PACKING LIST Faucet Assembly Gasket Allen Key Two Metal braided hoses Lock nut Lower ring O-ring Plate Set screws DIMENSIONS MODEL # SPOUT REACH 4 3/4" 13" VG03009 FAUCET HEIGHT 13" NOTE: All faucets are compliant to CEC 2016 regulations.
6 1/8" 1" 1.5" MAX.
FLOW RATE REGULATIONS This product meets the CEC requirements. It is up to the discretion of the client to modify the product with the provided restrictor. Doing so will remove the ability for the product to meet certain low flow standards. Please talk to your local or statewide plumbing enforcement agency prior to modifying.
PACKAGE CONTENTS ASSEMBLY 1. SHUT OFF WATER SUPPLY. REMOVE OLD FAUCET AND FLEXIBLE HOSES. CLEAN SINK SURFACE IN PREPARATION FOR THE NEW FAUCET. FLUSH WATER CONNECTION AT HOME TO MAKE SURE NO DEBRIS IS STUCK IN THE LINE. 2 MAINTENANCE Your new faucet is designed for years of trouble-free performance. Keep it looking new by cleaning it periodically with a soft cloth.
TROUBLESHOOTING PROBLEM POTENTIAL CAUSE 1 - Leaks from handle 2 - Insufficient flow rate 1.B - Contact Vigo Technical Support for replacement. 2.A - Dirty aerator 2.B - Clog in supply hose / line 2.C - Clog in copper supply pins 3 - Leak at connection points 4 - Loose faucet body 5 - Loose handle CORRECTIVE ACTION 1.A - Remove cartridge from housing, wash thoroughly with hot water and reseat in housing. 1.A - Cartridge unseated 1.B - Cartridge defective 2.
VIGO INDUSTRIES, LLC ("VIGO") FAUCET LIMITED LIFETIME WARRANTY EFFECTIVE APRIL 1, 2013 VIGO offers the following limited warranty on each of its Faucet products (the "Product") and the components thereof. This warranty extends only to the original owner for personal household use. For commercial uses, additional limitations apply.
Robinet de salle de bain pour vasque Raccords de plomberie standard LISTE DES ARTICLES Ensemble de robinet Joint torique Plaque Vis de pression DIMENSIONS 13" VG03009 HAUTEUR DU ROBINET 13" de la CEC de 2016.
6 1/8" 1" 1.5" MAX.
responsable des modifications et de la touche qui peut venir avec la modification du poste de vente de produits et horaire.
CONTENU DE L'EMBALLAGE ASSEMBLAGE RETIREZ L'ANCIEN ROBINET ET LES ANCIENS FLEXIBLES. NETTOYEZ LA SURFACE DU LAVABO EN VUE DE L'INSTALLATION DU NOUVEAU ROBINET. RINCEZ AVEC DE L'EAU POUR VOUS 1 2 ENTRETIEN nettoyants abrasifs, la laine d'acier et les produits chimiques puissants peuvent CONDUIT. 2. BRANCHEZ LES FLEXIBLES SUR LES TUYAUX EN LAITON. 3 3. PLACEZ L'ANNEAU TORIQUE SUR LE ROBINET. Pince multiple Mastic de plombier Ruban pour tuyau 4. POSITIONNEZ LE NOUVEAU ROBINET SUR LE LAVABO.
MESURE CORRECTIVE l'eau chaude et replacez la cartouche dans son logement. 1.B - Contactez le service de soutien technique de Vigo pour remplacer la cartouche. 3 - Fuites au niveau des points de raccordement 3.A - Fuite du flexible au niveau du point de raccordement 2.C - Retirez les axes en cuivre et rincez/nettoyez-les. pas de fuites. perpendiculaire au comptoir. cartouche.
VIGO INDUSTRIES, LLC ("VIGO") usage personnel domestique. D'autres limitations s'appliquent en cas d'usage commercial. constructeur. constructeur. un tiers. Limitations directement ou indirectement. produit, notamment, mais sans s'y limiter, de les briser et de provoquer des blessures, voire la mort.] SAUF DISPOSITION CONTRAIRE CI-DESSUS, VIGO NE FAIT AUCUNE GARANTIE, EXPRESSE OU IMPLICITE, Y COMPRIS DE VALEUR MARCHANDE, constructeur.
ESPECIFICACIONES DEL GRIFO Grifo para lavabo Modelo VG03009 MODELO VG03009 CONTENIDOS DEL PAQUETE Juego de grifo Junta Llave Allen Dos mangueras de metal con refuerzo trenzado Contratuerca Anillo inferior Placa Tornillos sujetadores DIMENSIONES GRIFO ALTURA 13" 13" MODEL NRO. VG03009 NOTA: Todos los grifos cumplen con CEC 2016 regulaciones. Si usted tiene preguntas acerca de su flujo de agua, por favor escriba techmail@vigoindustries.com.
6 1/8" 1" 1.5" MAX.
NORMAS DE CAUDAL La velocidad de flujo con aireador instalada - 1.2 gpm Caudal con aireador dispuesto en el cuadro - 1.5 gpm Giro abra la tapa del aireador hacia la izquierda para quitar Basta con quitar el aireador 1.2 gpm y reemplazarlo con el aireador 1,5 gpm (siempre). Vuelva a colocar la cubierta del Cubierta aireador 1.2gpm aireador Cubierta aireador 1.
CONTENIDO DEL PAQUETE MONTAJE AIREADOR 1. CIERRE EL SUMINISTRO DEL AGUA. QUITE EL GRIFO VIEJO Y LAS MANGUERAS FLEXIBLES. LIMPIE LA SUPERFICIE DEL LAVABO PARA PREPARARLO PARA EL NUEVO GRIFO. ENJUAGUE LA 1 2 AGUA PARA ASEGURARSE DE QUE NO QUEDEN TRABADOS MANTENIMIENTO inconvenientes. HERRAMIENTAS NECESARIAS Llave inglesa Pinzas pico de loro 2. CONECTE LAS MANGUERAS FLEXIBLES A 3 3. COLOQUE EL ANILLO INFERIOR Y LA JUNTA Destornillador para tornillos de cabeza plana CONSEJOS DE SEGURIDAD 4.
PROBLEMA CAUSA POTENCIAL MEDIDA CORRECTIVA 1.A - Cartucho no ajustado 1.B - Cartucho defectuoso 2 - Caudal insuficiente 2.A - Aireadores sucios 4 - Afloje el cuerpo del grifo no abrasivo (es decir, mitad agua caliente, mitad vinagre). 5 - Afloje la llave 3.B - Arandela defectuosa completo. 4. - Los dispositivos de ensamblaje se aflojaron 3.A - Ajuste las mangueras. Si eso no resuelve el problema, 4.
VIGO INDUSTRIES, LLC ("VIGO") comienza en la fecha de compra inicial por parte del propietario, contratista o constructor a VIGO o a un distribuidor autorizado de VIGO y durante toda la vida del propietario o usuario final originales. VIGO. Limitaciones aplicables sobre dichas instalaciones. otros, productos de vidrio (es decir, puertas de duchas y lavabos de vidrio) por parte de personas sin experiencia puede provocar fallos en el producto incluidos, entre otros, el Producto.