
User Guide


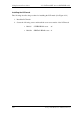


Table Of Contents
- Table of Contents - Introduction
- Chapter 1 - Hardware Overview
- Chapter 2 - Troubleshooting Procedures
- Chapter 3 - Tests anf Diagnostics
- The Diagnostic Test
- Executing the Diagnostic Test
- Subtest
- System Test
- Memory Test
- Keyboard Test
- Display Test
- USB Floppy Disk Test
- ASYNC Test
- Hard Disk Test
- Real Timer Test
- NDP Test
- Expansion Test
- Wireless LAN Test Program (CERT201T.EXE)
- Sound / LAN / Modem Test
- Error Status Code
- HDC Status
- FDD Cleaning
- Log Utilities
- Running Test
- Floppy Disk Drive Utilities
- System Configuration
- Chapter 4 - Replacement Procedures
- Overview
- Battery Pack / PC Card
- Memory Module
- HDD
- Keyboard / Bottom Cover
- Speaker / RTC Battery
- Wireless LAN Board /MDC Board / HDD Cable
- PC Card Slot
- Main Board / FAN
- Sound Board / SW Knob
- Touch Pad / MODEM Jack / LED SW Membrane
- Power Membrane SW / Wireless LAN Antenna
- LCD Mask / FL Inverter / LCD / LCD Cable
- Hinge
- Fluorescent Lamp
- Appendices

4 Replacement Procedures 4.12 Power membrane SW/Wireless LAN antenna
4-40 Portage 2000 Maintenance Manual (960-333)
3. Remove the left side cover. (white wire cable side) and the wireless LAN antenna.
(The wireless LAN antenna is stuck to the frame)
Figure 4-31 Removing the left side wireless LAN antenna
Installing the wireless LAN antenna
The following describes the procedure for installing the wireless LAN antenna. (See
Figure 4-29,4-30,4-31)
1. Install the left side wireless LAN antenna. (Stick the wireless LAN antenna to the
frame)
2. Install the left side cover. (white wire cable side)
3. Install the right side wireless LAN antenna. (Stick the wireless LAN antenna to
the frame)
4. Install the right side cover. (black wire cable side)
5. Stick the three glass tapes