
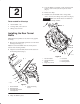
Installation Instructions


6
3
Step
Parts needed for this step:
• 1 Center cutting chamber baffle
• 3 Button Head Socket Bolts, 5/16 x 3/4 inch
• 3 Flange nuts, 5/16 inch
Installing the Center Rear
Baffle
A right angle drill is recommended to install this baffle.
1. Place the center rear baffle behind the center cutting
blade chamber (Fig. 11).
2. Align the center rear baffle so the baffle ends are
touching the back mower flange (Fig. 9).
Note: The center baffle ends will rest on the mower flange
(Fig. 9).
3. Align the middle part, of the center rear baffle, 9/16 to
11/16 inch from the blade tip. See Figures 9 and 10
on where to measure.
1
2
m–6256
3
4
5
Figure 9
1. Mower flange
2. Center baffle
3. Center baffle end touching
mower
4. Blade clearance,
9/16 to 11/16 inch
(14 mm to 17 mm)
5. Center blade
Important Make sure the baffle flange is
9/16 to 11/16 inch (14 mm to 17 mm) from the mower
blade (Figures 9 and 10).
m–62291
4 32
Figure 10
1. Baffle flange
2. Blade
3. Spindle
4. Blade clearance,
9/16 to 11/16 inch
(14 mm to 17 mm)
4. Clamp the center baffle tightly against the cutting
chamber (Fig. 11).
5. Using the baffle as a template, mark, center punch and
drill 1/8 inch pilot holes at the 3 locations (Fig. 11).
6. Drill 11/32 inch dia. holes through the pilot holes
(Fig. 11).
7. Install the center baffle with 3 button head socket bolts
(5/16 x 5/8 inch) and 3 flange nuts (5/16 inch)
(Fig. 11).
Important Make sure the bolt heads are installed on
the inside of the cutting chamber (Fig. 11).
4
m–6176
1
5
2
53
2
Figure 11
1. Center Baffle
2. Hole to drill
3. Center cutting blade
chamber
4. Flange nuts, 5/16 inch
5. Button head socket bolt,
5/16 x 5/8 inch