
Operator's Manual


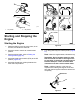


Table Of Contents
- NO TITLE
- NO TITLE
- NO TITLE
- Adding Fuel
- Checking the Engine-Oil Level
- Breaking in a New Machine
- Using the Rollover Protection System (ROPS)
- Entering the User Position
- Think Safety First
- Operating the Parking Brake
- Operating the Mower Blade-Control Switch (PTO)
- Operating the Throttle
- Operating the Choke
- Operating the Ignition Switch
- Using the Fuel Shutoff Valve
- Starting and Stopping the Engine
- Using the Safety-Interlock System
- Driving Forward or Backward
- Stopping the Machine
- Adjusting the Height-of-Cut
- Adjusting the Anti-Scalp Rollers
- Adjusting the Flow Baffle Cam Locks
- Positioning the Flow Baffle
- Positioning the Seat
- Unlatching the Seat
- Adjusting the MyRide™ Suspension System
- Using the Drive-Wheel-Release Valves
- Using the Side Discharge
- Transporting the Machine
- Loading the Machine
- NO TITLE
- NO TITLE
- NO TITLE
- NO TITLE
- NO TITLE

g008955
Figure27
Transport-LockPositions
1.Transportlock3.Unlockposition—doesnot
lockthemowerdeckinto
transportposition
2.Lockposition—mower
deckwilllockintotransport
position
AdjustingtheHeight-of-CutPin
Theheight-of-cutisadjustedfrom25to140mm(1
to5-1/2inches)in6mm(1/4inch)incrementsby
relocatingtheclevispinintodifferentholelocations.
1.Movethetransportlocktothelockposition.
2.Pushonthedeck-liftpedalwithyourfoot,and
raisethemowerdecktothetransportposition
(alsothe140mm(5-1/2inches)cuttingheight
position)asshowninFigure28.
3.Toadjust,rotatethepin90degreesandremove
thepinfromtheheight-of-cutbracket(Figure
28).
4.Selectaholeintheheight-of-cutbracket
correspondingtotheheight-of-cutdesired,and
insertthepin(Figure28).
5.Pushonthedecklift,pullbackonthetransport
lock,andslowlylowerthemowerdeck.
28