
Operator's Manual


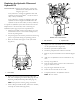


Table Of Contents
- NO TITLE
- NO TITLE
- NO TITLE
- NO TITLE
- Adding Fuel
- Checking the Engine-oil Level
- Breaking In a New Machine
- Using the Rollover Protection System (ROPS)
- Think Safety First
- Operating the Parking Brake
- Operating the Mower Blade-control Switch (PTO)
- Operating the Throttle
- Operating the Choke
- Operating the Ignition Switch
- Using the Fuel Shutoff Valve
- Starting and Stopping the Engine
- Using the Safety-interlock System
- Driving Forward or Backward
- Stopping the Machine
- Adjusting the Height-of-Cut
- Adjusting the Anti-scalp Rollers
- Adjusting the Flow Baffle Cam Locks
- Positioning the Flow Baffle
- Positioning the Seat
- Unlatching the Seat
- Changing the Seat Suspension
- Using the Drive-wheel-release Valves
- Using the Side Discharge
- Transporting Machines
- Loading Machines
- Adding Light Oil or Spray Lubrication
- Greasing the Mower
- Lubricating the Caster-wheel Hubs
- Servicing the Air Cleaner
- Servicing the Engine Oil
- Servicing the Spark Plug
- Checking the Spark Arrester (if equipped)
- Replacing the Fuel Filter
- Servicing the Fuel Tank
- Servicing the Battery
- Servicing the Fuses
- Checking the Seat Belt
- Checking the Rollover Protection System (ROPS) Knobs
- Adjusting the Tracking
- Checking the Tire Pressure
- Checking the Wheel Lug Nuts
- Checking the Wheel Hub Slotted Nut
- Adjusting the Caster-pivot Bearing
- Using the Clutch Shim
- Cleaning the Engine Screen and Engine-oil Cooler
- Cleaning the Engine-cooling Fins and Shrouds
- Checking and Cleaning the Hydraulic-unit Shrouds
- Adjusting the Parking Brake
- Inspecting the Belts
- Replacing the Mower Belt
- Replacing the Hydraulic Pump-drive Belt
- Adjusting the Control-handle Position
- Adjusting the Motion-control Linkage
- Adjusting the Motion-control Damper
- Adjusting the Motion Control Neutral-lock Pivot
- Servicing the Hydraulic System
- Mower Deck Maintenance
- Cleaning under the Mower
- Disposing of Waste
- NO TITLE

CheckingforBentBlades
1.DisengagethePTO,movethemotion-controlleversto
theneutral-lockedposition,andsettheparkingbrake.
2.Stoptheengine,removethekey,andwaitforallmoving
partstostopbeforeleavingtheoperatingposition.
3.Rotatethebladesuntiltheendsfaceforwardand
backward.
4.Measurefromalevelsurfacetothecuttingedge,
positionA,oftheblades(Figure93).
Figure93
1.Measureherefromblade
tohardsurface
2.PositionA
5.Rotatetheoppositeendsofthebladesforward.
6.Measurefromalevelsurfacetothecuttingedgeofthe
bladesatthesamepositionasinstep
4above.
Note:Thedifferencebetweenthedimensions
obtainedinsteps4and5mustnotexceed3mm
(1/8inch).
Note:Ifthisdimensionexceeds3mm(1/8inch),the
bladeisbentandmustbereplaced.
WARNING
Abladethatisbentordamagedcouldbreak
apartandcouldseriouslyinjureorkillyouor
bystanders.
•Alwaysreplacebentordamagedblade
withanewblade.
•Donotleorcreatesharpnotchesinthe
edgesorsurfacesoftheblade.
RemovingtheBlades
Bladesmustbereplacedifasolidobjectishit,ifthe
bladeisoutofbalance,orifthebladeisbent.Toensure
optimumperformanceandcontinuedsafetyconformance
ofthemachine,usegenuineTororeplacementblades.
Replacementbladesmadebyothermanufacturersmayresult
innonconformancewithsafetystandards.
1.Holdthebladeendusingaragorathickly-padded
glove.
2.Removethebladebolt,thecurvedwasher,andthe
bladefromthespindleshaft(Figure94).
Figure94
1.Sailareaoftheblade3.Curvedwasher
2.Blade4.Bladebolt
SharpeningtheBlades
1.Usealetosharpenthecuttingedgeatbothendsof
theblade(Figure95).
Note:Maintaintheoriginalangle.
Note:Thebladeretainsbalanceifthesameamount
ofmaterialisremovedfrombothcuttingedges.
Figure95
1.Sharpenattheoriginalangle
2.Checkthebalanceofthebladebyputtingitonablade
balancer(Figure96).
60