
Operator's Manual


Squealing when the belt is rotating, blades slipping
when cutting g rass , fra yed belt edg es , bur n marks ,
and crac ks are signs of a w or n mo w er belt. R e place
the mo w er belt if any of these conditions are
evident.
Replacing the Mower Belt
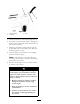
1. Stop the engine , set the parking brak e , remo v e
the k ey , and disconnect the spark plug wire(s)
from the spark plug(s).
2. Set the height-of-cut at 1-1/2 inc h (38 mm).
3. R emo v e the belt co v ers o v er the outside
spindles .
4. Pull the idler pulley in the direction sho wn in
Figure 48 and roll the belt off of the pulleys .
Note: Do not remo v e the spring .
T he spring is under tension when
installed and can cause per sonal injur y .
Do not r emo v e the spring fr om the spring
ey e bolt.
5. R oute the new belt through the idler ar m and
around the idler pulley ( Figure 48 ).
Figure 48
Top View
1. Outer nut
5. Spring
2. Idler pulley
6. 1/8 inch (3 mm)
3. Idler arm 7. Mower belt
4. Spring eye bolt
6. Pull the idler pulley in the direction sho wn in
Figure 48 and route the belt onto the other
pulleys ( Figure 49 ).
Note: Chec k to ensure that the length of
exposed thread on the spring eye bolt is 1/8 in.
(3 mm) ( Figure 48 ).
7. Install the belt co v ers o v er the outside spindles .
Figure 49
Top View
1. Mower belt
4. Spring
2. Idler arm 5. Idler pulley
3. Outside pulley
Installing the Mower
1. P ark the mac hine on a lev el surface .
2. Diseng ag e the blade control switc h and mo v e
the control lev ers to the neutral loc k ed position
and apply the parking brak e .
3. Stop the engine , remo v e the k ey , and w ait for
all mo ving par ts to stop before lea ving the
operating position.
4. Slide the mo w er under the tractor .
5. Lo w er the height-of-cut lev er to the lo w est
position.
6. Attac h the rear tr union rod to the tractor with
the clevis pin and hair pin cotter ( Figure 47 ) on
eac h side of the mo w er .
7. Slide the lev eling brac k ets onto the mounting
pins and secure them with the w ashers and
hair pin cotters ( Figure 47 ).
8. Attac h the front tr union rods to the tractor
with the clevis pins and hair pin cotters
( Figure 46 ).
9. Install the mo w er belt onto the engine pulley;
refer to R e placing the Mo w er Belt.
34