
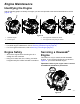
Operator's Manual


RemovingtheElements
1.Rotatethelatchesoutward.
2.Removethecovertoaccesstheair-cleaner
elements(Figure57).
g028105
Figure57
1.Air-cleanercover2.Air-cleanerlatch
3.Removethefoamandpaperelements(Figure
58).
4.Removethefoamelementfromthepaper
element(Figure58).
g028106
Figure58
1.Air-cleanercover3.Paperelement
2.Foamelement
ServicingtheFoamElement
1.Washthefoamelementinliquidsoapand
warmwater.Whentheelementisclean,rinse
itthoroughly.
2.Drytheelementbysqueezingitinacleancloth.
Important:Replacethefoamelementifit
istornorworn.
ServicingthePaperElement
1.Gentlytapthepaperelementtodislodgedirt.
Note:Donotwashthepaperelementoruse
pressurizedair,asthiswilldamagetheelement.
Note:Replaceadirty,bent,ordamaged
element.Handlethenewelementcarefully;
donotuseifthesealingsurfacesarebentor
damaged.
2.Cleantheair-cleanerbaseasrequired,and
checkthecondition.
InstallingtheElements
1.Installthefoamelementontothepaperelement.
2.Installtheelementsontotheair-cleanerbase
(Figure58).
3.Installthecover,andsecureitwiththelatches
(Figure57).
ServicingtheEngineOil
EngineOilSpecications
OilType:Detergentoil(APIserviceSJorhigher)
CrankcaseCapacity:1.9L(64oz)withtheoillter
Viscosity:Seethetablebelow.
g017552
Figure59
CheckingtheEngine-OilLevel
ServiceInterval:Beforeeachuseordaily
Note:Checktheoilwhentheengineiscold.
Important:Ifyouoverllorunderlltheengine
crankcasewithoilandruntheengine,youmay
damagetheengine.
1.Parkthemachineonalevelsurface,disengage
theblade-controlswitch(PTO),andengagethe
parkingbrake.
47