
Service Manual


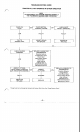


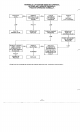


FIG.
12B.
Late Model Friction Adjustment
NEUTRAL
To test neutral adjustment tractor should be brought
to a stop from both directions on a level surface,
using Brake/Return to Neutral pedal. Once tractor
is
stopped, release pedal.
If
tractor "creeps" in either
direction, neutral adjustment
is
necessary
1.
If
applicable, disconnect wiring as required and
remove seat and rear fender on early models
only (Fig.
12).
2.
Support rear of tractor
so
both wheels are
off
ground.
3.
Start engine and run at full throttle. Move mo-
tion control lever forward and wait for drive
train to reach normal operating temperature.
4.
Depress brake pedal fully and release.
5.
Slightly loosen lock bolt and turn large eccen-
tric
with a wrench until
rear
wheels stop turn-
ing. Turn eccentric in opposite direction. until
wheels start turning, then
set
eccentric mid-way
between these two positions.
6.
Tighten lock bolt and retest for neutral, from
both directions, at full throttle.
FIG.
13.
Neutral Adjustment
7.
if
tractor can not be neutralized in both direc-
tions with eccentric, control rod .length should
be reset and neutral then re-adjusted:
A)
Remove control cover plate (Fig.
14).
B)
Set
parking brake.
C)
Disconnect front end of control rod from
motion control arm.
D) Adjust position
of
cam plate
so
that
right
edge of friction washer
is
even with right
end of slot in cam plate.
E)
Adjust rod end on control rod
so
that bolt
enters hole in control arm exactly at a right
angle (square) to
it.
F)
If
a satisfactory neutral
still
cannot be ob-
tained,
check
linkage for wear or damage.
8.
After neutral has been set,
check
that motion
control lever
is
centered in notch of detent
spring. Spring has slotted bolt holes
so
it
may
be adjusted to line up notch with lever. Belt
cover and control cover plate in front of seat
must be removed to make this adjustment.
9.
If
applicable, reinstall fender and seat. Recon-
nect wiring.
FIG.
14.
Detent Spring Adjustment
TESTING
SYSTEM
PERFORMANCE
A test for observing transmission system perform-
ance under load can be helpful when checking a
"low
power", or "tractor loses power" condition.
1.
Operate tractor to bring engine and drive train
to normal operating temperature.
2.
Anchor rear of tractor to an immoveable object
(tree, beam, etc.) with a chain secured to trans-
axle case. Rear wheels must be on a high
fric-
tion surface, such as unfinished concrete or
asphalt. Front wheels may be placed against
a
curb or wall as an alternative, but provision
must be made to
keep
front of tractor on ground.
3.
Set engine at half throttle and move motion
control lever fully forward. Tractor should have
enough power to spin rear wheels with an
operator in seat.
4.
If
wheels do not spin, carefully note engine,
drive belt, and transmission/transaxle perform-
ance to isolate problem.
5.
If
test results are marginal, tractor should be
used under actual operating conditions to isolate
problem.
PRESSURE CHECKS
Perform pressure checks at locations described be-
low. Do not connect a pressure gage in a way that
cuts off flow to hydraulic valve, which eliminates re-
lief valves from system. Charge pump pressure will
build until internal failure occurs.
-
13-