
Service Manual
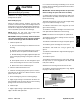


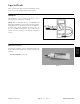


Disassembly (Fig. 25)
1. Remove oil from the steering cylinder into a drain pan
by slowly pumping the cylinder shaft. Plug both ports
and clean the outside of the cylinder
.
IMPORTANT: Prevent damage when clamping the
hydraulic cylinder into a vise. Do not close vise
enough
to distort the barrel.
2. Mount end of steering cylinder in a vise. Remove re-
taining ring.
3. Remove plugs from ports. Extract shaft, head, and
piston by carefully twisting and pulling on the shaft.
IMPORTANT: Do not clamp vise jaws against the
shaft surface. Protect shaft surface before mount-
ing in a vice.
4. Mount shaft securely in a vise by clamping on the end
o
f the shaft. Remove lock nut and piston from the shaft.
Slide head off the shaft.
5. Remove Uni–ring and o–ring from the piston.
6. Remove o–ring, back–up ring, rod seal, and dust
seal from the head.
Reassembly (Fig. 25)
1. Make sure all parts are clean before reassembly.
2. Coat new o–rings, Uni–ring, rod seal, and back–up
ring with with clean Dexron III A
TF.
A. Install Uni–ring and o–ring to the piston.
B. Install o–ring, back–up ring, rod seal, and dust
seal to the head.
IMPORTANT: Do not clamp vise jaws against the
shaft surface. Protect shaft surface before
mounting in a vice.
3. Mount shaft securely in a vise by clamping on the end
of the shaft.
A. Coat shaft with a light coat of clean Dexron III
AT
F.
B. Slide head assembly onto the shaft. Install piston
a
nd lock nut onto the shaft. Torque lock nut to 75 ft–lb
(102 N–m).
C. Remove shaft from the vise.
IMPORTANT: Prevent damage when clamping
the hydraulic cylinder into a vise. Do not close
vise enough to distort the barrel.
4. Mount end of the barrel in a vise.
5. Coat all internal parts with a light coat of clean Dex-
ron III ATF. Slide piston, shaft, and head assembly into
the barrel being careful not to damage the seals.
6. Secure head into the barrel with retaining ring.
Hydraulic
System
Multi Pro 1200/1250 Page 4 – 31 Hydraulic System