
Operator's Manual


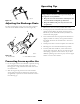

Setup
Loose Parts
Use the chart b elow to verify that all parts have been shipped.
Step
Description
Qty.
Use
Handle bolt
1
Curved washer
1
1.
Knob
1
Install the handle.
Discharge chute
1
Phillips head screws
3
Washers
3
2.
Locknuts
3
Install the discharge chute.
Chute crank and mounting plate
1
Bolts
2
3.
Locknuts
2
Install the chute crank.
1. Installing the Handle
1. Cut the plastic tie that secures the control cable to the
handle.
Note: Hold the cable taut to ensure that it stays
connected at the bottom.
2. Position the upper handle as shown (Figure 3).
G001115
Figure 3
3. Loosely install the handle bolts, curved washers, and
knobs (Figure 4).
G001143
Figure 4
4. Hook the end of the control cable spring into the
bottom hole of the control bar (Figure 5).
G001144
Figure 5
5. Fully insert the handle bo lts (Figure 6).
Important: Ensure that you do not pinch the
control cable (Figure 6).
6