
Operator's Manual


Electrical System
Maintenance
Charging and Connecting
the Battery
Warning
CALIFORNIA
Pr oposition 65 W ar ning
Batter y posts, ter minals, and r elated
accessories contain lead and lead
compounds, chemicals kno wn to the State of
Calif or nia to cause cancer and r epr oducti v e
har m. W ash hands after handling .
1. Unlatc h and raise the hood.
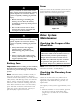
2. R emo v e the batter y strap and co v er ( Figure 41 ).
Figure 41
1. Battery cover
2. Battery strap
Batter y electr ol yte contains sulfuric acid
which is a deadl y poison and causes
sev er e bur ns.
• Do not drink electr ol yte and a v oid
contact with skin, ey es or clothing .
W ear safety g lasses to shield y our
ey es and r ub ber g lo v es to pr otect y our
hands.
• Fill the batter y wher e clean w ater is
al w ays a v aila ble f or flushing the skin.
3. Connect a 3 to 4 amp . batter y c harg er to the
batter y posts . Charg e the batter y at a rate of 3
to 4 amperes for 4 to 8 hours .
4. W hen the batter y is c harg ed, disconnect the
c harg er from the electrical outlet and batter y
posts .
Charging the batter y pr oduces gasses
that can explode.
Nev er smok e near the batter y and k eep
spar ks and flames a w ay fr om batter y .
5. Install the positi v e cable (red) to the positi v e
(+) ter minal and the neg ati v e cable (blac k)
to the neg ati v e (-) ter minal of the batter y
( Figure 42 ). Secure cables to posts with
capscrews and n uts . Mak e sure that the positi v e
(+) ter minal is all of the w a y onto the post and
the cable is positioned sn ug to the batter y . T he
cable m ust not contact the batter y co v er . Slide
the r ubber boot o v er the positi v e ter minal to
prev ent a possible shor t from occur ring .
Figure 42
1. Positive battery cable 2. Negative battery cable
Warning
CALIFORNIA
Pr oposition 65 W ar ning
Batter y posts, ter minals, and r elated
accessories contain lead and lead
compounds, chemicals kno wn to the
State of Calif or nia to cause cancer and
r epr oducti v e har m. W ash hands after
handling .
6. Coat both batter y connections with Grafo
112X (skin-o v er) g rease , T oro P ar t No . 505-47,
petroleum jelly , or light g rease to prev ent
cor rosion. Slide the r ubber boot o v er the
positi v e ter minal.
7. Install the batter y co v er .
39