
Operator's Manual


AdjustingtheRearCuttingUnit
Thefrontandrearcuttingunitsrequiredifferent
mountingpositions.Therearcuttingunithas1
mountingpositionforproperalignmentwiththe
Sidewinder®unitundertheframe.
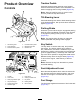
Forallheightsofcut,mounttherearcuttingunitinthe
rearmountingholes(Figure17).
7
AdjustingtheHeightofCut
NoPartsRequired
Procedure
Important:Thiscuttingdeckoftencuts
approximately6mm(1/4inch)lowerthanareel
cuttingunitwiththesamebenchsetting.Itmay
benecessarytohavetherotarycuttingdecks
benchset6mm(1/4inch)abovethatofthereels
cuttinginthesamearea.
Important:Accesstotherearcuttingunitsis
greatlyimprovedbyremovingthecuttingunit
fromthemachine.Ifthemachineisequippedwith
aSidewinder®unit,side-windthecuttingunitsto
theright,removetherearcuttingunit,andslide
itouttotherightside.
1.Lowerthecuttingdecktotheground,shutoff
theengine,andremovetheignitionkey.
2.Loosentheboltsecuringeachheight-of-cut
brackettotheheight-of-cutplate(frontandeach
side)asshowninFigure18.
g031577
Figure18
1.Spacer3.Height-of-cutbracket
2.Height-of-cutplate
3.Beginningwiththefrontadjustment,removethe
bolt.
4.Whilesupportingthechamber,removethe
spacer(Figure18).
5.Movethechambertothedesiredheightof
cutandinstallaspacerintothedesignated
height-of-cutholeandslot(Figure19).
g026184
Figure19
6.Positionthetappedplateinlinewiththespacer.
7.Installthebolt(ngertight).
8.Repeatsteps4to7foreachsideadjustment.
9.Tightenthe3boltsto41N∙m(30ft-lb).
Note:Tightenthefrontboltrst.
Note:Adjustmentsofmorethan3.8cm(1-1/2
inches)mayrequiretemporaryassemblyto
anintermediateheighttopreventbinding(for
example,changingfrom3.1to7cm(1-1/4to
2-3/4inches)heightofcut).
18