
Service Manual


JointYokeAssembly
1.Makesurethatrubberplate(item6)andplate(item5)arepositionedin
bottomofdeckmount.
2.Applyacoatingofgreasetobearingboresofyokeanddeckmount.Also,
applygreasetobearingsandsealofbearingassembly.Makesurethatall
bearingrollersareproperlyseatedinbearingcage.
3.Useapresstoinstallcrossandbearingsintoyoke.
A.Pressonebearingpartiallyintoyoke.
IMPORTANT
Takecarewheninstallingcrossintobearingtoavoiddamaging
bearingseal.
B.Carefullyinsertcrossintobearingandyoke.
C.Holdcrossinalignmentandpressbearinginuntilithitstheyoke.
D.Carefullyplacesecondbearingintoyokeboreandontocrossshaft.
Pressbearingintoyoke.
4.Useapressandtheaboveprocesstoinstalldeckmounttoyoke.
5.Installretainingringstoyokeanddeckmounttosecurebearingsinplace.
6.Makesurethatassembledjointyokemoveswithoutbinding.Slightbinding
canusuallybeeliminatedbylightlyrappingtheyokelugswithasoftfaced
hammer.Ifbindingcontinues,disassemblejointyokeanddeckmountto
identifyandeliminatesourceofbinding.
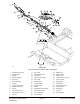
Installation(Figure310)
1.Positionjointyokewithdeckmounttocuttingdeck.
2.Securedeckmounttodeckwitheight(8)capscrews,lockwashersandat
washers(Figure311).
3.Placespacerwasher(chamferedIDsidedown)andthenthrustwasher(item
11)ontojointyokeshaft.Insertyokeshaftupthroughliftarmbushings.
Placeadditionalthrustwashers(items11and21)andthenhardenedwasher
(item12)onyokeshaftandsecurewithslottedhexnut.Torquenutfrom
203to244N·m(150to180ft−lb)whilealigningholeinshaftwithslotin
nut.Installcotterpin.
4.Positionspacersonbothsidesofrodendofreararmassembly.Securerod
endofreararmassemblytodeckmountwithcapscrewandlocknut.
5.Greasejointyokeandliftarmbushingsafterinstallationonmachine.
6.Afterassemblyiscompleted,raiseandlowerthecuttingdecktoverifythat
hydraulichosesandttingsdonotcontactanything.
Groundsmaster
®
4000-D&4010-D
Page8–21
Chassis:ServiceandRepairs
13202SLRevF