
Service Manual


RemovingtheLiftControlValve(continued)
IMPORTANT
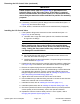
Aowcontrolorice(item5inFigure109)isplacedbelowthe
hydraulicttingontheliftcontrolvalve.Ifthettingisremoved
fromthemanifoldandaowcontroloriceisinthemanifoldblock,
ensurethatyouremovetheoriceandlabelitspositionforassembly
purposes.
12.Ifnecessary,removethehydraulicttingsfromthemanifoldblock(item1in
Figure109),anddiscardtheO-rings.
13.Locate,retrieve,andlabeltheoricefromthemanifoldblock(ifequipped).
InstallingtheLiftControlValve
1.Ifthehydraulicttingswereremovedfromthemanifoldblock(item1in
Figure109),dothefollowing:
A.LubricatenewO-ringswithcleanhydraulicuid,installthelubricated
O-ringsontothettings.
IMPORTANT
Wheninstallingtheowcontroloriceinthemanifoldblock,
ensurethattheowcontroloriceisatinthebaseofthetting
cavity.Lettingtheowcontroloricestaycockedinthecavity
candamagethemanifoldblock.
B.Forthemanifoldportwithorice,installtheowcontroloriceinthe
blockwiththeoriceslotfacingout.
C.Installthettingsintothemanifoldblock.Torquethettingstothetorque
valuesidentiedinFigure109.
2.Positiontheliftcontrolvalvetothemachineframeandinstallthe2bolts(item
6inFigure108),2lockwashers,and2atwashersbutdonotfullytighten.
3.Removethecapsandplugsfromthehydrauliclinesandttings.
4.LubricateandinstallnewO-ringsonthemanifoldttings.Usethelabelsthat
youattachedduringremoval,correctlyconnectthehydrauliclinestothe
ttingsandtightenalltheconnections;refertoInstallingtheHydraulicHose
andTube(O-RingFaceSealFitting)(page5–9).
5.Tightenthe2boltstosecuretheliftcontrolvalvetotheframe.
6.Usethelabelsthatyouattachedduringremovaltoconnectthewireharness
leadstothesolenoidcoilsonthemanifoldblock.
7.Installthefueltank;refertoInstallingtheFuelT ank(page4–17).
8.Installtheoperatorseat;refertoInstallingtheOperatorSeat(page7–20).
9.Checkthehydraulic-uidlevelinthehydraulicreservoir(frontaxle)andadd
correctquantityofuidifnecessary;refertotheOperator’sManual.
10.Operatethemachinefunctionsslowlyuntilairisoutofsystem;referto
ChargingtheHydraulicSystem(page5–85).
HydraulicSystem:ServiceandRepairs
Page5–138
Groundsmaster
®
3280-D/3320
05138SLRevB