
Service Manual


50
GTS 200
Pistons, Rings, and Rods
Check Piston Ring Groove Wear
1. Clean
carbon from top ring groove.
2.
Place a NEW ring in groove, Fig. 120 and measure space
between ring and ring land, T
able No. 1, page 52.
1
2
Fig. 120
– Checking Ring Grooves
1. Piston 2. New
piston ring
Check Piston Ring End Gap
1. Clean
all carbon from the end of the rings, and from the
cylinder bore.
2.
Insert old rings one at a time one inch down into the
cylinder.
3.
Check end gap with feeler gauge, Fig. 121.
3
Î
Î
2
1
Fig. 121
– Checking Ring End Gap
1. Ring
2. Feeler
gauge
3.
See T
able 1
4. If
ring gap is greater than shown in T
able No. 2, page 52,
the ring should be rejected.
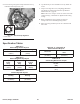
Check Connecting Rod
If
the crankpin bearing is scored, the rod must be replaced.
Check condition of crankpin bearing surface on crankshaft.
Reject sizes of crankpin bearing hole and piston pin bearing
hole, Fig. 122, are shown in T
able No. 3, page 52.
2
1
Fig. 122
– Checking Rod Bearings
1. Crankpin
bearing
2.
Piston pin bearing
Check Piston Pin and Piston Pin Bore
If
piston pin is worn .0005” (.013mm) out of round or below
reject size shown in Table 4, it should be replaced.
If piston pin bore, Fig. 123, is worn over reject size, replace
piston.
1
Fig. 123
– Checking Piston Pin Bore
1. Piston
pin bore
Assemble Piston and Connecting Rod
Note:
Pistons on the GTS 200 engine have a shoulder stop on
one side of piston and use only one (1) piston pin lock.
The piston pin is a slip fit in both piston and connecting rod.
Note:
All pistons are made with an of
fset piston pin bore.
1.
Piston must be installed with notch or arrow toward
flywheel side of cylinder
.
2.
Determine correct position of connecting rod relative to
notch or arrow on piston, Fig. 124.
1
Fig. 124
– Assembling Piston and Rod
1. Notch
or arrow