Form No. 3374-8 6 $60 Rev A 55cm Recycler® Lawn Mower Model No. 20955—Serial No. 310000001 and Up Model No. 20956—Serial No. 310000001 and Up Operator's Manual Replacement parts are available from an Authorized Service Dealer or at www.shoptoro.com. Introduction This rotary-blade, walk-behind lawn mower is intended to be used by residential homeowners. It is designed primarily for cutting grass on well-maintained lawns on residential properties.
• Never allow children or people unfamiliar with these Operation ..................................................................... 7 Filling the Fuel Tank ................................................ 7 Checking the Engine Oil Level .................................. 8 Adjusting the Cutting Height .................................... 8 Starting the Engine .................................................. 9 Using the Self-propel Drive....................................... 9 Stopping the Engine ....
• Do not put hands or feet near or under rotating parts. • Never store the equipment with gasoline in the tank and Keep clear of the discharge opening at all times. inside a building where fumes can reach an open flame or spark. • Never pick up or carry a lawn mower while the engine is • Allow the engine to cool before storing in any enclosure. running.
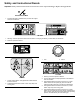
Safety and Instructional Decals Important: Safety and instruction decals are located near areas of potential danger. Replace damaged decals. Manufacturer's Mark 1. Indicates the blade is identified as a part from the original machine manufacturer. 104-7953 1. Warning—read the Operator's Manual for information on charging the battery; contains lead; do not discard. 2. Read the Operator's Manual. 108-8117 112-8867 1. Lock 2. Unlock 114-7982 112-8760 1. 2.
Setup Important: Remove and discard the protective plastic sheet that covers the engine. 1 117-1054 Electric-start model only Installing the Handle No Parts Required Procedure WARNING Folding or unfolding the handle improperly can damage the cables, causing an unsafe operating condition. • Do not damage the cables when folding or unfolding the handle. • If a cable is damaged, contact an Authorized Service Dealer. 1. Remove the handle knobs from the machine housing (Figure 3).
Figure 4 1. Figure 3 2. Move the handle to the operating position. 3. Install and tighten the handle knobs that you removed in step 1. 3. Wipe the dipstick clean with a clean cloth. 4. Insert the dipstick fully into the oil-fill tube. 5. Remove the dipstick and read the oil level on the dipstick; refer to Figure 4.
Product Overview Operation Filling the Fuel Tank DANGER Gasoline is extremely flammable and explosive. A fire or explosion from gasoline can burn you and others. • To prevent a static charge from igniting the gasoline, place the container and/or machine directly on the ground before filling, not in a vehicle or on an object. • Fill the tank outdoors when the engine is cold. Wipe up spills. • Do not handle gasoline when smoking or around an open flame or sparks. Figure 5 1. Handle 2. 3.
Checking the Engine Oil Level Adjusting the Cutting Height Service Interval: Before each use or daily WARNING Note: Max. fill: 0.59 l (20 fl. oz.), type: SAE 30 detergent oil with an API service classification of SF, SG, SH, SJ, SL, or higher. 1. Move the machine to a level surface. 2. Remove the dipstick (Figure 8). Adjusting the cutting height may bring you into contact with the moving blade, causing serious injury. • Stop the engine and wait for all moving parts to stop.
Starting the Engine 1. Note: If the machine does not start after several attempts, contact an Authorized Service Dealer. Hold the blade-control bar against the handle (Figure 10). Using the Self-propel Drive To operate the self-propel drive, simply walk with your hands on the upper handle and your elbows at your sides, and the machine will automatically keep pace with you (Figure 13). Figure 10 1. 2.
Bagging the Clippings Use the grass bag when you want to collect grass and leaf clippings from the lawn. WARNING A worn grass bag could allow small stones and other similar debris to be thrown in the operator's or bystander's direction and result in serious personal injury or death to the operator or bystanders. Check the grass bag frequently. If it is damaged, install a new Toro replacement bag.
Side-discharging the Clippings Use the side discharge for cutting very tall grass. If the grass bag is on the machine and the bag-on-demand lever is in the bagging position, move the lever to the recycling position; refer to Operating the Bag-on-Demand Lever (page 10). WARNING The blade is sharp; contacting the blade can result in serious personal injury. Figure 15 1. Stop the engine and wait for all moving parts to stop before leaving the operating position.
Installing the Side-discharge Chute Operating Tips Lift up the side deflector and install the side-discharge chute (Figure 17). General Mowing Tips • Clear the area of sticks, stones, wire, branches, and other debris that the blade could hit. • Avoid striking solid objects with the blade. Never deliberately mow over any object. • If the machine strikes an object or starts to vibrate, immediately stop the engine, disconnect the wire from the spark plug, and examine the machine for damage.
Cutting Leaves • If there are more than 13 cm (5 in) of leaves on the lawn, set the front cutting height one or two notches higher than the rear cutting height. Slow down your mowing speed if the machine does not cut the leaves finely enough. • After cutting the lawn, ensure that half of the lawn shows through the cut leaf cover. You may need to make more than one pass over the leaves. • Maintenance Note: Determine the left and right sides of the machine from the normal operating position.
Replacing the Air Filter Service Interval: Every 25 hours 1. Use a screw driver to open the air-filter cover (Figure 19). Figure 19 Figure 21 1. 2. Dipstick Replace the air filter (Figure 20). 7. Tip the machine onto its side, with the oil-fill tube down, to drain the used oil through the oil-fill tube into the oil-drain pan (Figure 22). Figure 20 3. Install the cover. Figure 22 Changing the Engine Oil 8. After draining the used oil, return the machine to the operating position. 9.
Important: If the oil level in the crankcase is too low or too high and you run the engine, you may damage the engine. Replacing the Fuse 14. Install the dipstick into the oil-fill tube securely. 15. Dispose of the used oil properly at a local recycling center. If the battery does not charge or the engine does not run with the electric starter, the fuse may be blown. Replace it with a 40-amp plug-in type fuse. 1. Raise the rear deflector and locate the battery compartment (Figure 24).
Note: Your machine comes with a spare fuse in the battery compartment. 5. Install the battery compartment with the screw that you removed in step 3. 6. Install the cover over the battery compartment. 7. Lower the rear deflector. Replacing the Blade Service Interval: Yearly Important: You will need a torque wrench to install the blade properly. If you do not have a torque wrench or are uncomfortable performing this procedure, contact an Authorized Service Dealer.
Cleaning under the Machine Housing Service Interval: Before each use or daily WARNING The machine may dislodge material from under the machine housing. • Wear eye protection. • Stay in the operating position (behind the handle) when the engine is running. Figure 28 This figure is simplified for the purpose of clarity. • Do not allow bystanders in the area. 2. For best results, clean under the machine housing soon after you have completed mowing.
Storage 1. Remove the ignition key (electric-start model only). 2. Loosen the handle knobs until you can move the upper handle freely. 3. Fold the upper handle forward as shown in Figure 31. Store the machine in a cool, clean, dry place. Preparing the Machine for Storage Important: Route the cables to the outside of the handle knobs as you fold the handle. WARNING Gasoline vapors can explode. • Do not store gasoline more than 30 days. • Do not store the machine in an enclosure near an open flame.
International Distributor List Distributor: Atlantis Su ve Sulama Sisstemleri Lt Balama Prima Engineering Equip. B-Ray Corporation Casco Sales Company Ceres S.A. CSSC Turf Equipment (pvt) Ltd. Cyril Johnston & Co. Equiver Femco S.A. G.Y.K. Company Ltd. Geomechaniki of Athens Guandong Golden Star Hako Ground and Garden Hako Ground and Garden Hayter Limited (U.K.) Hydroturf Int. Co Dubai Hydroturf Egypt LLC Ibea S.P.A. Irriamc Irrigation Products Int'l Pvt Ltd.
The Toro Warranty Owner Responsibilities Conditions and Products Covered The Toro Company and its affiliate, Toro Warranty Company, pursuant to an agreement between them, jointly promise to the original purchaser* to repair the Toro Products listed below if defective in materials or workmanship. You must maintain your Toro Product by following the maintenance procedures described in the Operator's Manual. Such routine maintenance, whether performed by a dealer or by you, is at your expense.
Form No. 3374-866-ASM Rev A Recycler® Rasenmäher (55 cm) Modellnr. 20955—Seriennr. 310000001 und höher Modellnr. 20956—Seriennr. 310000001 und höher Bedienungsanleitung Ersatzteile erhalten Sie vom offiziellen Vertragshändler oder unter www.shoptoro.com. Einführung Modellnr. Dieser handgeführte Rasenmäher mit Sichelmessern sollte von Privatleuten oder geschulten Lohnarbeitern verwendet werden. Er ist hauptsächlich für das Mähen von Gras auf gepflegten Grünflächen in Privatanlagen gedacht.
Schallleistung ......................................................... 4 Hand-/Armvibration............................................... 4 Sicherheits- und Bedienungsschilder .......................... 5 Einrichtung ................................................................... 6 1 Montieren des Griffs ............................................. 6 2 Auffüllen des Motors mit Öl ................................... 7 3 Aufladen der Batterie.............................................
• Prüfen Sie vor der Inbetriebnahme visuell, ob alle • Lassen Sie den Motor nie in unbelüfteten Räumen laufen, Schutzvorrichtungen und Sicherheitsgeräte, wie z. B. Ablenkbleche und/oder Grasfangkörbe einwandfrei montiert sind und richtig funktionieren. da sich dort gefährliche Kohlenmonoxidgase ansammeln können. • Stellen Sie den Motor in den folgenden Situationen ab: • Überprüfen Sie vor dem Einsatz immer, ob die – Wenn Sie den Rasenmäher verlassen.
• Wenn Sie den Kraftstoff aus dem Tank ablassen müssen, sollte dies im Freien geschehen. • Verändern Sie nie die Einstellung des Motorfliehkraftreglers, und überdrehen Sie niemals den Motor. Durch das Überdrehen des Motors steigt die Verletzungsgefahr. • Achten Sie beim Einstellen des Rasenmähers sorgfältig darauf, dass Sie Ihre Finger nirgendwo zwischen den sich bewegenden Messern und starren Teilen verklemmen.
Sicherheits- und Bedienungsschilder Wichtig: Sicherheits- und Bedienungsschilder sind in der Nähe potenzieller Gefahrenbereiche angebracht. Tauschen Sie beschädigte Schilder aus. Herstellermarke 1. Gibt an, dass das Messer Teil der Originalmaschine des Herstellers ist. 104-7953 1. Weitere Informationen zum Aufladen der Batterie finden Sie in der Bedienungsanleitung. Die Batterie enthält Blei, daher dürfen Sie sie nicht wegwerfen. 2. Lesen Sie die Bedienungsanleitung. 108-8117 112-8867 1. 112-8760 1.
Einrichtung Wichtig: Nehmen Sie den Plastikschutz ab, mit dem der Motor abgedeckt ist. Werfen Sie ihn ab. 1 114-7982 1. Warnung: Lesen Sie die Bedienungsanleitung. 2. Gefahr durch fliegende Teile: Achten Sie darauf, dass Unbeteiligte den Sicherheitsabstand zum Gerät einhalten. Montieren des Griffs 3. Schnitt- bzw. Amputationsgefahr an Händen und Füßen beim Schnittmesser: Ziehen Sie den Zündkerzenstecker ab und lesen Sie die Anweisungen, bevor Sie Wartungs- oder Reparaturarbeiten ausführen.
3. Befestigen und ziehen Sie die Bügelhandräder fest, die Sie in Schritt 1 entfernt haben. Schritte 3 bis 5, um den Ölstand auf die Voll-Marke am Peilstab anzuheben. • Wenn der Ölstand über der Voll-Marke am Peilstab liegt, lassen Sie Öl ab, bis der Ölstand an der Voll-Marke am Peilstab liegt. Weitere Informationen zum Ablassen des Öls finden Sie unter Wechseln des Motoröls (Seite 16).
Technische Daten Produktübersicht Modell Gewicht Länge Breite Höhe 20955 37 kg 150 cm 58 cm 107 cm 20956 40 kg 150 cm 58 cm 107 cm Betrieb Betanken GEFAHR Benzin ist brennbar und explodiert schnell. Feuer und Explosionen durch Benzin können Verbrennungen bei Ihnen und anderen Personen verursachen. Bild 5 1. Bügel 8. Schnitthöheneinstellhebel (4) 2. Schaltbügel 9. Luftfilter 3. Zündschlüssel (nur bei 10. Modellen mit Elektrostart) Seitauswurfkanal 4. Tankdeckel 11.
• Wenn der Ölstand unter der Nachfüll-Marke ist, gießen Sie langsam etwas Öl in den Einfüllstutzen, warten Sie drei Minuten und wiederholen die Schritte 3 bis 5, um den Ölstand auf die Voll-Marke am Peilstab anzuheben. • Wenn der Ölstand über der Voll-Marke am Peilstab liegt, lassen Sie Öl ab, bis der Ölstand an der Volll-Marke am Peilstab liegt. Weitere Informationen zum Ablassen des Öls finden Sie unter Wechseln des Motoröls (Seite 16).
kräftig durch (Bild 12). Lassen Sie das Seil langsam zum Bügel zurücklaufen. Bild 11 Bild 9 1. Anheben der Maschine 2. Absenken der Maschine Hinweis: Schnitthöhen sind 25 mm, 35 mm, 44 mm, 54 mm, 64 mm, 73 mm, 83 mm, 92 mm sowie 102 mm. Bild 12 Anlassen des Motors 1. Halten Sie den Schaltbügel gegen den Bügel gedrückt (Bild 10). Hinweis: Wenn der Rasenmäher nach mehreren Versuchen nicht anspringt, wenden Sie sich an den offiziellen Vertragshändler.
Hinweis: Wenn die Maschine nicht ungehindert nach dem Selbstantrieb rückwärts rollt, gehen Sie nicht weiter, lassen Sie die Hände am Bügel und lassen Sie die Maschine ein paar Zentimeter vorwärts rollen, um den Radantrieb einzukuppeln. Sie können auch unter dem oberen Bügel den Metallbügel anfassen und die Maschine ein paar Zentimeter nach vorne schieben. Wenn die Maschine immer noch nicht ungehindert rückwärts rollt, wenden Sie sich an den offiziellen Vertragshändler.
• Zum Sammeln des Schnittguts und Laubs drücken Sie die Taste am Hebel für den zuschaltbaren Fangkorb und bewegen den Hebel nach vorne, bis die Taste am Hebel herausspringt (Bild 15). Bild 15 1. Hebel für den zuschaltbaren Fangkorb (in Fangkorb-Stellung) • Zum Recyclen des Schnittguts und Laubs drücken Sie die Taste am Hebel und bewegen den Hebel nach hinten, bis die Taste am Hebel herausspringt.
Bild 16 1. An dieser Stelle reinigen Seitauswurf des Schnittguts Verwenden Sie den Seitauswurf, wenn Sie sehr hohes Gras schneiden. Wenn der Grasfangkorb an der Maschine angebracht ist, und der Hebel für den zuschaltbaren Fangkorb auf der Fangkorb-Stellung steht, schieben Sie den Hebel in die Recycler-Stellung, siehe Verwenden des Hebels für den zuschaltbaren Fangkorb (Seite 12). WARNUNG: Das Messer ist scharf; ein Kontakt damit kann zu schweren Verletzungen führen.
• Vermeiden Sie, dass das Messer auf Fremdkörper – Lassen Sie die Bahnen überlappen, anstelle bei jedem Gang eine neue Bahn zu mähen. aufprallt. Mähen Sie nie absichtlich über irgendwelchen Gegenständen. – Stellen Sie die Schnitthöhe vorne um eine Auskerbung tiefer als an den Hinterrädern. Stellen Sie die Vorderräder z. B. auf 54 mm und die Hinterräder auf 64 mm ein.
Wartung Hinweis: Bestimmen Sie die linke und rechte Seite der Maschine anhand der üblichen Einsatzposition. Empfohlener Wartungsplan Wartungsintervall Wartungsmaßnahmen Nach fünf Betriebsstunden Bei jeder Verwendung oder täglich Alle 25 Betriebsstunden Vor der Einlagerung Jährlich • Wechseln Sie das Motoröl. • Prüfen Sie den Ölstand im Motor. • Stellen Sie sicher, dass der Motor innerhalb von 3 Sekunden nach dem Loslassen des Schaltbügels abstellt.
Bild 19 2. Tauschen Sie den Luftfilter aus (Bild 20). Bild 21 1. 7. Bild 20 3. Peilstab Kippen Sie die Maschine zur Seite, der Einfüllstutzen zeigt nach unten, um das Altöl über den Einfüllstutzen in eine Auffangwanne abzulassen (Bild 22). Setzen Sie die Abdeckung auf. Wechseln des Motoröls Wartungsintervall: Nach fünf Betriebsstunden Jährlich Bild 22 Hinweis: Max.
• Ein grünes Licht gibt an, dass das Ladegerät ganz Schritte 11 bis 13, um den Ölstand auf die Voll-Marke am Peilstab anzuheben. aufgeladen oder nicht an die Batterie angeschlossen ist. • Wenn der Ölstand über der Voll-Marke am Peilstab • Ein zwischen rot und grün abwechselnd blinkendes liegt, lassen Sie Öl ab, bis der Ölstand an der Volll-Marke am Peilstab liegt. Licht gibt an, dass die Batterie fast aufgeladen ist. Dieser Zustand dauert ein paar Minuten, bis die Batterie ganz aufgeladen ist.
1 2 3 2. Kippen Sie die Maschine auf die Seite, sodass der Luftfilter nach oben zeigt. 3. Stabilisieren Sie das Messer mit einem Holzblock (Bild 26). G017398 Bild 25 1. Abdeckung 2. Sicherungsfassung 4. 3. Sicherung Bild 26 Wechseln Sie die Sicherung im Sicherungshalter aus (Bild 25). 4. Nehmen Sie das Messer ab und bewahren Sie alle Befestigungsschrauben auf (Bild 26). Hinweis: Die Maschine hat eine Ersatzsicherung im Batteriefach. 5.
Wichtig: Eine auf 82 Nm angezogene Schraube ist sehr fest. Arretieren Sie das Messer mit einem Holzstück und verlagern Sie gleichzeitig das Gewicht auf den Schlüssel und ziehen Sie die Schraube fest. Diese Schraube kann fast nicht zu fest angezogen werden. WARNUNG: Die Maschine kann Ablagerungen unter dem Maschinengehäuse lockern. • Tragen Sie eine Schutzbrille. • Bleiben Sie in der Einsatzstellung (hinter dem Griff) wenn der Motor läuft.
Einlagerung Zusammenklappen des Bügels WARNUNG: Lagern Sie die Maschine an einem kühlen, sauberen und trockenen Ort ein. Wenn Sie den Bügel falsch auf- oder zusammenklappen, können Sie die Kabel beschädigen und den sicheren Geräteeinsatz gefährden. Vorbereiten des Rasenmähers für die Einlagerung • Beschädigen Sie beim Auf- oder Zusammenklappen des Bügels nicht die Kabel. WARNUNG: Benzindämpfe können explodieren. • Wenden Sie sich bei einem beschädigten Kabel an einen offiziellen Vertragshändler.
Hinweise: 21
Hinweise: 22
Internationale Händlerliste Vertragshändler: Land: Telefonnummer: Vertragshändler: Atlantis Su ve Sulama Sisstemleri Lt Balama Prima Engineering Equip. B-Ray Corporation Casco Sales Company Ceres S.A. Türkei Hongkong Korea Puerto Rico Costa Rica 90 216 344 86 74 852 2155 2163 82 32 551 2076 787 7888383 506 2391138 Jean Heybroek b.v. Maquiver S.A. Maruyama Mfg. Co. Inc. Agrolanc Kft Mountfield a.s. CSSC Turf Equipment (pvt) Ltd. Cyril Johnston & Co. Equiver Femco S.A. G.Y.K. Company Ltd.
Die Garantie von Toro Bedingungen und abgedeckte Produkte The Toro Company und die Tochtergesellschaft, die Toro Warranty Company, gewährleisten dem Erstkäufer* im Rahmen eines gegenseitigen Abkommens, die aufgeführten Toro Produkte zu reparieren, wenn sie Material- oder Herstellungsfehler aufweisen.
Form No. 3374-866-ASM Rev A Tondeuse Recycler® 55 cm N° de modèle 20955—N° de série 310000001 et suivants N° de modèle 20956—N° de série 310000001 et suivants Manuel de l'utilisateur Vous pouvez vous procurer des pièces de rechange chez n'importe quel concessionnaire agréé ou sur le site www.shoptoro.com. Introduction Cette tondeuse à conducteur marchant à lame rotative est destinée au grand public.
Sécurité générale de la tondeuse Puissance acoustique ............................................... 4 Vibrations au niveau des mains et des bras ................... 4 Autocollants de sécurité et d'instruction ..................... 5 Mise en service .............................................................. 6 1 Montage du guidon ............................................... 6 2 Plein d'huile moteur .............................................. 7 3 Charge de la batterie .............................
usés ou endommagés par paires pour ne pas modifier l'équilibre. Démarrage • N'inclinez pas la tondeuse lorsque vous démarrez • le moteur, à moins que ce ne soit indispensable au démarrage. Dans ce cas, ne l'inclinez pas plus que nécessaire, et ne relevez que la partie éloignée de l'utilisateur. Mettez le moteur en marche avec précaution, conformément aux instructions, et n'approchez pas les pieds des lames ou de l'avant de l'éjecteur.
La pression acoustique est déterminée en conformité avec les procédures énoncées dans la norme EN 836. Puissance acoustique Cette machine a un niveau de puissance acoustique garanti de 98 dBA, qui comprend une valeur d'incertitude (K) de 1 dBA. La puissance acoustique est déterminée en conformité avec les procédures énoncées dans la norme ISO 11094.
Autocollants de sécurité et d'instruction Important: Les autocollants de sécurité et d'instruction sont placés près des endroits potentiellement dangereux. Remplacez les autocollants endommagés. Marque du fabricant 1. Identifie la lame comme pièce d'origine. 104-7953 1. Attention – lisez le Manuel de l'utilisateur pour connaître la procédure correcte de charge de la batterie. La batterie contient du plomb, ne la mettez pas au rebut. 2. Lisez le Manuel de l'utilisateur. 108-8117 112-8867 1.
Mise en service Important: Retirez et mettez au rebut la pellicule de plastique qui protège le moteur. 1 114-7982 1. 2. 3. 4. 5. Attention – lisez le Manuel de l'utilisateur. Risque de projection d'objets – tenez les spectateurs à bonne distance de la machine. Risque de coupure/mutilation des mains ou des pieds par la lame du plateau de coupe – débranchez la bougie et lisez les instructions avant d'entreprendre un entretien ou une révision.
3. Montez et serrez les boutons du guidon que vous avez retirés à l'opération 1. l'excédent d'huile jusqu'à ce que le niveau soit redescendu au repère maximum (Full). Pour vidanger l'excédent d'huile, voir Vidange et remplacement de l'huile moteur (page 15). 2 Important: Si vous faites tourner le moteur alors que le niveau d'huile dans le carter est trop bas ou trop élevé, vous risquez d'endommager le moteur. Plein d'huile moteur 6.
Vue d'ensemble du produit Caractéristiques techniques Modèle Poids Longueur Largeur Hauteur 20955 37 kg 150 cm 58 cm 107 cm 20956 40 kg 150 cm 58 cm 107 cm Utilisation Remplissage du réservoir de carburant DANGER L'essence est extrêmement inflammable et explosive. Un incendie ou une explosion causé(e) par l'essence peut vous brûler, ainsi que les personnes se tenant à proximité. Figure 5 8. Guidon 2. Barre de commande de la 9. Filtre à air lame Clé de contact (modèles 10.
5. Sortez de nouveau la jauge et vérifiez le niveau d'huile ; voir Figure 8. • Si le niveau n'atteint pas le repère minimum (Add) sur la jauge, versez lentement une petite quantité d'huile dans le goulot de remplissage et répétez les opérations 3 à 5 jusqu'à ce que le niveau atteigne le repère maximum (Full). • Si le niveau d'huile dépasse le repère maximum (Full) sur la jauge, vidangez l'excédent d'huile jusqu'à ce que le niveau soit redescendu au repère maximum (Full).
Remarque: Tirez lentement la poignée du lanceur (Figure 12) jusqu'à ce que vous sentiez une résistance, puis tirez vigoureusement. Laissez le lanceur se rétracter lentement jusqu'à la poignée. Figure 11 Figure 9 1. Élevez la machine. 2. Abaissez la machine Remarque: Les hauteurs de coupe suivantes sont disponibles : 25 mm, 35 mm, 44 mm, 54 mm, 64 mm, 73 mm, 83 mm, 92 mm et 102 mm. Figure 12 Démarrage du moteur 1. Maintenez la barre de commande de la lame contre le guidon (Figure 10).
Remarque: Si vous avez des difficultés à faire reculer la machine après avoir utilisé l'autotraction, arrêtez de marcher, immobilisez vos mains et laissez la machine rouler de quelques centimètres en avant pour désengager la transmission aux roues. Vous pouvez aussi essayer d'atteindre la poignée en métal, située juste sous la partie supérieure du guidon, et de pousser la machine en avant sur quelques centimètres. Si vous avez des difficultés à faire reculer la machine, contactez un réparateur agréé.
Retrait du bac à herbe Pour retirer le bac à herbe, inversez la procédure de montage décrite plus haut. Utilisation du levier de ramassage sur demande La fonction de ramassage sur demande vous permet de ramasser ou de recycler les déchets d'herbe et de feuilles quand le bac à herbe est monté sur la machine.
• Si la machine a heurté un obstacle ou commence à vibrer, • • coupez immédiatement le moteur, débranchez la bougie et vérifiez si la machine n'est pas endommagée. Pour obtenir de meilleurs résultats, montez une lame neuve au début de la saison de tonte. Remplacez la lame dès que nécessaire par une lame Toro d'origine. La tonte • Ne tondez l'herbe que sur 1/3 de sa hauteur à chaque • • fois.
• Si la couche de feuilles fait plus de 13 cm d'épaisseur, réglez les roues avant un ou deux crans plus haut que les roues arrière. Ralentissez la vitesse de déplacement si les feuilles ne sont pas hachées assez menues. • Entretien Remarque: Les côtés gauche et droit de la machine sont déterminés d'après la position de conduite.
Remarque: Niveau max. : 0,59 l , type : huile détergente SAE 30 de classe de service an API SF, SG, SH, SJ, SL ou supérieure. moteur en marche jusqu'à ce qu'il s'arrête faute de carburant. Si vous ne pouvez pas attendre que le moteur s'arrête par manque de carburant, utilisez une pompe manuelle pour vider le reste de carburant. Basculez toujours la machine sur le côté (filtre à air vers le haut). 1. Garez la machine sur un sol plat et horizontal. 2.
9. Versez environ 3/4 de la capacité d'huile totale dans le carter moteur. Remarque: Niveau max. : 0,59 l , type : huile détergente SAE 30 de classe de service an API SF, SG, SH, SJ, SL ou supérieure. 10. Attendez 3 minutes pour donner le temps à l'huile de se déposer. 11. Essuyez la jauge sur un chiffon propre. 12. Enfoncez la jauge complètement dans le goulot de remplissage. 13. Sortez de nouveau la jauge et vérifiez le niveau d'huile.
Remplacement de la lame Périodicité des entretiens: Une fois par an Important: Vous aurez besoin d'une clé dynamométrique pour monter la lame correctement. Si vous n'en possédez pas ou si vous ne sentez pas être capable d'effectuer cette procédure, adressez-vous à un réparateur agréé. Examinez l'état de la lame chaque fois que le réservoir d'essence est vide. Si la lame est endommagée ou fêlée, remplacez-la immédiatement. Si la lame est émoussée ou ébréchée, faites-la aiguiser et équilibrer ou remplacez-la.
Figure 28 Cette figure est simplifiée pour plus de clarté. 2. Tirez la gaine du câble vers le bas (vers la machine) pour éliminer le mou du câble (Figure 29). Figure 27 Important: Les extrémités incurvées de la lame doivent être dirigées vers la machine. 6. À l'aide d'une clé dynamométrique, serrez le boulon de la lame à 82 Nm. Important: Un boulon vissé à 82 Nm est très serré. Bloquez la lame avec une cale en bois, appuyez de tout votre poids sur le rochet ou la clé, et serrez le boulon solidement.
2. Placez la machine sur une surface plate et revêtue. 3. Lavez le dessous du déflecteur arrière au point où l'herbe coupée passe du carter au bac de ramassage. Remisage Remisez la machine dans un local frais, propre et sec. Remarque: Lavez le côté ramassage sur demande aux positions avant et arrière maximales. 4. Préparation de la machine au remisage Branchez un tuyau d'arrosage, relié à une arrivée d'eau, à l'embout de lavage du carter de la machine (Figure 30).
Pliage du guidon ATTENTION Vous risquez d'endommager les câbles et de rendre la machine dangereuse à utiliser si vous pliez ou dépliez mal le guidon. • Veillez à ne pas endommager les câbles en pliant ou dépliant le guidon. • Si un câble est endommagé, adressez-vous à un réparateur agréé. 1. Enlevez la clé de contact (modèle à démarrage électrique uniquement). 2. Desserrez les boutons du guidon jusqu'à ce que la moitié supérieure bouge librement. 3.
Remarques: 21
Remarques: 22
Liste des distributeurs internationaux Distributeur : Pays: Atlantis Su ve Sulama Sisstemleri Lt Balama Prima Engineering Equip. B-Ray Corporation Casco Sales Company Ceres S.A. Turquie Hong Kong Corée Puerto Rico Costa Rica Numéro de téléphone: 90 216 344 86 74 852 2155 2163 82 32 551 2076 787 788 8383 506 239 1138 CSSC Turf Equipment (pvt) Ltd. Cyril Johnston & Co. Equiver Femco S.A. Sri Lanka Irlande du Nord Mexique Guatemala 94 11 2746100 44 2890 813 121 52 55 539 95444 502 442 3277 G.Y.K.
La garantie Toro Conditions et produits couverts The Toro Company et sa filiale, Toro Warranty Company, en vertu de l'accord passé entre elles, s'engagent conjointement à réparer les produits Toro ci-dessous s'ils présentent un défaut de fabrication ou de matériau.
Form No. 3374-866-ASM Rev A 55 cm Recycler® gazonmaaier Modelnr.: 20955—Serienr.: 310000001 en hoger Modelnr.: 20956—Serienr.: 310000001 en hoger Gebruikershandleiding Vervangingsonderdelen zijn verkrijgbaar bij een erkende servicedealer of via www.shoptoro.com. Inleiding Modelnr.: Deze loopmaaier met draaiende messen is bedoeld voor gebruik door particulieren. De machine is voornamelijk ontworpen voor het maaien van gras op goed onderhouden particuliere gazons.
Geluidsdruk ........................................................... 4 Geluidsniveau ........................................................ 4 Hand-armtrillingen.................................................. 4 Veiligheids- en instructiestickers ................................ 5 Montage ....................................................................... 6 1 De handgreep bevestigen ....................................... 6 2 De motor bijvullen met olie ....................................
• Controleer vóór gebruik altijd of de beschermplaten • en veiligheidsvoorzieningen zoals grasgeleiders en grasvangers, op hun plaats zitten en naar behoren werken. Controleer vóór het gebruik de messen, bevestigingsbouten en het maaimechanisme altijd op sporen van slijtage of beschadiging. Vervang versleten of beschadigde messen en bouten altijd als complete set om een goede balans te behouden.
Gebruik nooit universele onderdelen en accessoires; deze kunnen de veiligheid in gevaar brengen. Geluidsdruk Deze machine oefent een geluidsdruk van 89 dBA uit op het gehoor van de gebruiker, met een onzekerheidswaarde (K) van 1 dBA. De geluidsdruk is vastgesteld volgens de procedures in EN 836. Geluidsniveau Deze machine heeft een gegarandeerd geluidsniveau van 98 dBA uit met een onzekerheidswaarde (K) van 1 dBA. Het geluidsniveau is vastgesteld volgens de procedures in ISO 11094.
Veiligheids- en instructiestickers Belangrijk: Veiligheidsstickers en veiligheidsinstructies bevinden zich bij plaatsen waar gevaar kan ontstaan. Vervang beschadigde stickers. Merkteken van fabrikant 1. Geeft aan dat het mes onderdeel van een originele Toro-maaimachine is. 104-7953 1. Waarschuwing – Raadpleeg de Gebruikershandleiding voor informatie over het opladen van de accu. Bevat lood, niet weggooien. 2. Lees de Gebruikershandleiding. 108-8117 112-8867 1. 112-8760 1.
Montage Belangrijk: Verwijder de beschermfolie van de motor en werp deze weg. 1 114-7982 1. Waarschuwing – Raadpleeg de Gebruikershandleiding. 2. De machine kan voorwerpen uitwerpen – Houd omstanders op een veilige afstand van de machine. 3. Handen of voeten kunnen worden gesneden/geamputeerd, maaimes – Trek de bougiekabel los en raadpleeg de instructies vóór u service- of onderhoudswerkzaamheden uitvoert.
3. Plaats de handgreepknoppen die u tijdens stap 1 hebt verwijderd terug en draai deze vast. tot het peil de Vol-markering op de peilstok bereikt. Voor het aftappen van overtollige olie, zie De motorolie verversen (bladz. 15). 2 Belangrijk: Als het oliepeil in het carter te hoog of te laag is en u laat de motor toch draaien, kunt u deze beschadigen. 6. De motor bijvullen met olie Plaats de peilstok goed in de vulbuis.
Algemeen overzicht van de machine Specificaties Type 20955 20956 Gewicht Lengte Breedte Hoogte 37 kg 150 cm 58 cm 107 cm 40 kg 150 cm 58 cm 107 cm Gebruiksaanwijzing De brandstoftank vullen GEVAAR Benzine is uitermate ontvlambaar en explosief. Brand of explosie van benzine kan brandwonden veroorzaken.
hoeveelheid olie in de vulbuis, wacht 3 minuten en herhaal de stappen 3 tot en met 5 totdat het peil de Vol-markering op de peilstok bereikt. • Als de olie tot boven de Vol-markering op de peilstok reikt, laat dan de overtollige olie weglopen tot het peil de Vol-markering op de peilstok bereikt. Voor het aftappen van overtollige olie, zie De motorolie verversen (bladz. 15). Belangrijk: Als het oliepeil in het carter te hoog of te laag is en u laat de motor toch draaien, kunt u deze beschadigen. 6.
Opmerking: Trek de starthandgreep langzaam uit totdat u weerstand voelt, daarna krachtig uittrekken (Figuur 12). Laat het koord langzaam terugkeren. Figuur 11 Figuur 9 1. Maaimachine omhoog brengen 2. Maaimachine omlaag brengen Opmerking: De maaihoogte-instellingen zijn 25 mm, 35 mm, 44 mm, 54 mm, 64 mm, 73 mm, 83 mm, 92 mm en 102 mm. Figuur 12 De motor starten 1. Opmerking: Als de motor na enkele pogingen niet wil starten, moet u contact opnemen met een erkende Service Dealer.
Opmerking: Als de maaimachine niet vrij naar achteren rolt na het inschakelen van de zelfaandrijving, sta dan stil, houd uw handen bij de handgreep en laat de maaimachine een paar centimeter naar voren rollen om het aandrijfsysteem uit te schakelen. U kunt ook de metalen hendel aanraken die zich net onder de bovenste handgreep bevindt en de maaimachine een paar centimeter naar voren duwen. Als de maaimachine nog steeds niet naar achteren wil rollen, moet u contact opnemen met een erkende Service Dealer.
3. Breng de afvoergeleider aan de achterzijde omlaag. De graszak verwijderen Om de zak te verwijderen, voert u bovenstaande stappen in omgekeerde volgorde uit. De grasvangerhendel bedienen Met de grasvangfunctie kunt u kiezen tussen opvangen van het maaisel of recyclen van gras en bladeren terwijl de graszak aan de maaimachine is bevestigd.
• Als de maaimachine toch een voorwerp raakt en begint te trillen, moet u meteen de motor afzetten, de bougiekabel losmaken en de maaimachine op beschadiging controleren. • De beste resultaten krijgt u door een nieuw mes te monteren voordat het maaiseizoen begint. • Vervang indien nodig het maaimes door een Toro-mes. Gras maaien • U moet telkens niet meer dan ongeveer eenderde van de grassprieten afmaaien.
Bladeren fijnmaken • Als er een laag bladeren van meer dan 13 cm op het gazon ligt, moet u de voorwielen een of twee uitsparingen hoger zetten dan de achterwielen. Als de maaimachine de bladeren niet fijn genoeg maakt, is het beter om wat langzamer te maaien. • Na het maaien moet altijd 50 % van het gazon zichtbaar blijven door de bladerlaag. Dit kan een of meerdere rondgangen over de bladeren vereisen.
u de machine gebruiken totdat de benzinetank leeg is. Als u de machine moet kantelen voordat de benzinetank leeg is, dient u de benzine met een handpomp uit de tank te pompen. Kantel de maaimachine altijd op de linkerzijkant, met het luchtfilter naar boven. 2. Controleer of de brandstoftank weinig of geen brandstof bevat zodat de brandstof niet lekt als u de maaier op de zijkant kantelt. 3. Voordat u de olie ververst, moet u de motor enkele minuten laten lopen zodat de olie warm wordt.
10. 11. 12. 13. 14. 15. Opmerking: De lader is mogelijk voorzien van een LED-display met twee kleuren waarmee de volgende laadstatus kan worden weergeven: Wacht 3 minuten tot de olie gezakt is. Veeg de peilstok met een schone doek schoon. Steek de peilstok volledig in de vulbuis. Haal de peilstok eruit en controleer het oliepeil.
1 2 3 Figuur 26 G017398 Figuur 25 1. Deksel 2. Zekeringhouder 4. 3. 4. Verwijder het mes en bewaar alle bevestigingselementen (Figuur 26). 5. Monteer het nieuwe mes en alle bevestigingselementen (Figuur 27). Zekering Vervang de zekering in de zekeringhouder (Figuur 25). Opmerking: De maaimachine wordt geleverd met een reservezekering in het accucompartiment. 5. Plaats het accudeksel terug met de schroef die u bij stap 3 hebt verwijderd. 6. Plaats het deksel op het accucompartiment. 7.
Kabel van elfaandrijving afstellen Om de beste resultaten te verkrijgen, dient u onder de machinebehuizing te reinigen zodra u klaar bent met maaien. Wanneer u een nieuwe kabel voor de zelfaandrijving monteert of de zelfaandrijving ontsteld is, moet u de kabel afstellen. 1. Draai de moer van de kabelbeugel los (Figuur 28). 1. Zet de machine in de laagste maaistand; zie De maaihoogte instellen (bladz. 9). 2. Plaats de maaimachine op een vlakke en verharde ondergrond. 3.
Handgreep inklappen Stalling WAARSCHUWING Stal de maaimachine op een koele, schone, droge plaats. Als de handgreep verkeerd wordt in- en uitgeklapt, kunnen de kabels schade oplopen, waardoor de machine niet veilig kan worden gebruikt. Voorbereidingen voor stalling WAARSCHUWING • Zorg ervoor dat u de kabels niet beschadigt als u de handgreep in- of uitklapt. Benzinedampen kunnen tot ontploffing komen. • Indien een kabel is beschadigd, moet u contact opnemen met een erkende Service Dealer.
Opmerkingen: 20
Opmerkingen: 21
Opmerkingen: 22
Lijst met internationale dealers Dealer: Land: Atlantis Su ve Sulama Sisstemleri Lt Balama Prima Engineering Equip. B-Ray Corporation Casco Sales Company Ceres S.A. CSSC Turf Equipment (pvt) Ltd. Cyril Johnston & Co. Equiver Femco S.A. G.Y.K. Company Ltd. Geomechaniki of Athens Guandong Golden Star Hako Ground and Garden Hako Ground and Garden Hayter Limited (U.K.) Hydroturf Int.
Toro Garantie Plichten van de eigenaar Voorwaarden en producten waarvoor de garantie geldt The Toro Company en de hieraan gelieerde onderneming, Toro Warranty Company, geven aan de oorspronkelijke aankoper* krachtens een overeenkomst tussen beide ondernemingen gezamenlijk de garantie alle onderstaande Toro-producten te repareren als deze materiaalgebreken of fabricagefouten vertonen. U dient uw Toro-product te onderhouden zoals wordt beschreven in de Gebruikershandleiding.