
Service Manual


REASSEMBLY
(cont’d)
7.
8.
Thinly apply Loctite
515
or Three Bond
1104
gasket maker
to
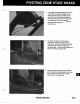
the crankcase cover
sealing surface. Be careful not to get
sealant on the bearings or seals.
Carefully align the
two
crankcase halves
using the alignment pin and its matching
hole; press the
two
halves together.
9.
Torque the hex washer-head screws to a
total of
110
in. Ibs
(12.5
NOTE: Tighten
the screws in increments
of
20
in Ibs
(2.26
Nm
)
while checking that the
crankshaft turns freely.
10.
Install new oil seals. Always use new seals
and lubricate new seals,
on
the
ID
only,
with oil before pressing them into place with
the seal driver. Use the seal driver to do
this.
CAUTION:
Do
not assemble the
crankcase cover with the seals in place.
11.
Install the shroud base.
9-16
Service
Section