
Service Manual


InspectingtheReelAssembly(continued)
Note:Thereelnutontheleftendofthecuttingreelhasablacknishand
hasleft-handthreads.Theleftendofthecuttingreelshaftisidentiedwitha
groovecutjustinsideoftheleft-mostreelspider.Tightenthereelnutstothe
speciedtorqueoncethecuttingreelisinstalledinthecuttingunit.
6.Installthereelnutsngertight.
InstallingtheReelAssembly
1.Positionthecuttingunitonaatworkarea.
CAUTION
Contactwiththereel,bedknifeorothercuttingunitpartscanresult
inpersonalinjury.Useheavygloveswheninstallingthecuttingreel.
2.Applyathincoatofgreasetotheoutsideofthecuttingreelbearingsand
carefullyslidethecuttingreelassemblyintotherightsideplate.Makesure
thatthereelbearingisfullyseatedintheRHsideplate,andthatthereelnut
ontheleft(exposed)endofthecuttingreelhasablacknish.
3.Placethegrassshieldassembly(18),framesupportrods(9and14)onto
theRHsideplate(10).
4.PlacetheatwirespringintobearingboreofLHsideplateandcarefully
slidetheleftsideplateontothecuttingreelassemblyasfaraspossible.
5.Installthe4socketheadscrews(3and17)thatsecuretheRHandLHside
plates(4and10)totheframesupportrods(9and14).Tightenthesocket
headscrewsfrom24to27N∙m(18to20ft-lb).
6.Ifloosenedduringcuttingreelservice,tightenthebearinglockscrewand
thereeldrivenut.
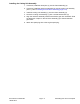
g330865
Figure83
1.Bearinglockscrew
3.Supportplate,weldside
2.Reelshaft
4.Prybar
A.Insertalong-handledprybar(3/8x12inchwithascrewdriverhandle
recommended)throughthefrontofthecuttingunit.Theprybarshould
passbetweenthetopofthereelshaftandthebacksofthereelbladesso
thatthereelwillnotmove;refertoFigure83.
DPACuttingUnits:ServiceandRepairs
Page8–22
Greensmaster
®
1018/1021/1026
18238SLRevC