
User Instructions


PREPARE THE MODEL
PREPARE THE MODEL
A covering job’s worst enemy is a poorly- nished model with rough surfaces,
gaps or uneven edges – MonoKote usually won’t hide these blemishes and
sometimes seams to magnify them – especially darker colors such as black
and insignia blue. When preparing a model for MonoKote, sand all surfaces
smooth and even with progressively ner grades of sandpaper. No need to
go any ner than 400-grit. Use compressed air or a shop-vac with a brush
attachment (or both!) to remove all dust and particles just before covering.
A covering job’s next-worst enemies are wrinkles and air bubbles. These
instructions will show you how to pre-tension MonoKote to prevent wrinkles
and seal it to the wood to minimize air bubbles.
SET YOUR IRON TEMPERATURE
SET YOUR IRON TEMPERATURE
For MonoKote, most of the time you’ll want the Trim Seal Tool set
to Hi, but occasionally Lo may be better. For the Sealing Iron, begin
with a dial setting of about 2 to 2-1/4. “Medium” heat (around 300°F
measured on the surface of the cover sock) is usually best. This will
allow the covering to adequately shrink while not causing excess air
bubbles that cannot be worked out. As the covering job progresses,
adjust the heat to suit your preferences.
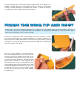
APPLY THE COVERING
APPLY THE COVERING
NOTE: The covering techniques demonstrated in the following pages can be applied to all parts of the model including
the fuselage, tail and control surfaces. A fully-sheeted wing is shown, but the techniques for covering an open-
framework wing are the same except where noted.
APPLY INITIAL TRIM PIECES
APPLY INITIAL TRIM PIECES
Taking care of small details rst may seem tedious now, but in
the end results in a faster covering job that is thoroughly sealed
and looks better.
Begin by sealing corners and inconspicuous areas such as the
aileron cutouts in the wing that the main sheets of covering
won’t be as easy to reach.
1. Cut an oversize piece for the inboard aileron cutout and remove the
backing – a hobby blade may be used to pick-and-peel the backing at
one of the corners.
If, during the covering procedure, you forget which side has the adhesive, you can look at the covering
in the glare of your room lighting. The adhesive side will be dull and the top, outside will be shiny. If
you still can’t tell which is the top you can lightly touch your iron to the one side of the covering near
the edge; if the covering sticks that’s the bottom, if the covering doesn’t stick that’s the top.