
Information


408- 8547
Rev L4 of 4
4. Hold the wire in place and squeeze the handles
until the ratchet releases. Hold the handles in this
position, maintaining just enough tension to keep the
dies closed.
5. Check the clearance between the bottoming
surfaces of the wire crimper and the wire anvil. See
Figure 1. If the clearance is 0.025 mm [.001 in.] or
less (on at least two of the bottoming surfaces), the
ratchet is satisfactory. If clearance exceeds 0.025 mm
[.001 in.], the ratchet is out of adjustment and must be
repaired. See Section 5.
The insulation crimper does not bottom on the
insulation anvil.
6. REPLACEMENT AND REPAIR
The replaceable part is listed in Figure 4. Parts other
than that listed in Figure 4 should be replaced by TE to
ensure quality and reliability of the tool.
Order replacement parts through your local TE
Representative, or call 1--800--526--5142.
Tools may also be returned for evaluation and repair.
For tool repair service, call 1--800--526--5136.
7. REVISION SUMM ARY
Revisions to this instruction sheet include:
: Deleted web addresses in Section 6
70.36
[2.770]-
76.71 [3.020]
50.04
[1.970]
41.91
[1.650]
220.22 [8.670]
15.75 [.620]
296.93 [11.690]
27.43
[1.080
]
1
29.46 [1.160]
12.19 [.480]
19.81
[.780]
- Closed to Last Ratchet Point Before Release
Note: Dimensions are in millimeters
[
with inches in brackets
]
.
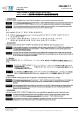
REPLACEABLE PART
ITEM PART NUMBER DESCRIPTION QTY PER TOOL
1 21045--3 RING, Retaining 4
Figure 4
NOTE
i