
User manual


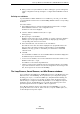
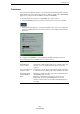


Table Of Contents
- Table of Contents
- Introduction
- Part I: Getting into the details
- Setting up your system
- VST Connections
- The Project window
- Working with projects
- Creating new projects
- Opening projects
- Closing projects
- Saving projects
- The Archive and Backup functions
- The Project Setup dialog
- Zoom and view options
- Audio handling
- Auditioning audio parts and events
- Scrubbing audio
- Editing parts and events
- Range editing
- Region operations
- The Edit History dialog
- The Preferences dialog
- Working with tracks and lanes
- Playback and the Transport panel
- Recording
- Quantizing MIDI and Audio
- Introduction
- Quantizing Audio Event Starts
- AudioWarp Quantize (Cubase Only)
- Quantizing MIDI Event Starts
- Quantizing MIDI Event Lengths
- Quantizing MIDI Event Ends
- Quantizing Multiple Audio Tracks (Cubase Only)
- AudioWarp Quantizing Multiple Audio Tracks (Cubase Only)
- The Quantize Panel
- Additional Quantizing Functions
- Fades, crossfades, and envelopes
- The arranger track
- The transpose functions
- Using markers
- The MixConsole
- Overview
- Configuring the MixConsole
- Keyboard Navigation in the MixConsole
- Working with the Fader Section
- Working with the Channel Racks
- Linking Channels (Cubase only)
- Metering (Cubase only)
- Using Channel Settings
- Saving and Loading Selected Channel Settings
- Resetting MixConsole Channels
- Adding Pictures
- Adding Notes
- The Control Room (Cubase only)
- Audio effects
- VST instruments and instrument tracks
- Surround sound (Cubase only)
- Automation
- Audio processing and functions
- The Sample Editor
- The Audio Part Editor
- The Pool
- The MediaBay
- Introduction
- Working with the MediaBay
- The Define Locations section
- The Locations section
- The Results list
- Previewing files
- The Filters section
- The Attribute Inspector
- The Loop Browser, Sound Browser, and Mini Browser windows
- Preferences
- Key commands
- Working with MediaBay-related windows
- Working with Volume databases
- Working with track presets
- Track Quick Controls
- Remote controlling Cubase
- MIDI realtime parameters and effects
- Using MIDI devices
- MIDI processing
- The MIDI editors
- Introduction
- Opening a MIDI editor
- The Key Editor – Overview
- Key Editor operations
- The In-Place Editor
- The Drum Editor – Overview
- Drum Editor operations
- Working with drum maps
- Using drum name lists
- The List Editor – Overview
- List Editor operations
- Working with SysEx messages
- Recording SysEx parameter changes
- Editing SysEx messages
- The basic Score Editor – Overview
- Score Editor operations
- Working with the Chord Functions
- Introduction
- The Chord Track
- The Chord Track Inspector Section
- The Chord Editor
- The Chord Assistant (Cubase only)
- Creating a Chord Progression from Scratch (Chords to MIDI)
- Extracting Chords from MIDI (Make Chords)
- Controlling MIDI or Audio Playback with the Chord Track (Follow Chords)
- Assigning Chord Events to MIDI Effects or VST Instruments
- Expression maps (Cubase only)
- Note Expression
- The Logical Editor, Transformer, and Input Transformer
- The Project Logical Editor (Cubase only)
- Editing tempo and signature
- The Project Browser (Cubase only)
- Export Audio Mixdown
- Synchronization
- Video
- ReWire
- File handling
- Customizing
- Key commands
- Part II: Score layout and printing (Cubase only)
- How the Score Editor works
- The basics
- About this chapter
- Preparations
- Opening the Score Editor
- The project cursor
- Playing back and recording
- Page Mode
- Changing the zoom factor
- The active staff
- Making page setup settings
- Designing your work space
- About the Score Editor context menus
- About dialogs in the Score Editor
- Setting clef, key, and time signature
- Transposing instruments
- Printing from the Score Editor
- Exporting pages as image files
- Working order
- Force update
- Transcribing MIDI recordings
- Entering and editing notes
- About this chapter
- Score settings
- Note values and positions
- Adding and editing notes
- Selecting notes
- Moving notes
- Duplicating notes
- Cut, copy, and paste
- Editing pitches of individual notes
- Changing the length of notes
- Splitting a note in two
- Working with the Display Quantize tool
- Split (piano) staves
- Strategies: Multiple staves
- Inserting and editing clefs, keys, or time signatures
- Deleting notes
- Staff settings
- Polyphonic voicing
- About this chapter
- Background: Polyphonic voicing
- Setting up the voices
- Strategies: How many voices do I need?
- Entering notes into voices
- Checking which voice a note belongs to
- Moving notes between voices
- Handling rests
- Voices and Display Quantize
- Creating crossed voicings
- Automatic polyphonic voicing – Merge All Staves
- Converting voices to tracks – Extract Voices
- Additional note and rest formatting
- Working with symbols
- Working with chords
- Working with text
- Working with layouts
- Working with MusicXML
- Designing your score: additional techniques
- About this chapter
- Layout settings
- Staff size
- Hiding/showing objects
- Coloring notes
- Multiple rests
- Editing existing bar lines
- Creating upbeats
- Setting the number of bars across the page
- Moving bar lines
- Dragging staves
- Adding brackets and braces
- Displaying the Chord Symbols from the Chord Track
- Auto Layout
- Reset Layout
- Breaking bar lines
- Scoring for drums
- Creating tablature
- The score and MIDI playback
- Tips and Tricks
- Index

419
The MediaBay
Working with MediaBay-related windows
Applying effect presets
When you have added an insert effect, you can choose from a variety of presets via
the Presets pop-up menu for the effect slot.
The Presets browser opens:
Applying instrument presets
When working with VST instruments, you can choose from a variety of presets via the
Presets pop-up menu.
The Presets browser opens:
VST presets for instruments can be divided into two groups: “presets” containing the
settings of the whole plug-in (for multi-timbral instruments, this means the settings for
all sound slots as well as the global settings) and “programs” containing only the
settings for one program (for multi-timbral instruments, this means only the settings for
one sound slot). In the MediaBay, they can be recognized by their icons. This way, you
can see directly whether a VST preset contains a single sound or more.