
SimpliPhi ESS Battery Installation Manual

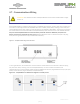


Table Of Contents
- Safety Information 4
- 2.0 –Safety 9
- 3.0 – Pre-Installation 10
- 4.0 – Installation 12
- 4.1 – Installation Options 12
- 4.2 – Environmental Considerations 12
- 4.3 – Mounting Hardware 13
- 4.4 – Dimensions and Weight 13
- 4.5 – SimpliPHI Battery Connection Terminals 14
- 4.6 – Electrical Wiring 15
- 4.7 – Communications Wiring 19
- 4.8 – Conduit Box Installation (Outdoor Installations) 20
- 4.9 – Battery System Commissioning 21
- 4.10 – Battery Bank Expansion 23
- 5.0 – Programming 23
- 6.0 – Troubleshooting 24
- Appendix A – SimpliPHI Battery Safety & Green Attributes, Certifications 26
- Safety Information
- 2.0 –Safety
- 3.0 – Pre-Installation
- 4.0 – Installation
- 4.1 – Installation Options
- 4.2 – Environmental Considerations
- 4.3 – Mounting Hardware
- 4.4 – Dimensions and Weight
- 4.5 – SimpliPHI Battery Connection Terminals
- 4.6 – Electrical Wiring
- 4.7 – Communications Wiring
- 4.8 – Conduit Box Installation (Outdoor Installations)
- 4.9 – Battery System Commissioning
- 4.10 – Battery Bank Expansion
- 5.0 – Programming
- 6.0 – Troubleshooting
- Appendix A – SimpliPHI Battery Safety & Green Attributes, Certifications

|
21
|
REV202207071617
Step 3: Secure the conduit box cover with provided
10/32 flat head flush style screws using a #2 Phillips
head screwdriver.
4.9 – Battery System Commissioning
WARNING! SimpliPHI Batteries should be installed, wired and commissioned by a qualified
installer or professional electrician who is familiar with general electrical safety precautions
and specific regional code requirements.
If the SimpliPHI Battery’s voltage has dropped (during an extended period in storage) to a voltage below the inverter’s
minimum starting voltage requirement, then the battery will need to be charged using a plug-in / external charger.
SimpliPhi’s batteries have a very low self-discharge rate and typically do not require ancillary charging. If the SimpliPHI
Battery’s voltage has dropped due to over-discharge, try the steps outlined in Section 6.0 – Troubleshooting prior to
using ancillary charging equipment.
CAUTION:
Only use a SimpliPhi approved LFP charger if ancillary charging is required before
installation, testing or troubleshooting.
Failure to use a SimpliPhi approved LFP charger will
damage the SimpliPHI Batteries and Violate the terms of the Warranty.
Before installing the SimpliPHI Battery, inspect the battery for any signs of damage. Do not install or operate
the battery if it has been damaged during shipping.
1. Prepare the battery module for installation by removing its plastic terminal covers, 11/16” stainless
steel hex nuts and 3/8” lock washers from the battery terminals and set aside.
CAUTION: Do not attempt to loosen the large brass nut at the base of the terminals; doing so
will damage the SimpliPHI battery and Violate the terms of the Warranty.
2. Before installing the SimpliPHI Battery, test its voltage by turning its built-in breaker to the ON (I)
position.
3. Measure the SimpliPHI Battery’s voltage with a multimeter. Batteries typically ship at ~52 VDC.
4. When installing more than one SimpliPHI Battery, check that the batteries’ voltage readings are
similar. Batteries with a voltage variance greater than 1 Volt DC should be isolated and charged
separately.