
Unit installation


17
…always there
The STU provides two different modes of local line monitoring, which can be
selected when the NVM is programmed. The ARC must be notified if local line
monitoring is to be enabled, and if so, which mode is required.
For STUs connected to normal phone lines, ‘PSTN mode’ should be used. This
mode monitors the DC line voltage and triggers the Line Fault output within 100
seconds of a line break.
For STUs connected to private wires (RedDIRECT), ‘Private Wire mode’ should be
used. This mode causes regular ‘chirps’ on the line and triggers the Line Fault
output within 3 minutes of a line break.
In both PSTN and Private Wire modes, the Line Fault output will be triggered
within 40 seconds if the STU has an alarm to transmit but cannot communicate
with the redcare system.
Telephone Line Selection (LK1)
The STU is supplied ready to connect to the Public Switched Telephone Network
(LK1 is not fitted). If the STU is to be connected to a Private Wire (RedDIRECT) a
suitable link must be fitted in the position marked LK1. An NVM chip must be
configured for PW use and fitted in accordance with the procedure on page 17.
If you have any doubts about the type of telephone line to which the STU is being
connected, contact BT redcare for advice.
INSTALLING THE NVM
The NVM (Non-Volatile Memory) chip is a device used by the STU to store
configurable parameters. This memory is retained even when the power is
completely removed.
There is a socket provided (at IC2) for the fitting of a pre-programmed NVM.
Suitable NVMs for use with the STU are National Semiconductor NM93C46N or
Microchip Technology 93C46/P.
The NVM can be supplied pre-programmed by the ARC or the NVM can be
manually programmed using a Scantronic 7200 NVM programmer (version 1.2 or
1.3 software) or a Scantronic 7300 NVM programmer (version 1.3 software).
Once fitted, the NVM can be re-programmed after careful removal using an IC
extractor. If the unit has already been commissioned, see the note on page 4.
The STU and alarm system must be totally powered down (switch off mains
power and disconnect the battery) before fitting or removing the NVM.
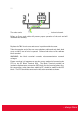
Note the orientation of the device shown below and make sure it is fitted the
correct way around.