Paper Specifications Overview This printer accepts a variety of media, such as cut-sheet paper (including up to 100 % recycled fiber content paper), envelopes, labels, transparencies and custom-size paper. Properties such as weight, composition, grain and moisture content are important factors affecting printer performance and output quality.
Paper Specifications Supported Sizes of Paper Tray 1 or Optional Tray 2 Dimensionsa Letter 8.5 X 11 in. (216 X 279 mm) A4 210 X 297 mm (8.3 X 11.7 in.) Executive 7.3 X 10.5 in. (191 X 267 mm) Legal 8.5 X 14 in. (216 X 356 mm) B5 (JIS) 182 X 257 mm (7.2 X 10 in.) Folio 216 X 330 mm (8.5 X 13 in.) Weight Capacityb 16 to 28 lb Bond (60 to 105 g/m2) 550 sheets of 20 lb Bond (75 g/m2) paper a. The printer supports a wide range of media sizes.
Paper Specifications Guidelines for Using Paper For best results, use conventional 90 g/m2 (24 lb) paper. Make sure the paper is of good quality, and free of cuts, nicks, tears, spots, loose particles, dust, wrinkles, voids, and curled or bent edges. If you are unsure of what type of paper you are loading (such as bond or recycled), check the label on the package of the paper. The following problems with paper can cause print quality deviations, jamming, or even damage to the printer.
Paper Specifications Paper Specifications Category Specifications Acid Content 5.5 ~ 8.0 pH Caliper .094 ~ .18 mm (3.0 ~ 7.0 mils) Curl in Ream Flat within 5 mm (.02 in.) Cut Edge Conditions Cut with sharp blades with no visible fray. Fusing Compatibility Must not scorch, melt, offset, or release hazardous emissions when heated to 200 °C (392 °F) for .1 second.
Paper Specifications Printer and Paper Storage Environment Ideally, the printer and paper storage environment should be at or near room temperature, and not too dry or humid. Remember that paper absorbs and loses moisture rapidly. Heat works with humidity to damage paper. Heat causes the moisture in paper to evaporate, while cold causes it to condense on the sheets. Heating systems and air conditioners remove most of the humidity from a room.
Paper Specifications Envelopes Envelope construction is critical. Envelope fold lines can vary considerably, not only between manufacturers, but also within a box from the same manufacturer. Successful printing on envelopes depends upon the quality of the envelopes. When selecting envelopes, consider the following components: • Weight: The weight of the envelope paper should not exceed 90 g/m2 (24 lb) or jamming may occur. • Construction: Prior to printing, envelopes should lie flat with less than 6 mm (0.
Paper Specifications Envelopes with Double Side Seams Double side-seams construction has vertical seams at both ends of the envelope rather than diagonal seams. This style may be more likely to wrinkle. Be sure the seam extends all the way to the corner of the envelope as illustrated below.
Paper Specifications Labels CAUTIONS: • To avoid damaging the printer, use only labels recommended for laser printers. • To prevent serious jams, always use the Multi-Purpose Tray to print labels and always use the rear output tray. • Never print on the same sheet of labels more than once and never print on a partial sheet of labels. When selecting labels, consider the quality of each component: • Adhesives: The adhesive material should be stable at 200 °C (392 °F), the printer’s fusing temperature.
Appendix B Using Your Printer with a USB Cable If you have a USB (Universal Serial Bus) port enabled on your computer, and if your computer is running Windows 98, you can connect your ML-1650 series printer to the USB chain of devices.
Installing the Printer Software If you have a USB (Universal Serial Bus) port enabled on your computer, and if your computer is running Windows 98, you can connect your ML-1650 series printer to the USB chain of devices. Note: Connecting the printer to the USB port of the computer requires a certified USB cable. You will need to buy the USB 1.0 compliant cable. 1. Install PCL driver 2.
Installing the Printer Software 5 Check Search for the best driver for your device and click Next. 6 Check CD-ROM drive and click Browse, then choose x:\1650\Eng (or the desired language code, see page D.2.)\USB (where x is the drive letter for the CD-ROM drive). 7 Click Next. The USB driver will be installed. 8 Follow the instructions on the screen to complete the installation. B.
Installing the Printer Software 3. Set your PC printer 1 port From the Start menu, select Settings, then select Printers. 2 Select the ML-1650 Series PCL 6 printer icon in the Printers folder. 3 Select Properties from the File menu. 4 Click the Details tab. Select SSUSB: (ML-1650) in the Print to the following port box. Click OK. The setup is now completed. USING YOUR PRINTER WITH A USB CABLE B.
Frequently Asked Questions About USB Q What is USB? A Universal Serial Bus (USB) makes it easy to connect devices to your computer without having to open your PC. USB uses a standard port and plug combination for connecting devices like printers, modems, scanners, and digital cameras. It also offers the benefit of being able to easily add, remove, and move devices. Because USB is a relatively new technology, we recommended using a parallel printing connection.
Frequently Asked Questions About USB Q Can other users on my USB chain print to my ML-1650 series printer? A Yes. Windows 98 allows you to “share” your printer using software settings on your computer. After others on the USB chain have installed the printer software for your specific printer, they can print to your shared printer.
Appendix C Using Your Printer with a Macintosh Your printer supports Macintosh systems with a built-in USB interface or 10/100 Base-TX network interface card. When you print a file from Macintosh, you can use the PCL driver to support your printer’s major printing features. You can also use PostScript driver by installing the PPD file.
Macintosh Installation System Requirements To use your ML-1650 Series printer and its software with a Macintosh, your system should have: Macintosh Hardware Requirement • One of the following Macintosh models: -Power Macintosh series (for network connection only) -Power Macintosh G3, G4 -iMac series -iBook series • USB interface or network interface (for network connection only) Macintosh System Requirement Printer Hardware Requirement • For network connection: System 7.
Macintosh Installation Connecting To Macintosh You can connect the printer to your Macintosh using the USB interface or network interface. USB Connection USB cable is not provided in your printer. Purchase a certified USB 1.0 compliant cable. 1 Turn off the printer and computer. 2 Hold the USB cable so the icon faces up and connect it to your printer’s USB connector. 3 Connect the other end of the cable to an available USB port on your Macintosh computer.
Macintosh Installation Network Connection If you have a printer with 10/100Base-TX network interface card installed, you can connect to an Ethernet network. Use a Category 5 twisted pair cable with RJ-45 connectors for 10/100Base-T Ethernet. 1 Plug one end of the network cable into the twisted-pair connector on the back of the printer. 2 Connect the other end to the network hub. Note: You must configure your printer for the network.
Macintosh Installation Installing Software for Macintosh 1 Turn on your computer and printer. 2 Insert the CD-ROM which came with your printer into the CDROM drive. 3 Double-click Samsung ML-1650 on your Macintosh desktop. 4 Select the correct language, then click Continue. 5 The Samsung Laser Printer Installer opens. Select installation type. The installer provides two options for software installation: • Easy Install (recommended method): This option loads PPD, installs PCL driver.
Using PCL Driver If you want to use your printer’s PCL driver on your Macintosh computer, take the following steps: Choosing PCL Driver 1 From the Apple menu, select Chooser. 2 From the left pane of the Chooser window, click SAMSUNG PCL. Then the Samsung PCL driver name will appear in the right pane of the Chooser window. 3 Click the Samsung PCL driver, and close the Chooser window. 4 You see the message box indicating that you have changed your current printer. Click OK.
Using PCL Driver 3 Choose your paper size, orientation, paper type and other options and click OK. Choose Watermark if you want to add a watermark to each page in your document to emphasize its purpose or indicate how it should be handled. For details on the watermark option, see page 5.21. C.
Using PCL Driver 4 Now open the File menu and click Print. You see the main printer settings dialog box. 5 Choose the number of copies and indicate which pages you want to print. For advanced printing features, select the desired option. For details, see page C.8. Select the desired option for advanced printing features. 6 Click Print when you are finished checking your settings. USING YOUR PRINTER WITH MACINTOSH C.
Using PCL Driver Advanced Printing The Page Setup dialog box contains five categories of page setup properties. Listed below is the name of each property. -Darkness/Quality -Layout -Color -Background Printing -Paper Source Figures below display each property in the Page Setup dialog box. Darkness/Quality Select print darkness. Select print resolution. Layout Select the number of pages you want to print on one sheet of paper. The pages will appear decreased in size and arranged on the sheet. C.
Using PCL Driver Color Select grayscale mode. Grayscale Black&White Background Printing Turns background printing on or off. Select a priority for your print job in the queue of jobs waiting to print, by clicking one of the following: • Normal to print in the order the job is received. • Urgent to print before any Normal priority job. • Print at: to print at the specific time you enter in the day and time in the fields to the right.
Using PS Driver If you want to use the PS driver which were installed on your Macintosh computer, you must install the PPD file to access your printer features and allow the computer to communicate with your printer. PPD file installation method is different for USB connection and the network connection. Installing PPD file on the USB-connected Macintosh 1 Follow the instruction as described on page C.4 to install the PPD file on your computer. 2 Open the Macintosh HD and double-click Apple Extras.
Using PS Driver Installing PPD file on the network-connected Macintosh 1 Follow the instruction as described on page C.4 to install the PPD file on your computer. 2 From the Apple menu, select Chooser. 3 Click LaserWriter 8 (the PostScript driver provided with your Macintosh). The name of your printer appears in the list. Select SEC000xxxxxxxxx from the printer box (where the xxxxxxxxx varies depending on each of the products.).
Appendix D Printing from DOS Applications While your printer is primarily a Windows printer, you can also print from a DOS software program using the Remote Control Panel utility provided in the ML-1650 series CD-ROM.
About Remote Control Panel for DOS DOS users have access to many printer features through specific DOS printer drivers; however, many software manufactures do not develop printer drivers for their software programs. The Samsung ML-1650 series printer provides the DOS software control panel for improved printer control when DOS printer drivers are not available or when certain print settings are not available through DOS software programs.
Installing the Remote Control Panel for DOS Users The Remote Control Panel utility is provided on the printer software CD-ROM. If you do not have a CD-ROM drive, refer to Appendix G, “Installing Software from Diskette” for information on obtaining printer software on diskettes. To install the DOS Remote Control Panel: 1 Insert the printer software CD-ROM or RCP diskette in your computer’s drive. 2 At the DOS prompt, make a directory that you want to use the DOS software and change to that directory.
Selecting Print Settings To access the Remote Control Panel 1 Make sure that the Remote Control Panel is in your path statement. You can check your path by typing PATH and pressing Enter. If the Remote Control Panel directory is not in your path, you will have to change to the default directory C:\DOSUTIL to start the program. 2 At the DOS prompt, type DOSRCP and press Enter.
Selecting Print Settings CONFIG • Power Save determines the length of time the printer waits after a job is printed before it goes to a reduced power state. If the printer is used frequently, select OFF which keeps the printer ready to print with the minimum warm-up time. This uses more electricity to keep the printer warm and ready to print. • Econo Mode determines the toner quantity the printer should use when printing. If set to ON, the printer conserves toner when printing.
Selecting Print Settings TEST • Configuration Page prints the configuration sheet. A list of the user default settings, the installed options, and the amount of printer memory available prints. • Demonstration Page prints the demonstration page. It shows the printer features and specifications. PCL5e • Typeface allows you to select the desired typeface. This setting is ignored when the software application specifies a font. • Symbol Set determines the symbol set.
Appendix E Using Windows PostScript Driver If you want to use the PostScript driver provided with your system CD-ROM or diskettes to print a document, use the information on this Appendix.
Setting Your Printer with the PS Option If you want to use the PostScript driver to print a document, your printer should have: • PS DIMM For instructions on installing the printer options, see Appendix H, “Printer Options.” Installing PPD Files PPDs, in combination with the PostScript driver, access the printer features and allow the computer to communicate with the printer. An installation program for the PPDs is provided on the ML-1650 CD-ROM.
Installing PPD Files 2 Insert the CD-ROM shipped with your printer into your CD-ROM drive. If the CD-ROM drive does not automatically run: Select Run from the Start menu, and type x:\cdsetup.exe in the Open box (where x is the drive letter for the CD-ROM drive), then click OK. 3 When the opening screen appears, select the appropriate language. 4 Click Install the Samsung Software-II on your PC (PostScript). 5 Click on HaveDisk, click Browse, then choose: • for Windows 9x, x:\Eng(or the desired language
Accessing the PS Printer Driver Features Certain printer features are not available in this PS driver. Refer to “Printer Driver Features” on page 2.12. The printer automatically switches between PS and PCL printer languages depending on the driver you have selected. Opening the Printer Properties Window The properties window for the Windows PostScript printer driver can be opened from the Printers folder or an application. To open the properties window from the Printer folder: 1.
Appendix F Using Your Printer on Network If you work in a networked environment, the printer can be shared by other users on the network.
About Sharing the Printer on a Network If you work in a networked environment, you can connect the ML-1650 series printer to your network. Locally Shared You can connect the printer directly to a selected computer (called the “host computer”) on the network. The printer can then be shared by other users on the network through a Windows 9x or NT 4.0 network printer connection. Network-Connect If an option network card was installed on your printer (see page H.
Setting Up a Locally Shared Printer Setting Up Host Computer 1 Start Windows. 2 From the Start menu, select Control Panel, and doubleclick on the Network icon. 3 Check the File and Print Sharing box, then click OK. Close the window. 4 Click Start and select Printers from Settings, then double-click your printer name. 5 Select Properties in the Printers menu. 6 Click the Sharing tab, then check the Shared As box. Fill in the Shared Name field, then click OK.
Setting Up a Network-Connected Printer To use ML-1650 series printer as a network printer, you must install an optional network card in your printer. See page H.5 for information on installing network card. After the network card is installed, you must set up your printer as a network printer using the documentation and Samsung SyncThru software provided with the network card. USING THE PRINTER ON A NETWORK F.
Appendix G Installing Software from Diskettes If you need to install the printer software on a system that does not have a CD-ROM drive, use the instruction on this appendix to create the software diskettes and install the printer software from the diskettes.
Making Installation Diskettes If you do not have a CD-ROM drive but you have access to another computer with a CD-ROM drive, you can copy software installation files from your printer software CDROM onto floppy diskettes, and then use the diskettes instead of the CD-ROM to install the software. You can make installation diskettes for PCL6 printer driver, USB driver for Windows 98, PostScript Printer Description (PPD) file and Remote Control Panel utility independently.
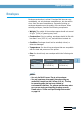
Making Installation Diskettes 4 The Copy to Floppy dialog box appears. Select the desired components you want to copy to the diskette from the Select box. You can select PCL6 Printer Driver, PostScript Printer Description file, USB Port Driver and RCP. Select the floppy disk drive you will use to insert the diskette. Select the floppy drive you will use. Shows the number of disks required to copy the selected component. Select the component you want to copy. Shows the path of the selected component.
Making Installation Diskettes 7 If you have more than one disk, insert the next disk and click Yes. Repeat this step for a third disk if necessary. 8 When copying to diskettes has been completed, click Close in the Copy to Floppy dialog box. Then click Exit in the SAMSUNG PRINTER SETUP dialog box. Installing Software from Diskettes The instructions to install a PCL 6 printer driver, PPD file and RCP are same.
Appendix H Printer Options Your printer is a full-featured laser printer that has been optimized to meet most of your printing needs. Recognizing that each user may have different requirements, however, Samsung makes several options available to enhance the printer’s capabilities.
Precautions DISCONNECT THE POWER CORD: Never remove the printer control board while the printer is plugged in. To avoid the possibility of electrical shock, always disconnect the power cord when installing or removing ANY internal or external printer option. DISCHARGE STATIC ELECTRICITY: The control board and internal printer options (Memory DIMM, PS DIMM, Network interface) are sensitive to static electricity.
Memory and PostScript DIMMs Additional printer memory and the PostScript option are provided on DIMMs (single in-line memory modules). This procedure is applicable to either option. 1 Turn the printer power off and unplug all cables from the printer. 2 Remove the two screws on the rear of the printer, then remove the control board cover. 3 Locate the PS DIMM slot (the lower slot on the left as shown) and the memory DIMM slot (the upper slot) on the control board. They are not interchangeable.
Memory and PostScript DIMMs 4 Hold the memory DIMM so that the notch 1 and the connection point 2 are aligned with the slot as shown, and insert the DIMM all the way into the upper slot labeled DRAM MODULE at a 90(Straight) degrees angle. 1 2 5 Hold the PS DIMM so that the notch 1 and the connection point 2 are aligned with the slot as shown, and insert the DIMM all the way into the lower slot labeled FLASH-ROM MODULE at a 90(Straight) degrees angle.
Network Interface Card Review the precautions on page H.1 and then follow this procedure to install the Network card option in your printer. 1 Unpack the network printer card. You should find the following items. 2 Two brackets come with the network card. Select the long bracket and attach it to the network card with two screws provided. 3 Turn the printer power off and unplug all cables from the printer. 4 Remove the two screws on the back of the printer, then remove the control board cover.
Network Interface Card 6 Align the connector on the network card with the connector on the control board. Push the card firmly into the connector until it is completely inserted in place. 7 Tighten the two screws as shown. 8 Tighten the two screws, then replace the plate. 9 Reconnect the power cord and printer cable, then turn the printer on. Note: For information on configuring and using the printer on a network environment, refer to the documentation provided with the network card option.
Paper Tray 2 You can increase the paper handling capacity of your printer by installing the optional Tray 2. The optional paper tray consists of two components; the support unit and paper tray. support unit paper tray Label Note: Be sure you check the label before using the optional Tray 2. (For use with ML-1650 Series only) 1 Turn off the printer and unplug all cables from the printer. 2 Observe the location of the support unit’s connector and tabs.
Paper Tray 2 5 Reconnect the cables, then turn the printer on. Note: To print from Tray 2, you must configure the printer driver from your application prior to printing. To access the printer driver, see page 5.2. Click. If this box is checked, you can select Tray 2 in the Paper Source drop-down list. PRINTER OPTIONS H.
Appendix I Using Your Printer in Linux You can use Samsung ML-1650 Series printer in Linux environment.
Linux Driver Installation This Linux driver is designed for the Samsung ML-1650 Series printer and supports Linux Red Hat 6.0 or higher and Intel Linux. If your Linux version is not included, this driver might not work properly. • Install Setup Script file configuration a. /cdrom/linux/install.sh b. /cdrom/linux/ssprt.db c. /cdrom/linux/readme.txt Installation To install the driver, open the x terminal screen and take the following steps: 1. Mount the CD-ROM drive.
Linux Driver Installation 3. Set up the printer filter. To set up: 1 Run printtool at x terminal. 2 To add the printer driver, click the Add button. 3 In the Add a Printer Entry window, decide the printer type you will use. Select Local Printer if you have a PCconnected printer. 4 Click the OK button. 5 If the Info button appears, ignore it, then click the OK button. 6 The Edit xxxx Entry window opens (where xxxx is the printer type you have selected at step 3).
INDEX Numeric 2-sided printing E 5.7 B booklet printing envelopes, print error messages 4.12 7.22 F 5.11 face-down tray 4.4 face-up tray 4.4 features 1.1 C cancel, print job 5.5 Cancel/Reprint button 3.2 cardstock, print 4.17 clean, printer 6.4 clean sheet, print 7.6 components 1.3 configuration page, print 7.6 control panel buttons 3.1 lights 3.4 custom-sized media, print 4.17 D Data light 3.4 Demo button 3.3 demo page, print 2.8, 7.6 diskette, make, install software G.
INDEX J N jam see paper jam network interface install network card H.5 set up a locally shared printer F.2 sharing the printer on a network F.1 n-up printing 5.10 L labels, print 4.14 letterhead, print 4.16 load, paper in the multi-purpose tray 4.8 in tray 1 or the optional tray 2 using the manual feed 4.10 Linux driver I.1 O 2.4 M Macintosh connecting network interface C.3 connecting USB interface C.2 install PCL driver C.4 install PPD file C.10 solving common problems 7.25 system requirements C.
INDEX P (continued) paper level indicator 4.6 Paper light 3.5 paper orientation, setting 5.3 paper out, indicator 7.22 paper source, setting 5.3 paper tray change paper size in tray 2.5 load paper 2.4 optional Tray 2 H.7 paper type, setting 5.3 parallel, connection 2.7 PCL 6 driver see driver, PCL 6 poster, print 5.16 postscript level 3 emulation 1.2 access windows PS driver E.3 install PPD file for Macintosh C.4, C.10 install PPD file for windows E.1 problem solving 7.
INDEX R U Ready Mode 3.4 rear output tray 4.4 remote control panel install D.2 use D.2 reprint, last page 3.2 resolution 5.19 uninstall, driver 2.13 unpacking 2.1 USB cable setup in windows B.1 setup in macintosh C.2 W S setup printer chapter 2 specifications paper A.2 printer A.1 SRT mode 5.19 system error 7.23 T toner cartridge cleaning sheet 6.5 install 2.2 life expectancy 6.1 recycle 6.1 redistribute toner 6.2 save toner 5.6, 6.1 storage 6.1 Toner Save button 3.1. 5.6 top output tray 4.