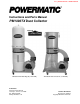
This .pdf document is bookmarked Instructions and Parts Manual PM1300TX Dust Collector Now with PM1300TX with Filter Bag Kit (1791078K) Powermatic 427 New Sanford Road LaVergne, Tennessee 37086 Ph.: 800-274-6848 www.powermatic.com PM1300TX with Canister Kit (1791079K) Part No.
13. Remove adjusting keys and wrenches. Form a habit of checking to see that keys and adjusting wrenches are removed from the machine before turning it on. IMPORTANT SAFETY INSTRUCTIONS 14. Keep safety guards in place at all times when the machine is in use. If removed for maintenance purposes, use extreme caution and replace the guards immediately after maintenance is complete. WARNING – To reduce the risk of fire, electric shock, or injury: 15. Check damaged parts.
5. Do not leave the machine when it is plugged in. Unplug from outlet when not in use and before servicing. 26. Do not use this dust collector with a damaged cord or plug. 27. Do not unplug by pulling on cord. To unplug, grasp the plug, not the cord. 36. Do not stand on the machine. Serious injury could occur if the machine tips over. 28. Do not use without dust bag and/or filters in place.
Table of Contents IMPORTANT SAFETY INSTRUCTIONS ...................................................................................................... 2 Table of Contents .......................................................................................................................................... 4 Introduction.................................................................................................................................................... 5 Specifications ......................
Introduction This manual is provided by Powermatic covering the safe operation and maintenance procedures for a Powermatic Model PM1300TX Dust Collector. This manual contains instructions on installation, safety precautions, general operating procedures, maintenance instructions and parts breakdown. This machine has been designed and constructed to provide consistent, long-term operation if used in accordance with instructions set forth in this manual.
Unpacking Remove all contents from the shipping carton and check against the Contents of Shipping Carton below to verify that all items have been received. Report any damage to your distributor. Do not discard any shipping material until after the dust collector has been assembled and is running properly. You will also require either the Filter Bag System or Canister Filter System. These items are packaged separately and are not listed here.
Base Machine Assembly The dust collector must not be connected to the power source during assembly. Failure to comply may result in serious injury! All instructions on this page refer to Figure 3. Base and Casters 1. The 3/8” hex nut (F) and M10 lock washer (G) are pre-assembled to each caster (J). For shipping purposes, the lock washer has been placed beneath the hex nut. Remove hex nut and lock washer from the caster shaft, reinstall the hex nut, then install the lock washer above the hex nut, as shown.
Handles 1. Mount the cone support bracket (AA) to the housing with four M6x12 hex cap screws (FF) and tighten from beneath with four M6 hex nuts (GG). 2. Install the cone (BB) from beneath using the M8x16 hex cap screw (CC), M8 flat washer (DD) and M8 hex nut (EE). 1. Remove the plate (V) from the handle (U) by loosening the two socket head cap screws (W) with a 6mm hex wrench. 2.
Filter Bag System Assembly Note: If your dust collection system includes the canister kit, proceed to Canister System Assembly on page 10. 1. Insert a hanger bracket between support bar and collector housing (Figure 4). 2. Align holes and secure with two M8x20 hex cap screws and two M8 flat washers outside the housing, and two M8 flat washers and two M8 hex nuts inside the housing. Hand tighten only. Figure 5 Figure 4 3.
Canister System Assembly (17mm wrench required) 1. Place the snap ring over the top of the plastic collector bag, and fold over the bag approximately three inches (Figure 8). Figure 9 Figure 8 2. Insert the snap ring of the collector bag into the bottom of the housing at an angle (Figure 9). 3. Pull down on the snap ring to make sure it “seats” on the inner lip of the housing.
Check with a qualified electrician or service personnel if the grounding instructions are not completely understood, or if in doubt as to whether the tool is properly grounded. Electrical Connections Electrical connections must be made by a qualified electrician in compliance with all relevant codes. This machine must be properly grounded to help prevent electrical shock and possible fatal injury. Repair or replace a damaged or worn cord immediately.
Connecting the Dust Collector to a Machine Operating the Machine Connect the dust collector to the power source. If power is flowing, a green indicator will light on the face of the control panel. Use the proper type hose to connect the dust collector to the machine being operated. Dryer vent hose is not acceptable for this purpose. Contact your nearest Powermatic distributor for a full line of Dust Collector hoses and accessories.
Cleaning the Canister Filter Motor Clean the canister filter frequently to keep the collector's performance at its optimum. To clean the filter, turn the handle a couple of rotations so the dust falls into the clear plastic bag. Properly discard the plastic collector bag when full. Make frequent inspections of the motor fan and blow out (with low pressure air hose) or vacuum any accumulation of foreign material in order to maintain normal motor ventilation. Grounding Instructions 1.
Replacement Parts Replacement Parts are listed on the following pages. To order parts or reach our service department, call 1-800-2746848, Monday through Friday (see our website for business hours, www.powermatic.com). Having the Model Number and Serial Number of your machine available when you call will allow us to serve you quickly and accurately.
Parts List for PM1300TX Dust Collector (Base Machine) Index No. Part No. Description Size Qty 1 ............... PM1300-101 ............ Impeller Housing .................................................. .................................... 1 2 ............... PM1300-102 ............ Housing Bracket ................................................... .................................... 1 3 ............... PM1300-103 ............ Motor Bracket ....................................................... ....
43 ............. TS-155010 ............... Flat Washer .......................................................... M16 ............................. 1 44 ............. TS-2361018 ............. Lock Washer ........................................................ M8 ............................. 15 45 ............. TS-2361101 ............. Lock Washer ........................................................ M10 ............................. 4 46 ............. TS-1504021 ............. Socket Head Cap Screw ....
Breakdown for PM1300TX Canister Filter System 17
Parts List for PM1300TX Canister Filter System Index No. Part No. Description Size Qty ................. 1791086 ................... Canister Assembly (includes #1 thru 24) ............. .................................... 1 1 ............... PM1900-301 ............ Filter ..................................................................... .................................... 1 2 ............... PM1900-302 ............ Knob ..................................................................... M6x20 .
Parts List for PM1300TX Filter Bag System Index No. Part No. Description Size Qty ................. 1791077B ................. PM1300 Collection and Filter Bag (includes #1 thru 5) ............................ 1 1 ............... 1791077F ................. Filter Bag .............................................................. 30 micron .................... 1 2 ............... 410012 ..................... Retainer Strap ...................................................... ...........................
Electrical Connections 20
Warranty and Service Powermatic® warrants every product it sells against manufacturers’ defects. If one of our tools needs service or repair, please contact Technical Service by calling 1-800-274-6846, 8AM to 5PM CST, Monday through Friday. Warranty Period The general warranty lasts for the time period specified in the literature included with your product or on the official Powermatic branded website. • Powermatic products carry a limited warranty which varies in duration based upon the product.
This page intentionally left blank 22
This page intentionally left blank 23
427 New Sanford Road LaVergne, Tennessee 37086 Phone: 800-274-6848 www.powermatic.