S-DJ08 S-DJ05 Active Reference Speakers for DJ/Producer Haut-Parleur Actif pour DJ & Studio Aktive Referenz-Lautsprecher für Diskjockeys/Produzenten Diffusori Attivi di Riferimento per DJ/Produttore Actieve referentieluidsprekers voor DJ/producer Altavoces activos de referencia para DJ/Productor ᎍӬ Ņŋİ ᇨձٻңޠлԓՄඵᖑᏣ http://www.prodjnet.
Thank you for buying this Pioneer product. Please read through these operating instructions so you will know how to operate your model properly. After you have finished reading the instructions, put them away in a safe place for future reference.
n n CAUTION The switch on this unit will not completely shut off all power from the AC outlet. Since the power cord serves as the main disconnect device for the unit, you will need to unplug it from the AC outlet to shut down all power. Therefore, make sure the unit has been installed so that the power cord can be easily unplugged from the AC outlet in case of an accident.
Introduction Main Features This product allows you to use a single set of speakers for all your music needs, from DJ performances to production, and ordinary music enjoyment. Audio response can be adjusted to perfectly match all situations, from DJ performances to production and ordinary music enjoyment. Frequently used controls such as sound LEVEL, MUTE ON/OFF, Power ON/Standby, EQ ON/OFF and source INPUT can be set with the hand-held controller simultaneously for both right and left speakers.
Names and Functions of Parts Front Panel Facilities 1 INPUT 1-4 indicators 32 2 EQ indicator INPUT 1 2 EQ 3 POWER 4 English Indicator lights for selected INPUT. During MUTE, the selected INPUT indicator flashes. 1 Lights when equalizer function is ON. 3 POWER indicator/clipping indicator Standby : Lights red. Power ON : Lights blue. Power OFF : Indicator light is OFF. During clipping : flashes or lights steadily pink.
Rear Panel Facilities 4 EQ LOW dial 45 6 7 8 9 Use to adjust low-frequency sounds. This dial functions only when the EQ ON/OFF button is set to ON. 5 EQ HIGH dial - 6 dB + 6 dB - 6 dB +6 dB a b c d e f Use to adjust high-frequency sounds. This dial functions only when the EQ ON/OFF button is set to ON. 6 EQ ON/OFF button Use to turn equalizer ON and OFF. 7 INPUT SELECTOR button Each time button is pressed, the input alternates in the order INPUT 1d 2 d 3 d 4.
Controller front surface 1 LEVEL dial 1 Use to control sound level (volume). 2 Power ON/Standby button (u) English Use to switch unit’s power between ON and Standby modes. When the button is pressed, power is turned on; when the button is pressed again, the unit enters the Standby mode. 2 Controller rear surface 3 INPUT SELECTOR button Each time the button is pressed, the input selector alternates in the order INPUT 1 d 2 d 3 d 4.
Connections When making or changing connections, always turn off the power and disconnect the power cord from its outlet. Also, be sure to read the operating instructions for the other components to which you are connecting these speakers. Do not connect the power cord until all other connections are completed. Use only the furnished accessory power cord.
Operation Using the MUTE function Set the main POWER switch on speaker rear panel to ON. Press the controller’s MUTE/EQ button to set the MUTE function to ON. Set power ON/Standby. Setting the Equalizer Press the power ON/Standby button (on the controller or speaker rear panel). On the rear panel of the speaker, set the EQ ON/OFF button to ON, then use the EQ LOW and EQ HIGH dials to adjust the tone quality as desired. Select the desired input.
Additional Information Troubleshooting ! If you think you are experiencing a malfunction with this unit, check the following items. Also check other devices connected to the unit. If the problem persists, consult your dealer for service. ! On occasion, the unit may fail to operate properly due to static electricity or other external conditions. In this event, disconnect the power cord and wait for five minutes or more, then reconnect the power cord and check for proper operation.
Specifications S-DJ08 Type............... Magnetically shielded bi-amp 2-way active speaker Speaker Enclosure.........................................................................Bass reflex Woofer...................................................................... 20 cm PP cone Tweeter................................................................. 2.5 cm soft dome Playback response.....................................43 Hz to 26 kHz (-10 dB) Power.................................................
Nous vous remercions d’avoir acheté ce produit Pioneer. Veuillez lire attentivement ce mode d’emploi de manière à pouvoir utiliser votre modèle correctement. Après avoir lu ces explications, conservez-les en lieu sûr pour éventuellement les consulter plus tard.
Ce produit est destiné à une utilisation domestique générale. Toute panne due à une utilisation autre qu'à des fins privées (comme une utilisation à des fins commerciales dans un restaurant, dans un autocar ou sur un bateau) et qui nécessite une réparation sera aux frais du client, même pendant la période de garantie. K041_A1_Fr Avant d’effectuer les raccordement, ou de les modifier, veillez à couper l’alimentation et à débrancher la fiche du cordon d’alimentation.
Introduction Caractéristiques principales Cet appareil vous permet d’avoir recours à un seul jeu d’enceintes pour tous vos besoins musicaux, qu’il s’agisse de performances DJ, de production sonore ou d’une écoute ordinaire de musique. La réponse audio peut s’ajuster pour convenir parfaitement à toutes les situations,aussi bien interprétations DJ que production de sons ou une simple écoute musicale.
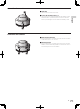
Fixation des pieds caoutchoutés Pieds caoutchoutés * L’illustration présente le modèle S-DJ08. Les pieds caoutchoutés fournis seront utilisés en fonction des besoins de l’installation. Fixez un pied caoutchouté à chaque coin sur le fond de l’enceinte. Sachez que l’adhérence des pieds caouthoutés ne sera pas suffisante sur certaines surfaces ; par conséquent, ne les utilisez pas sur des surfaces glissantes. Remarque : ! N’essayez jamais de fixer les pieds caoutchoutés en tenant l’enceinte en oblique.
Organes du panneau arrière 4 Bague d’égalisation des basses (EQ LOW) 45 6 7 8 9 - 6 dB + 6 dB - 6 dB +6 dB a b c d Elle permet d’ajuster les sons de basse fréquence. Cette bague agit seulement quand le bouton EQ ON/OFF est activé (réglé sur ON). e f 5 Bague d’égalisation des aigus (EQ HIGH) Elle permet d’ajuster les sons de haute fréquence. Cette bague agit seulement quand le bouton EQ ON/OFF est activé (réglé sur ON).
Face avant du contrôleur 1 Bague de niveau (LEVEL) 1 Elle permet d’ajuster le niveau sonore (volume). 2 Bouton Alimentation/Veille (u) Il permet de mettre l’appareil sous tension ou en mode Veille. Lorsque le bouton est actionné, l’appareil est mis sous tension ; une nouvelle pression fait passer l’appareil en mode Veille. Français 2 Face arrière du contrôleur 3 Sélecteur d’entrée (INPUT SELECTOR) A chaque pression sur ce bouton, l’entrée change dans l’ordre suivant : Entrée INPUT 1 d 2 d 3 d 4.
Connexions Avant d’effectuer ou de changer les connexions, coupez toujours l’alimentation et débranchez le cordon d’alimentation au niveau de la prise du secteur. Veillez également à lire les explications relatives aux autres composants auxquels ces enceintes seront raccordées. Ne branchez pas le cordon d’alimentation avant que toutes les autres connexions ne soient terminées. Utilisez uniquement le cordon d’alimentation fourni comme accessoire.
Fonctionnement Mise sous tension. Réglez sur ON l’interrupteur principal POWER sur le panneau arrière de l’enceinte. Réglage de mise sous tension/Veille. Appuyez sur le bouton Alimemtation/Veille u (sur le contrôleur ou sur le panneau arrière de l’enceinte). Appuyez sur le bouton MUTE/EQ du contrôleur pour activer (ON) la fonction Sourdine.
Informations complémentaires Guide de dépannage ! En présence d’une défaillance apparente de cet appareil, vérifiez les points suivants. Examinez aussi les autres composants raccordés à cet appareil. Si la difficulté subsiste, consultez votre revendeur pour les réparations éventuelles. ! Dans certains cas, il arrive que l’appareil ne fonctionne pas correctement à cause de l’électricité statique ou d’autres circonstances externes.
Fiche technique S-DJ08 Type........Enceinte active bi-ampli 2 voies à blindage magnétique Amplificateur Puissance dynamique (HF/BF)................................... 70 W/170 W Connecteurs d’entrée (entrée symétrique) ...................................... XLR x 1, TRS (téléphonique 1/4 pouce) x 1 Connecteurs d’entrée (entrée ssymétrique)...................... RCA x 2 Sensibilité/impédance d’entrée .........................
Wir danken Ihnen dafür, dass Sie sich für dieses Produkt von Pioneer entschieden haben. Bitte lesen Sie diese Bedienungsanleitung vor der Inbetriebnahme aufmerksam durch, damit Sie die optimale Leistung von diesem Produkt erzielen können. Bitte bewahren Sie diese Anleitung anschließend für spätere Bezugnahme griffbereit auf.
e ACHTUNG Der -Schalter dieses Gerätes trennt das Gerät nicht vollständig vom Stromnetz. Um das Gerät vollständig vom Netz zu trennen, muss der Netzstecker aus der Netzsteckdose gezogen werden. Daher sollte das Gerät so aufgestellt werden, dass stets ein unbehinderter Zugang zur Netzsteckdose gewährleistet ist, damit der Netzstecker in einer Notsituation sofort abgezogen werden kann.
Einleitung Hauptmerkmale Dieses Produkt gestattet es Ihnen, alle Ihre Musikbedürfnisse mit einem einzigen Paar Lautsprecher zu erfüllen, einschließlich von DJ-Darbietungen, Produktion und gewöhnlichem Musikgenuss. Das Ansprechverhalten kann allen Wiedergabesituationen, von DJ-Darbietungen und Produktion bis zu reiner Musikwiedergabe, optimal angepasst werden. Häufig benötigte Einstellungen, z. B.
Anbringen der Gummifüße Bei Bedarf können die mitgelieferten Gummifüße verwendet werden. Bringen Sie einen Gummifuß an jeder Ecke der Unterseite des Lautsprechers an. Bitte beachten Sie, dass diese Gummifüße an bestimmten Orten keinen ausreichenden Schutz gegen ein Verrutschen des Lautsprechers bieten, so dass sie bei Aufstellung auf einer sehr glatten Unterlage nicht verwendet werden sollten. Gummifüße * Die Abbildung zeigt das Modell S-DJ08.
Einrichtungen an der Rückseite 4 EQ LOW-Regler 45 6 7 8 9 - 6 dB + 6 dB - 6 dB +6 dB a b c d Dieser Regler dient zur Einstellung der tiefen Frequenzen. Dieser Regler ist nur bei eingeschalteter EQ ON/OFF-Taste funktionsfähig. e f 5 EQ HIGH-Regler Dieser Regler dient zur Einstellung der hohen Frequenzen. Dieser Regler ist nur bei eingeschalteter EQ ON/OFF-Taste funktionsfähig. 6 EQ ON/OFF-Taste Mit dieser Taste wird der Equalizer ein- und ausgeschaltet.
Vorderseite der Fernsteuerung 1 LEVEL-Regler 1 Mit diesem Regler wird der Lautstärkepegel eingestellt. 2 Netzschalter (u) Mit diesem Schalter wird das Gerät abwechselnd eingeschaltet und in den Bereitschaftszustand umgeschaltet. Beim ersten Drücken des Schalters wird die Stromzufuhr eingeschaltet; durch erneutes Drücken wird das Gerät in den Bereitschaftszustand umgeschaltet.
Anschlüsse Achten Sie unbedingt darauf, die Stromzufuhr auszuschalten und den Netzstecker von der Netzsteckdose zu trennen, bevor irgendwelche Anschlüsse hergestellt oder verändert werden. Bitte achten Sie auch stets darauf, in den Bedienungsanleitungen der anderen Komponenten nachzuschlagen, an die diese Lautsprecher angeschlossen werden. Schließen Sie den Netzstecker erst dann an die Netzsteckdose an, nachdem Sie alle anderen Anschlüsse hergestellt haben.
Bedienung Schalten Sie die Hauptstromversorgung ein. Schalten Sie den Hauptschalter an der Rückseite des Lautsprechers ein. Schalten Sie das Gerät ein. Drücken Sie den Netzschalter u (an der Fernsteuerung oder an der Rückseite des Lautsprechers). Wählen Sie den gewünschten Eingang. Stellen Sie die Lautstärke wunschgemäß ein. Wenn die Fernsteuerung angeschlossen ist: Drehen Sie den LEVEL-Regler der Fernsteuerung langsam, um die Lautstärke wunschgemäß einzustellen.
Zusätzliche Informationen Störungsbeseitigung ! Wenn Sie vermuten, dass eine Funktionsstörung dieses Gerätes vorliegt, überprüfen Sie bitte zunächst die Hinweise in der nachstehenden Tabelle. Überprüfen Sie auch die anderen angeschlossenen Geräte. Falls sich die Störung anhand der unten angegebenen Abhilfemaßnahmen nicht beseitigen lässt, wenden Sie sich bitte zwecks Reparatur des Gerätes an Ihren Fachhändler.
Technische Daten Ausführung.........................................Magnetisch abgeschirmter, aktiver Zweiverstärker-, 2-Wege-Lautsprecher Verstärker Dynamische Ausgangsleistung (HF/LF)..................... 70 W/170 W Eingangsbuchsen (symmetrischer Eingang) ...........XLR-Buchse x 1, TRS-Buchse (6,3-mm-Klinkenbuchse) x 1 Eingangsbuchsen (unsymmetrischer Eingang) ............................................................................... Cinchbuchse x 2 Eingangsempfindlichkeit/Impedanz ..................
Vi ringraziamo per avere acquistato questo prodotto Pioneer. Prima di usare il prodotto, leggere questo istruzioni per l’uso in modo da saperlo utilizzare correttamente. Finito di leggerle, conservarle in un luogo sicuro per poterle riutilizzare in futuro.
Questo prodotto è destinato esclusivamente all'uso domestico. Eventuali disfunzioni dovute ad usi diversi (quali uso prolungato a scopi commerciali, in ristoranti, o uso in auto o su navi) e che richiedano particolari riparazioni, saranno a carico dell'utente, anche se nel corso del periodo di garanzia. K041_A1_It AVVERTENZA L’interruttore principale ( ) dell’apparecchio non stacca completamente il flusso di corrente elettrica dalla presa di corrente alternata di rete.
Introduzione Caratteristiche principali Questo prodotto permette di usare un solo tipo di diffusori per tutti i tipi di musica, dalle performance DJ alla produzione, per finire al normale ascolto. La risposta audio è regolabile perfettamente a seconda della situazione, dalle performance DJ alla produzione, per finire al normale ascolto.
Applicazione dei piedini in gomma Piedini in gomma * L’illustrazione ritrae il modello S-DJ08. I piedini in gomma in dotazione vanno usati quando necessario. Applicare un piedino in gomma a ciascun angolo del diffusore. Tenere presente che i piedini i gomma potrebbero non offrire resistenza allo scivolamento in alcuni casi, e non devono essere usati su superfici scivolose. Nota: ! Non tentare mai di applicare i piedini i gomma mentre si tiene inclinato un diffusore.
Caratteristiche del pannello posteriore 4 Manopola EQ LOW 45 6 7 8 9 Consente di regolare le basse frequenze. Questa manopola funziona solo quando EQ ON/OFF si trova su ON. 5 Manopola EQ HIGH - 6 dB + 6 dB - 6 dB +6 dB a b c d e f Consente di regolare le alte frequenze. Questa manopola funziona solo quando EQ ON/OFF si trova su ON. 6 Pulsante EQ ON/OFF Consente di attivare o disattivare l’equalizzatore.
Superficie anteriore dell’unità di controllo 1 Manopola LEVEL 1 Usarla per controllare il livello (volume) audio. 2 Pulsante di accensione/standby (u) Consente di accendere o portare in standby questa unità. Premendo questo pulsante questa unità si accende, premendolo di nuovo essa si spegne. 2 Superficie posteriore dell’unità di controllo 3 Pulsante INPUT SELECTOR Ad ogni pressione del pulsante si attiva un ingresso nella sequenza INPUT 1 d 2 d 3 d 4.
Collegamenti Prima di fare o modificare i collegamenti, spegnere sempre questa unità e scollegarne il cavo di alimentazione dalla presa di corrente alternata. Non mancare inoltre di leggere le istruzioni per l’uso degli altri componenti da collegare a questi diffusori. Non collegare il cavo di alimentazione prima di aver completato i collegamenti. Usare solo il cavo di alimentazione in dotazione.
Uso Accendere l’apparecchio. Uso della funzione MUTE Portare l’interruttore principale POWER del pannello posteriore del diffusore su ON. Premere il pulsante MUTE/EQ dell’unità di controllo per attivare la funzione MUTE. Impostare l’accensione/lo standby. Impostazione dell’equalizzatore Premere il pulsante di accensione/standby u (dell’unità di controllo o del pannello posteriore del diffusore).
Informazioni addizionali Diagnostica ! Se si ritiene che questa unità non funzioni bene, controllare quanto segue. Controllare anche gli altri dispositivi collegati a questa unità. Se il problema persiste, consultare il vostro negoziante di fiducia. ! In altre occasioni, questa unità potrebbe non funzionare a dovere a causa di elettricità statica o altri fattori.
Dati tecnici S-DJ08 Tipo................................Diffusore attivo a 2 vie bi-amp schermato magneticamente Amplificatore Potenza dinamica (HF/LF)............................................ 70 W/170 W Connettori d’ingresso (ingresso bilanciato) .......................................................... XLR x 1, TRS(fono da 1/4”) x 1 Connettori d’ingresso (ingresso sbilanciato)..................... RCA x 2 Sensibilità/impedenza d’ingresso ............................................
Hartelijk dank voor de aanschaf van dit Pioneer product. Lees de handleiding aandachtig door zodat u volledig op de hoogte bent van de bediening en werking. Bewaar de handleiding op een veilige plaats voor eventuele naslag in de toekomst.
l l LET OP De schakelaar van dit apparaat koppelt het apparaat niet volledig los van het lichtnet. Aangezien er na het uitschakelen van het apparaat nog een kleine hoeveelheid stroom blijft lopen, moet u de stekker uit het stopcontact halen om het apparaat volledig van het lichtnet los te koppelen. Plaats het apparaat zodanig dat de stekker in een noodgeval gemakkelijk uit het stopcontact kan worden gehaald.
Inleiding Hoofdkenmerken Dit product biedt u de mogelijkheid om één enkele luidsprekerset te gebruiken voor al uw muziekbehoeften, van DJ-voorstellingen tot producing-doeleinden, en de luidsprekers tevens te gebruiken voor normale muziekweergave. Het frequentieverloop kan perfect worden afgestemd op alle situaties, van DJ-voorstellingen tot producing-doeleinden, en tevens op normale muziekweergave.
Bevestigen van de rubber voetjes De bijgeleverde rubber voetjes moeten overeenkomstig de toegepaste installatie worden gebruikt. Bevestig een rubber voetje op elke hoek aan de onderkant van de luidspreker. Het is mogelijk dat de rubber voetjes op sommige plaatsen onvoldoende slipweerstand leveren, dus let goed op wanneer de ondergrond erg glad is. Rubber voetje * De afbeelding toont het S-DJ08 model. Opmerking: ! Probeer de rubber voetjes niet te bevestigen terwijl u de luidspreker schuin houdt.
Voorzieningen op het achterpaneel 4 EQ LOW knop 45 6 7 8 9 - 6 dB + 6 dB - 6 dB +6 dB a b c d Gebruik deze knop om de weergave van de lage tonen in te stellen. Deze knop werkt alleen wanneer de EQ ON/OFF toets op ON staat. e f 5 EQ HIGH knop Gebruik deze knop om de weergave van de hoge tonen in te stellen. Deze knop werkt alleen wanneer de EQ ON/OFF toets op ON staat. 6 EQ ON/OFF toets Gebruik deze toets om de equalizer in en uit te schakelen.
Voorkant van de bedieningseenheid 1 LEVEL knop 1 Gebruik deze knop om de geluidssterkte (volume) in te stellen. 2 Aan/ruststand-toets (u) Gebruik deze toets om het apparaat in te schakelen of in de ruststand (standby) te zetten. Wanneer de toets wordt ingedrukt, wordt het apparaat ingeschakeld. Als de toets nogmaals wordt ingedrukt, komt het apparaat in de ruststand te staan.
Aansluitingen Schakel de stroom uit en haal de stekker uit het stopcontact voordat u begint met het maken of wijzigen van de aansluitingen. Lees ook de handleidingen van de andere apparatuur waarop deze luidsprekers worden aangesloten. Sluit het netsnoer pas aan nadat alle andere aansluitingen zijn voltooid. Gebruik alleen het bijgeleverde netsnoer.
Bediening Schakel de hoofdstroomvoorziening in. Zet de POWER hoofdstroomschakelaar op het achterpaneel van de luidspreker aan. Schakel het apparaat in. Druk op de aan/ruststandtoets u (op de bedieningseenheid of op het achterpaneel van de luidspreker). Kies de gewenste ingang. Druk op de INPUT SELECTOR toets (op de bedieningseenheid of op het achterpaneel van de luidspreker) om de gewenste ingangsbron te kiezen. Stel het geluidsvolume in.
Aanvullende informatie Problemen oplossen ! Als u denkt dat het apparaat niet juist functioneert, kunt u de volgende punten controleren. Controleer ook de apparatuur waarop dit apparaat is aangesloten. Neem contact op met uw dealer voor reparatie als het probleem blijft bestaan. ! Soms is het mogelijk dat het apparaat niet juist functioneert als gevolg van statische elektriciteit of andere externe invloeden.
Technische gegevens S-DJ08 Type................ Magnetisch afgeschermde, 2-wegsysteem actieve luidspreker met biversterker Versterker Dynamisch vermogen (HF/LF)..................................... 70 W/170 W Ingangsaansluitingen (gebalanceerde ingang) .....................................XLR x 1, TRS (1/4-inch klinkstekkerbus) x 1 Ingangsaansluitingen (niet-gebalanceerde ingang)......... RCA x 2 Ingangsgevoeligheid/impedantie ........................
Muchas gracias por la adquisición de este producto Pioneer. Lea todo este manual de instrucciones para aprender a operar correctamente su modelo. Después de haber leído las instrucciones, guarde el manual en un lugar seguro para poderlo consultar en el futuro. IMPORTANTE CAUTION RISK OF ELECTRIC SHOCK DO NOT OPEN La luz intermitente con el símbolo de punta de flecha dentro un triángulo equilátero.
Este producto es para tareas domésticas generales. Cualquiera avería debida a otra utilización que tareas domésticas (tales como el uso a largo plazo para motivos de negocios en un restaurante o el uso en un coche o un barco) y que necesita una reparación hará que cobrarla incluso durante el período de garantía. K041_A1_Es Antes de hacer o cambiar las conexiones, desconecte la alimentación y desenchufe el cable de la alimentación de la toma de CA.
Introducción Características principales Con este producto podrá emplear un sólo juego de altavoces para todas las aplicaciones musicales, desde interpretaciones a producciones de DJ y para disfrutar normalmente de la música. La respuesta del audio puede ajustarse para adaptarla perfectamente a todas las situaciones, desde interpretaciones a producciones de DJ y para disfrutar normalmente de la música.
Colocación de las patas de goma Las patas de goma suministrada pueden utilizarse según los requisitos de la instalación. Coloque una pata de goma en cada esquina de la parte inferior del altavoz. Tenga presente que las patas de goma pueden causar insuficiente resistencia al deslizamiento en algunos lugares, por lo que no deberán utilizarse sobre superficies resbaladizas. Pata de goma * La ilustración muestra el modelo S-DJ08.
Elementos del panel trasero 4 Control LOW de EQ 45 6 7 8 9 - 6 dB + 6 dB - 6 dB +6 dB a b c d Se emplea para ajustar el sonido de las bajas frecuencias. Este control sólo funciona cuando el botón ON/OFF de EQ está situado en la posición ON. e f 5 Control HIGH de EQ Se emplea para ajustar el sonido de las altas frecuencias. Este control sólo funciona cuando el botón ON/OFF de EQ está situado en la posición ON. 6 Botón ON/OFF de EQ Se emplea para activar y desactivar el ecualizador.
Superficie frontal del controlador 1 Control LEVEL 1 Se emplea para controlar el nivel del sonido (el volumen). 2 Botón de conexión de la alimentación/Estado de espera (u) Se emplea para cambiar el estado de la alimentación de la unidad entre los modos de conexión y de espera. Cuando se pulsa el botón, se conecta la alimentación, y cuando se vuelve a pulsar el botón, la unidad se establece en el modo de espera.
Conexiones Cuando desee realizar o cambiar conexiones, desconecte antes la alimentación y desenchufe el cable de alimentación de la toma de corriente. Lea también sin falta los manuales de instrucciones de los otros componentes a los que se proponga conecta estos altavoces. No enchufe el cable de alimentación hasta haber terminado todas las demás conexiones. Emplee sólo el cable de alimentación accesorio suministrado.
Operación Conecte la alimentación principal. Ponga el interruptor POWER principal del panel trasero del altavoz en la posición ON. Ajuste la alimentación/estado de espera. Pulse el botón de conexión de la alimentación/Estado de espera u (del controlador o del panel trasero del altavoz). Seleccione la entrada que desee. Pulse el botón INPUT SELECTOR (del controlador o del panel trasero del altavoz) para seleccionar la fuente de entrada que desee. Ajuste el volumen del sonido.
Información adicional Solución de problemas ! Si usted cree que hay algo que no funciona como es debido en esta unidad, revise los puntos siguientes. Compruebe también los otros dispositivos conectados a la unidad. Si el problema persiste, solicite el servicio técnico a su distribuidor. ! Es posible que alguna vez la unidad no pueda funcionar correctamente debido a la electricidad estática o a otras condiciones externas.
S-DJ08 Funciones Selector de entrada, modo de silenciamiento, indicador de recorte, Ecualización baja -6 dB a +6 dB, Ecualización alta -6 dB a +6 dB, Botón de activación(ON)/desactivación(OFF) de la ecualización Tipo................Altavoz activo de 2 vías de dos amplificadores, con protección magnética Especificaciones comunes Especificaciones Amplificador Potencia dinámica (Altas/bajas frecuencias)............. 70 W/170 W Conectores de entrada (entrada equilibrada) ..............................
२् ϊȁЗ ԥដႬޠӡᓏ ፝Ͻ҉ ๊ᜟήِםϲழԥᓟޠႬಓဵȂڐҭޠ ࣐ឍ֚ٻңȂݨཏҐࠣᐡ෧ϲґ๙ጣޠ ȶӡᓏႬᔇȷȂᗘռആԚដႬޠӡᓏȄ ݨཏ ࣐ᗘռដႬӡᓏȂ፝ϽܷڤαίᇑȞܗन८ ݗȟȂпᗘռដႬڨܗ།ȂᐡϲณӉեѠٽ ᆱঔٻңޠႮӈȂसሰᆱঔ݉ଡ଼፝ᖓཿ ᆱঔসȄ ๊ᜟήِםϲޠᡚოဵȂԠӶණᒻٻңݨ ཏҐᐡߤܛழϟᐈձІᆱៗ๊ࣻᜱ२्ᇴ ݃Ȅ D3-4-2-1-1_A1_Zhtw ឍ֚ Ґᐡϛ٪ЬȄ࣐٪ЦକЭܗដႬࢉٲȂ፝ϽҐᐡဋܺ ܼӉե౿၇షᡞޠৡᏣȞԄ߇౮ࣶ߇ܗȟߤߗܗڐኹ ܼᅔЬȃᘱЬȃߧϜܗዙᕇᕘძϜȄ D3-4-2-1-3_A1_Zhtw ҐࠣѬᎍۤΚૢঢ়৴ңഋȄԄݏҦܼᔗңӶڐу ߩঢ়৴ңഋĩԄ࣐୧ཿңഋՅߞٻңܼᓢᢉϜȂܗ ٻңܼآ಼ٚܗϜĪՅᏳयึҢࢉሬٯሰ्ঔ౪ȂӶ ߴң҇ܜᐋঔ౪ຳңȄ K041_A1_Zhtw ឍ֚ ಒΚԪඩဋႬྜࠊȂ፝сಡᎨίӗഌϸȈ Ⴌྜٽޠ
ݨཏ Ґᐡ ᜱϛӓႬྜՍһࢻႬඩ৵ϹᘟȄӱႬ ྜጤ࣐Ґᐡл्ႬྜϹᘟ၇ဋȂ்ሰ्ඩᓟܧଷп ϹᘟܛԥႬΩȄӱԫȂ፝ጃᇰҐᐡԋ၇ਣႬྜጤѠሇ ܿՍһࢻႬඩ৵ܧଷп٪ЦཏѵȄ࣐٪ЦЭدȂ࿌Ґ ᐡܼߞਣґٻңϟםȞԄϜȟਣȂ፝л ႬྜඩᓟՍᕔαඩ৵ܧଷпϹᘟႬྜȄ D3-4-2-2-2a*_A1_Zhtw ٪ᆅඵᖑᏣقಜ SGK001a_A1_Zhtw ҐඵᖑᏣقಜѠ٪ᆅȄϛႇຝԋ၇՞ဋՅۢȂसඵᖑᏣ قಜЋᎭߗႬຝᐡᒊᄎȂႬຝѠཽึҢՔீѷȄस ึҢԫݸȂ፝ᜱഗႬຝᐡޠႬྜȂ๊ࡠ26Վ41ϸយࡤ ӕఃȄ!सୱᚡٸดԇӶȂ፝ඵᖑᏣقಜሊᚕႬຝᐡ ܺဋȄ SGK002a_A1_Zhtw ፝ϽٳඵᖑᏣԋ၇ӶᕔαܗЉ߇ݗαȂӱ࣐௭ဤਣ ѠཽആԚসڨ།Ȅ SGK007*_A1_Zhtw ᄈܼӱԋ၇ϛ࿌ȃᓀᇳٻңܗ၇ࠣܗЉدᏳयޠӉե ཏѵܗᚾȂӒᎣ྆ϛ॓ೱȄ SGK008_A1_Zhtw S-DJ08_05_CS_ChH-7L.
簡介 主要功能 您可利用本產品搭配單一揚聲器,滿足您從 DJ 表演到製作及一 般音樂欣賞的所有音樂需求。 可調整音訊響應,以完美配合從 DJ 表演到製作及一般音樂欣賞 的所有情況。 可同時使用手持控制器設定左右揚聲器的常用控制項目如音效 音量、靜音開/關、電源開啟/待機、EQ 開/關及來源輸入。 確認所有配件 保證書 操作手冊(本文件) 電源線(2) 連結纜線(1) 控制器(1) 橡膠墊(8) 安裝 如何安裝 揚聲器的播放音效會稍微受到聆聽房間環境的影響。若要產生最 佳的聆聽環境,在開始實際安裝前,請適當考慮您安裝位置的環 境。 注意 為提供適當冷卻,確定揚聲器與附近牆壁或其他裝置間留有足 夠的空間(各揚聲器背面、左右側最少離 30 cm 以上)。 揚聲器 與牆壁或其他裝置的間隔空間不足可能會造成內部溫度上升, 導致故障或受損。 安裝至耳部位置。 如需天然立體聲效果,可在聆聽位置的對稱及等距位置上安裝 左右揚聲器。 揚聲器放置的最佳角度應與聆聽位置呈 30°角(形成共 60°角)並向內旋轉面對聆聽位置。 附註: 為提供適當冷卻,揚聲器必須離牆壁 30 c
零件名稱及功能 前面板設備 1 INPUT 1-4 指示燈 32 指示燈亮起代表已選擇該輸入。 靜音時,選擇的輸入指示燈 會閃爍。 2 EQ 指示燈 INPUT 1 2 EQ 3 POWER 4 1 等化器功能為開啟時此燈亮起。 3 POWER 指示燈/削剪指示燈 待機: 亮紅色。 電源開啟: 亮藍色。 電源關閉: 指示燈燈號熄滅。 削剪期間: 閃爍或穩定亮起粉紅色。 若擴大機產生訊號削剪,此指示燈會閃爍(或穩定亮起)粉 紅色。在正常使用下,揚聲器應可使用,如此一來指示燈便 不會閃爍或穩定亮起粉紅色。當此指示燈閃爍(或穩定亮起) 粉紅色時,請降低本機後面板上的音量(LEVEL 旋鈕),或從 連接的來源裝置中降低本機訊號輸入的音量。 允許過多訊號 削剪可能會破壞本機。 注意 本產品的設計在使用者切換揚聲器主機上的控制項目或開啟控 制器時,所有指示燈燈號都會關閉(產品隨附控制器時)。 此情 況與中斷揚聲器電源(拔下插頭)時相同,但即使在這種情況下 仍有電力供給本機。 如要完全關閉所有本機電源,必須從電源插 座上實際拔下本機的電源插頭。 為做好防火措施,必須在伸手可 及的電源插座範圍內安裝本產品,
後面板設備 4 EQ LOW 旋鈕 45 6 7 8 9 可調整低頻音效。只有在 EQ 開/關鍵設為開啟時此旋鈕才有 效。 5 EQ HIGH 旋鈕 - 6 dB + 6 dB - 6 dB +6 dB a b c d e f 可調整高頻音效。只有在 EQ 開/關鍵設為開啟時此旋鈕才有 效。 6 EQ ON/OFF 按鍵 可開啟/關閉等化器。 7 INPUT SELECTOR 按鍵 每次按下此鍵時,輸入會以輸入 1 2 3 4 的順序交替 切換。 8 電源開啟/待機按鍵() 可切換本機為電源開啟及待機模式。 按下按鍵後,電源為開啟;再次按下按鍵時,本機會進入待 機模式。 9 LEVEL 旋鈕 g h 可調整音效音量(音量)。 未連接控制器時可操作此旋鈕。 a CONTROL IN 接頭 可連接附屬控制器或附屬連結纜線。 b CONTROL OUT 接頭 可連接附屬連結纜線。 c INPUT 4 * 圖例為 S-DJ08 機型。 平衡輸入耳機插孔。 附註: 可使用含耳機插頭的非平衡式纜線,但音效音量可能會降低。 當您想要較高的音效音量時,請使用配備 TRS 耳
控制器正面 1 LEVEL 旋鈕 1 可控制音效音量(音量)。 2 電源開啟/待機按鍵() 可切換本機的電源為開啟及待機模式。 按下按鍵後,電源為開啟;再次按下按鍵時,本機會進入待 機模式。 2 控制器背面 3 INPUT SELECTOR 每次按下此鍵時,輸入選擇器會以輸入 1 2 3 4 的順 序交替切換。 4 MUTE/EQ 按鍵 每次按下此鍵時,靜音功能會開啟/關閉。 按住此鍵達一秒 以上,可開啟/關閉等化器功能。 3 4 中文 Zhtw S-DJ08_05_CS_ChH-7L.
連線 進行連線或變更連線時,請務必關閉電源並從插座上拔下電源 線。 另外,請確定詳閱其他與揚聲器連接裝置的操作手冊。 在完成所有其他連線前,請不要連接電源線。 只能使用隨附的附屬電源線。 您所需的安裝環境需要比隨附纜線更長的連結纜線時,請購買市 售 MINI DIN 8a 延長線,並連接隨附的連結纜線。 附註: 連接控制器與連結纜線時,請以逆時針方向將揚聲器主要音 量旋鈕轉到底至 MIN 位置,因為當控制器與連結纜線突然分開 時,揚聲器可能會發出突如其來的大聲音效。 連接控制器時,請以逆時針方向將控制器的音量旋鈕轉到底至 MIN 位置,然後於完成連線後再視需要調整音效音量。 若在控 制器音量旋鈕為高設定位置時進行連線,揚聲器可能會發出突 如其來的大聲音效。 連接控制器時,會停用揚聲器的主要音量旋鈕功能。 警告 請勿單獨使用市售的 MINI DIN 8a 延長線;請務必連接延長線與 本機附屬的隨附連結纜線,因為若不使用隨附的纜線,可能會導 致故障、起火或觸電。 若控制器連接其中一個揚聲器的 CONTROL IN 接 頭,請使用連結纜線連接該揚聲器的 CONTROL OUT 接頭與其他揚聲器的 CO
操作 開啟主電源。 使用靜音功能 將揚聲器後面板上的主電源開關設為開啟。 按下控制器的 MUTE/EQ 鍵,將靜音功能設為開啟。 設定電源開啟/待機。 設定等化器 按下(控制器上或揚聲器後面板上的)電源開啟/待機按 鍵。 在揚聲器的後面板上,將 EQ ON/OFF 鍵設為開啟,再使 用 EQ LOW 與 EQ HIGH 旋鈕調整所需的音調品質。 選擇所需輸入。 使用等化器 按下(控制器上或揚聲器後面板上的)INPUT SELECTOR 按鍵以選擇所需輸入來源。 若要將等化器設為開啟,按下控制器的 MUTE/EQ 鍵,並 按住達一秒以上,或按下揚聲器後面板上的 EQ ON/OFF。 調整音效音量。 若已連接控制器: 緩慢旋轉控制器的音量旋鈕以調整所需的音效音量。 若未連接控制器: 緩慢旋轉揚聲器後面板上的音量旋鈕以調整所需的音 效音量。 省電功能 將(揚聲器後面板上的)AUTO STANBY ON/OFF 開關設 為開啟。 下列情況符合 60 分鐘時,本機將自動切換為待機模式: — 未操作音量旋鈕、控制鍵及其他旋鈕和控制項目。 — 揚聲器未收到 –40 dBu 以上的輸入訊號。
其他資訊 疑難排解 若您認為本機遭遇故障問題,請檢查下列項目。 另外需檢查與本機連接的其他裝置。 若問題依然存在,請聯絡經銷商安排維修。 本機有時會因靜電或其他外部狀況導致無法操作。 此時請中斷連接電源線,然後稍等約五分鐘以上,接著重新連接電源線並檢查 本機是否能正常運作。 問題 檢查項目 解決方法 無電源 電源線是否正確連接? 將電源線連接插座(第 6 頁)。 連接的音訊裝置聽不見聲音或聲音非 常小。 是否正確設定連接的音訊裝置? 請正確設定裝置的輸出選擇器及音效音量。 連接纜線是否正確連接? 請正確連接纜線(第 8 頁)。 接頭或插頭是否髒污? 連接前請清潔接頭與插頭。 音效音量是否正確設定? 以順時針方向緩慢旋轉 LEVEL 旋鈕(若已連接控制器請 使用控制器上的旋鈕,否則請使用揚聲器後面板)。 選擇輸入項目是否符合連接裝置的輸入接頭類型? 請選擇符合所需裝置輸入類型的輸入接頭。 靜音功能是否設為開啟? 按下控制器的 MUTE/EQ 鍵。 電源是否開啟? 按下主電源開關及電源開啟/待機按鍵。 音效音量是否設為適當音量? 以逆時針方向緩慢旋轉音量旋鈕(若
一般規格 規格 電源 ..................................................... AC 230 V,50 Hz/60 Hz 待機模式時的耗電量..............................................0.5 W 或以下 S-DJ08 類型 .........................................防磁雙擴大機雙向主動式揚聲器 配件 擴大機 動態功率(高頻/低頻)......................................... 70 W/170 W 輸入接頭(平衡輸入)......... XLR x 1、TRS(1/4 吋耳機插孔)x 1 輸入接頭(不平衡輸入)................................................ RCA x 2 輸入靈敏度/阻抗 ................................
Published by Pioneer Corporation. Copyright © 2010 Pioneer Corporation. All rights reserved. Publication de Pioneer Corporation. © 2010 Pioneer Corporation. Tous droits de reproduction et de traduction réservés. PIONEER CORPORATION 1-1, Shin-ogura, Saiwai-ku, Kawasaki-shi, Kanagawa 212-0031, Japan PIONEER ELECTRONICS (USA) INC. P.O. BOX 1540, Long Beach, California 90801-1540, U.S.A. TEL: (800) 421-1404 PIONEER ELECTRONICS OF CANADA, INC.