Register your product and get support at www.philips.
Tartalomjegyzék Áttekintés.................................................. 3 7 Médialejátszás .................................... 24 Tisztelt vásárlónk! ............................................................... A kezelési útmutatóról ...................................................... A doboz tartalma ................................................................ Termék csúcspontok .......................................................... Videolejátszás ....................................
Áttekintés Tisztelt vásárlónk! A doboz tartalma Köszönjük, hogy mini kivetítőnk mellett döntött. Legyen sok öröme a készülék és sokoldalú funkciói használatában! 1 – távirányító 2 – PicoPix kivetítő 3 – hálózati tápegység 4 – USB kábel 5 – HDMI kábel 6 – Quick Start Guide 7 – táska A kezelési útmutatóról A következő oldalakon található telepítési útmutatóval készülékét gyorsan és egyszerűen használatba veheti. A részletes leírást a jelen kezelési útmutató következő fejezeteiben találja meg.
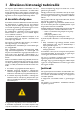
1 Általános biztonsági tudnivalók Ne végezzen olyan beállítást és módosítást, ami nincs leírva a jelen kezelési útmutatóban. A szakszerűtlen kezelés következtében sérülés vagy kár, a készülék megrongálódása vagy adatveszteség léphet fel. Kérjük, vegye figyelembe az összes megadott biztonsági előírást. A készülék elhelyezése A készülék csak beltéri alkalmazásra készült. A készüléket biztonságosan és stabilan kell egy sima felületen elhelyezni.
Tápellátás Csak a mellékelt hálózati tápegységet használja (l. Függelék / Műszaki adatok). Ellenőrizze, hogy a hálózati tápegység hálózati feszültsége megegyezik-e használat helyszínén érvényes hálózati feszültséggel. Az összes alkotóelem megfelel a készüléken feltüntetett feszültségfajtának. Az akkumulátor kapacitása idővel csökken. Ha a készülék csak a hálózati tápellátással működik, akkor az akkumulátor hibás. Ekkor hivatalos szakszervizben cseréltesse ki az akkumulátort.
2 Áttekintés Felső oldal Oldalnézet 1 – Touchpad a navigációhoz és az egérmutató kezeléséhez (lásd még itt: Touchpad / gesztusok fejezet, 8 oldal) 2 – LED-állapotsor Kék: készülék bekapcsolva / készülék készenléti üzemmódban Nem világít: Készülék kikapcsolva 3 – Fókusztárcsa a képélesség beállításához. 1 – Reset-nyílás A mini kivetítő nem reagál tovább, vagy lefagyott: Vezessen be egy vékony, hegyes tárgyat a reset-nyílásba a hardver reset végrehajtásához.
1 ý – USB-csatlakozó USB-tárolóeszköz, DVB-T stick, egér vagy billentyűzet számára 2 – Lencse Alsó oldal 1 – állványmenet a a b Pico Station Elölnézet (nincs mellékelve) A Pico Station dokkolóegység saját akkumulátort tartalmaz, amivel Ön meghosszabbítja a készülék lejátszási idejét. A beépített hangszórók jobb hangminőséget eredményeznek a lejátszásnál. A Pico Station DVB-T adapterrel rendelkezik, így közvetlenül csatlakoztathat DVB-T antennát.
Touchpad / gesztusok Beviteli terület A touchpad érintésérzékeny felület. Érintse meg egy vagy több ujjal a touchpadet a kurzor mozgatásához, a menüben való navigáláshoz vagy egyéb műveletek elvégzéséhez. A beviteli területet a navigációs terület / képgörgető terület határolja. A t beviteli területe gesztusokkal vezérelheti a kurzort. VIGYÁZAT! Golyóstoll! Ne használjon golyóstollat vagy más tárgyat a touchpad kezeléséhez. A kemény és hegyes tárgyak megsérthetik a touchpadet.
Zoom – Helyezze hüvelykujját és mutatóujját a beviteli terület közepére és lassan terpessze szét a kép vagy a dokumentum nagyítására. Helyezze hüvelykujját és mutatóujját a beviteli terület sarkaiba és lassan húzza őket össze a kép vagy a dokumentum vissza kicsinyítésére. Forgatás – Érintse meg hüvelykujjával a touchpadet és mutatóujjával kör alakban simítson abba az irányba, amelybe a képet forgatni szeretné.
Távirányító B – Készülék nyugalmi állapotba helyezése – Belépés a menübe u – Belépés a főmenübe v – Belépés a keresőmenübe ¿ – Egy menülépés vissza, egy mappaszint vissza / funkciók megszakítása w – Átkapcsolás külső HDMI, , vagy VGA videobemenetre x – DVB-T mód: váltás a kedvencekre 1 Navigáló gombok à – Kiválasztás nyugtázása / , À/Á – Navigáló gombok / navigálás a menükben / beállítások módosítása / – Beállítások módosítása / zene lejátszása közben az előző, következő cím választása À/Á – Ze
A menüfunkciók áttekintése 1 A készülék bekapcsolása után a főmenü jelenik meg. 2 A À/Á navigáló gombokkal válassza ki a kívánt menüt. 3 Nyomja meg az à gombot. 4 A u gomb megnyomásával a főmenübe térhet vissza. Forrás – Átkapcsolás külső videobemenetre (HDMI, , vagy VGA ) Videók – A lejátszandó videofájlok kijelölése Képek – A diabemutató fájljainak kijelölése.
3 Első üzembe vétel A készülék elhelyezése A készüléket síkban elhelyezheti egy asztalon a vetítési felület előtt; nem szükséges azt ferdén a vetítési felületre irányítania. A készülék kiegyenlíti a ferde vetítés okozta torzítást (párnatorzítást). A hálózati tápegység csatlakoztatása / az akkumulátor töltése VIGYÁZAT! Hálózati feszültség a használati helyen! Ellenőrizze, hogy a hálózati tápegység hálózati feszültsége megegyezik-e használat helyszínén érvényes hálózati feszültséggel.
2 A távvezérlő hátoldalán látható ábra szerint, a pozitív és negatív pólusra ügyelve helyezze bele az új elemet az elemfiókba. Ügyeljen eközben a polaritásra! A távirányító felhasználása A távirányítót irányítsa a készülék hátoldalán található távirányító-érzékelő felé. A távirányító legfeljebb 60 fokos szögben és a készüléktől legfeljebb 5 m távolságból használható. Használat közben a távirányító és az érzékelő között ne legyen semmilyen tárgy.
Első telepítés 1 A bekapcsoláshoz működtesse mintegy 3 másodpercig a be-/kikapcsolót a készülék oldalán. 2 Irányítsa a készüléket megfelelő vetítési felületre vagy a falra. Ügyeljen arra, hogy a vetítőfelület távolságára legalább 0,5 m és legfeljebb 5 m ajánlott. Ügyeljen a projektor stabil helyzetére. 3 A készülék tetején található fókusztárcsával állítsa be a képélességet. 4 A / használatával válassza ki a nyelvet a menühöz. 5 Nyomja meg az à gombot.
4 Csatlakoztatás lejátszókészülékre A projektor csatlakoztatására csak a mellékelt összekötőkábeleket, vagy a tartozékként kapott összekötőkábeleket használja. Csatlakoztatás iPhone/iPad/ iPod eszközre Mellékelt összekötőkábelek Használja az iPhone/iPad/iPod-HDMI-kábelt ((nincs mellékelve) a kivetítő iPhone/iPad/iPod eszközre csatlakoztatásához. HDMI-kábel USB-kábel Tartozékként kapható összekötőkábelek Komponens videokábel YUV /YPbPr ..............................................
Csatlakoztatás okostelefonra 3 A számítógépen állítsa be a megfelelő felbontást és a VGA-jelet kapcsolja be mint egy külső monitor esetében. A következő felbontások használhatók: Felbontás Képfrissítési frekvencia VGA 640 x 480 60 Hz SVGA 800 x 600 60 Hz XGA 1024 x 768 60 Hz WXGA 1280 x 768 60 Hz FULL HD 1920 x 1080 60 Hz Használja az MHL-kábelt (nincs mellékelve) a kivetítő okostelefonra csatlakoztatásához. VG Y-P A HDb-P MI r 1 Válassza: Menü > Forrás és kapcsoljon át a HDMI re.
Csatlakoztatás mobil multimédia-eszközre Egyes videoeszközök (pl. a pocket multimedia player) csatlakoztatása speciális kábeleket igényel. Ezeket vagy a készülékekhez mellékelik, vagy a multimédia eszköz gyártójától szerezhetők be. Ügyeljen arra, hogy esetleg csak a készülékgyártó eredeti kábelei használhatók. Megjegyzés Két piros RCA-csatlakozó A csatlakoztatás során ügyeljen arra, hogy a kábelen két piros RCA-csatlakozó van. Az egyik a jobb audiojelé, a másik pedig a V/Pr komponens videojelé.
A fejhallgató csatlakoztatása 1 Csökkentse le a készülék hangerejét a fejhallgató csatlakoztatása előtt. 2 Csatlakoztassa a fejhallgatót a projektor fejhallgatóaljzatára. A készülék hangszórója automatikusan kikapcsolódik a fejhallgató bedugásakor. VG Y-P A HDb-P MI r 3 A csatlakoztatás után növelje a hangerőt, amíg kellemes szintet ér el. VESZÉLY! Hallássérülés veszélye! Ne használja a készüléket hosszabb ideig nagy hangerővel – főleg fejhallgató alkalmazásakor.
5 Tároló Memóriakártya behelyezése USB-tárolóeszköz csatlakoztatása V Y-PGA HDb-P MI r 1 Dugjon bele egy memóriakártyát az érintkezőkkel felfelé a készülék hátoldalán lévő / dugaszhelyre. Az Ön készüléke a következő memóriakártyákat támogatja: SD/SDHC/SDXC/MMC. 2 A memóriakártyát kattanásig tolja bele a készülékbe. 1 Csatlakoztassa a mellékelt USB-tárolóeszközt az USB-aljzatba a készülék oldalán.
Csatlakoztatás a számítógépre (USB) 5 Nyugtázza ezt a kapcsolat aktiválásához. Az USB-kábel segítségével a mini kivetítőt összekapcsolhatja egy számítógéppel, hogy fájlokat továbbítson a belső memória, egy behelyezett memóriakártya és a számítógép között, vagy törölje őket. A mini kivetítőn tárolt fájlokat a számítógépen is megjelenítheti. VG Y-PbA HD -P MI r 1 A készülék oldalán található be-/kikapcsolóval kapcsolja be a készüléket. 2 A nyitóképernyő után a főmenü jelenik meg.
6 Vezeték nélküli hálózat (WLAN) Egy vezeték nélküli hálózatban (Wireless Local Area Netzwork, WLAN) legalább két számítógép, nyomtató vagy egyéb kiegészítő eszköz kommunikál rádióhullámokon (RF-hullámokon) egymással. A vezeték nélküli hálózatban az adatátvitel alapját a 802.11b, 802.11g és 802.11n szabványok adják. VESZÉLY! Megjegyzések a WLAN alkalmazásához! Biztonsági berendezések, orvosi vagy kényes készülékek működését a készülék adóteljesítménye zavarhatja.
11 Ha vezeték nélküli hálózata jelszóval védett, beviteli ablak jelenik meg. Kattintson a touchpaddel vagy egérrel a beviteli mezőbe (lásd még itt: Touchpad / gesztusok fejezet, 8 oldal). 12 Adja be a touchpaddel vagy egérrel a jelszót a képernyő billentyűzeten. 13 Kattintson az Összekapcsolódás gombra. A ¿ gombbal egy menülépést visszaléphet.
Digital Living Network Alliance (DLNA) Ez az eszköz támogatja a Digital Living Network Alliance (DLNA) szolgáltatást. Ezen szabvány segítségével multimédia-eszközeit gyorsan összekapcsolhatja egymással. DLNA be- és kikapcsolása A DLNA-funkció alapértelmezésben be van kapcsolva. Ön kikapcsolhatja ezt a funkciót. 1 A készülék oldalán található be-/kikapcsolóval kapcsolja be a készüléket. 2 A nyitóképernyő után a főmenü jelenik meg. 3 Válassza a Beállítások lehetőséget a navigáló gombokkal.
7 Médialejátszás Megjegyzés Navigáló gombok Minden ábrázolt gomb a távirányító gombja. Megjegyzés Beállítási lehetőségek Olvassa el a megjegyzéseket a beállítási lehetőségekről a Beállítások fejezetben (lásd még itt: Beállítások fejezet, 36 oldal) eszköze optimális alkalmazásához. Videolejátszás Videolejátszás (USB/SD-kártya/ belső memória/DLNA) 1 A készülék oldalán található be-/kikapcsolóval kapcsolja be a készüléket. 2 A nyitóképernyő után a főmenü jelenik meg.
Videolejátszás (mini HDMI-aljzat) 7 A képernyőn áttekinthető módon a fényképek miniatűrjei jelennek meg. 1 A külső készülék audio-/videokimenetét csatlakoztassa a Pocket Projector aljzatára. Erre a célra használja a megfelelő kábelt és adapterkábelt (lásd még itt: Csatlakoztatás lejátszókészülékre fejezet, 15 oldal). 2 Olvassa el a külső készülék kezelési útmutatójában, hogyan kapcsolhatja be a videokimenetet. A megfelelő menüben ennek jelölése legtöbbször "TV out" vagy "TV kimenet".
5 Válassza ki a / gombokkal a lejátszani kívánt fájlt. 7 Válassza ki a / gombokkal a lejátszani kívánt fájlt. Megjegyzés Tárolás helye Csak a belső tárolóról/memóriakártyáról/ USB-tárolóeszközről lehet fájlt lejátszani. 6 Nyomja meg a à gombot a háttérzene indításához. 7 Nyomja meg a / gombot a hangerő szabályozásához. 8 Bevitel hiányában a menüsor 5 másodperc múlva kikapcsol.
Office megjelenítés (YOZO Office) A YOZO Office segítségével dokumentumokat jeleníthet meg. 1 A készülék oldalán található be-/kikapcsolóval kapcsolja be a készüléket. 2 A nyitóképernyő után a főmenü jelenik meg. 3 Válassza a Mappanézet lehetőséget a navigáló gombokkal. 4 Nyomja meg az à gombot. 5 Behelyezett memóriakártyával vagy USBtárolóeszközzel: Válassza ki a / segítségével a belső memóriát, az USB-tárolóeszközt vagy a memóriakártyát. 6 Nyomja meg az à gombot.
11 Válassza a / gombokkal a Másolás lehetőséget. 12 Nyomja meg az à gombot. 13 A / gombbal jelölje ki, hova szeretne másolni: SD-kártya, belső memória vagy USB-memória. 14 Nyomja meg az à gombot. Megjegyzés Már vannak ilyen fájlok Ha ezek a fájlok már megvannak, akkor a / és à eldöntheti, hogy felülírja-e őket, vagy sem. Ha nem a felülírást választja, akkor a fájlnevek egy számmal egészülnek ki. 3 Válassza a Mappanézet lehetőséget a navigáló gombokkal. 4 Nyomja meg az à gombot.
8 Digital TV lejátszás Megjegyzés Tartozék szükséges Kivetítője Digital TV funkciójának használatához a Pico Station PPA7301 eszköz (nincs mellékelve) vagy az USB DVB-T stick PPA8301 (nincs mellékelve) szükséges. A Pico Station dokkolóegységet és az USB DVB-T sticket a megrendelőlap szerint szerezheti be. Antenna csatlakoztatása az USB DVB-T stickre PPA8301 Antenna csatlakoztatása Megjegyzés Antenna mérete és irányítása Egyes körzetekben nagyobb antenna csatlakoztatása szükséges a vétel biztosítására.
Első lejátszás Megjegyzés Navigáló gombok Minden ábrázolt gomb a távirányító gombja. A DVB-T funkció első üzembe vételénél el kell indítani az automatikus adókeresést. 1 A készülék oldalán található be-/kikapcsolóval kapcsolja be a készüléket. 2 A nyitóképernyő után a főmenü jelenik meg. 17 Erősítse meg az à gombbal. 18 Válassza a navigáló gombokkal: Auto. 19 Erősítse meg az à gombbal. Televízió 20 Válassza a Video Broadcast lehetőséget a navigáló gombokkal. 21 Erősítse meg az à gombbal.
6 Megjelenik az almenü. 7 Válassza a Video Broadcast lehetőséget a navigáló gombokkal. 8 Nyomja meg az à gombot. 9 Az utoljára nézett adó jelenik meg. Váltsa a z/{ gombbal az adót. Megjegyzés Az adóinformációk kijelzése Adóváltásnál az alsó vetítési peremen megjelennek az adóinformációk. Az információs sáv 5 másodperc után eltűnik. 10 Nyomja meg a u gombot a lejátszás befejezéséhez és a főmenübe való visszatéréshez. A lejátszás közben a távirányítón a hangerőt a / gombbal állíthatja be.
9 Android A mini kivetítő az Android operációs rendszert használja. Android indítása 1 A készülék oldalán található be-/kikapcsolóval kapcsolja be a készüléket. 2 A nyitóképernyő után a főmenü jelenik meg. Android-alkalmazások telepítése VIGYÁZAT! Megbízható források! Az idegen forrásokból származó alkalmazások károsak lehetnek. Csak megbízható forrásokból származó telepítőcsomagokat használjon. További alkalmazásokat telepíthet. Használjon APKtelepítőcsomagokat.
Adobe Flash Player telepítése Önnek az Adobe Flash Player legújabb verzióját kell telepítenie ahhoz, hogy a Youtube-videókat lejátszhassa. 1 Töltse le az Androidhoz kiadott Adobe Flash Player telepítőcsomag (flashplayer.apk) legújabb verzióját. További információt a www.philips.com/support címen talál. 2 A csomagot mentse le egy memóriakártyára. 3 Helyezze bele a memóriakártyát a készülékbe (lásd még itt: Memóriakártya behelyezése fejezet, 19 oldal).
Böngésző üzemmód beállítása 10 Válassza a Beállítások lehetőséget a navigáló gombokkal. Módosítsa a böngészőprogram üzemmódját, hogy flashelemeket tartalmazó oldalakat is megjelenítsen. 1 A készülék oldalán található be-/kikapcsolóval kapcsolja be a készüléket. 2 A nyitóképernyő után a főmenü jelenik meg. 11 Erősítse meg a à gombbal. 12 Válassza a User agent lehetőséget a navigáló gombokkal. 3 Válassza az Android lehetőséget a navigáló gombokkal. 4 Nyomja meg az à gombot.
Böngésző üzemmód visszaállítása 1 A Böngésző üzemmód beállítása részben leírtak szerint járjon el (lásd még itt: Böngésző üzemmód beállítása fejezet, 34 oldal). 2 Válassza az iPad lehetőséget a navigáló gombokkal. 3 Erősítse meg a à gombbal.
10 Beállítások 1 A készülék oldalán található be-/kikapcsolóval kapcsolja be a készüléket. 2 A nyitóképernyő után a főmenü jelenik meg. 3 Válassza a Beállítások lehetőséget a navigáló gombokkal. 4 Nyomja meg az à gombot. 5 A / gombokkal válasszon az alábbi beállításokból. 6 Nyomja meg az à gombot. 7 Módosítsa a beállításokat a à, / gombbal. 8 Nyomja meg az à gombot. A ¿ gombbal egy menülépést visszaléphet.
Ismétlés – A videofájlok ismétlési módjának beállítása: Ismétlés kikapcsolva (Ki), a mappa minden képfájljának ismétlése (Mappa), minden tárolt fénykép ismétlése (Mind. Dia átmenet – Képátmenetek beállítása Diavetítés sorrendje – Véletlenszerű vagy rendezett diavetítés Power mód Fényesség – Ezen funkció bekapcsolásával csökken a fénykibocsátás, így növekszik a beépített akkumulátor üzemideje.
11 Szerviz Az akkumulátor ápolása Az akkumulátor kapacitása idővel csökken. A következő tanácsokat megfogadva meghosszabbíthatja az akkumulátor élettartamát: • Áramellátás nélkül a készülék a beépített akkumulátorról működik. Ha az akkumulátornak nincs már elegendő kapacitása, a készülék kikapcsol. Csatlakoztassa a készüléket a hálózati aljzatra. • Ha az akkumulátornak nincs már elegendő kapacitása, a kijelzőn az akkumulátor szimbóluma piros.
Tisztítás VESZÉLY! Tisztítási előírások! Ehhez használjon puha, szöszmentes kendőt. Semmiképpen sem használjon folyékony vagy könnyen gyulladó tisztítószert (spray, súrolószer, polírozó szer, alkohol stb.). Nem szabad nedvességnek jutnia a készülék belsejébe. A készülékre ne permetezzen semmiféle tisztítófolyadékot. A felületeket óvatosan törölje át. Ügyeljen arra, hogy ne karcolja meg a felületeket.
Problémák / megoldások 1 A készülék oldalán található be-/kikapcsolóval kapcsolja be a készüléket. 2 Várjon legalább tíz másodpercet. 3 A készülék oldalán található be-/kikapcsolóval kapcsolja be a készüléket. 4 Ha a probléma megismétlődik, kérjük, kérjen tanácsot műszaki vevőszolgálatunktól, vagy a készülék eladójától. Gyors segítség Ha probléma jelentkezik és azt a kezelési útmutató alapján nem lehet elhárítani (ld. a mellékelt súgót is), akkor kövesse az alábbi lépéseket.
Probléma Megoldások A készülék a maximális fényességi fokozatról a minimális • fényességi fokozatra kapcsol, ha a készülék USB-n át van csatlakoztatva videó lejátszásához. • Ha a környezeti hőmérséklet túl magas, a készülék automatikusan a maximális fényességi fokozatról a minimális fényességi fokozatra kapcsol a nagyteljesítményű LED védelmére. Alacsonyabb környezeti hőmérsékleten használja a készüléket. A készülék USB-vel nem köthető rá Android-eszközre • (pl.
12 Függelék Műszaki adatok Tartozék Méretek (SZ¦×¦MA¦×¦MÉ)......................105¦×¦31¦×¦105¦mm Súly ........................................................................... 0,284¦kg Ajánlott környezeti hőmérséklet.........................5¦–¦35¦ºC Relatív páratartalom .............. 15¦–¦85¦% (nem kicsapódó) Fájlformátumok.......... *.mp4, *.avi, *.mov, *.mkv, *.mpg, ..................................*.mpeg, *.flv, *.ts, *.m2ts, *.3gp Fotóformátumok ............................
A CE jelzés szavatolja, hogy ez a termék a felhasználók biztonságát és egészségvédelmét, valamint az elektromágneses zavarást illetően teljesíti az Európai Parlament és Tanács távközlési végberendezésekre vonatkozó 1999/5/EK, 2006/95/EK, 2004/108/EK és 2009/125/EK irányelveinek követelményeit. A megfelelőségi nyilatkozat a www.picopix.philips.com címen olvasható. A fenntartható fejlődés elvének keretében a Sagemcom Documents SAS számára nagyon fontos a környezet megőrzése.
PHILIPS and the PHILIPS’ Shield Emblem are registered trademarks of Koninklijke Philips Electronics N.V. and are used by Sagemcom Documents SAS under license from Koninklijke Philips Electronics N.V. È 2013 Sagemcom Documents SAS All rights reserved Sagemcom Documents SAS Documents Business Unit Headquarters : 250, route de l’Empereur 92848 Rueil-Malmaison Cedex · FRANCE Tel: +33 (0)1 57 61 10 00 · Fax: +33 (0)1 57 61 10 01 www.sagemcom.com Simplified Joint Stock Company · Capital 8.479.