
operation manual


English
21
Clock/Timer
Clock setting
There are two possible methods for setting the
clock: manually or automatically by using RDS.
Automatic clock setting
Refer to “Setting the RDS clock”.
Manual clock setting
The clock can be set in either 12-hour or
24-hour mode ("AM 12:00" or "00:00" for
example).
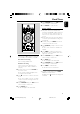
1 In standby mode, press and hold CLOCK on
the remote control.
➜ SET CLOCK is displayed briefly. Then, the
clock digits for the hours flash.
2 Press Ç on the remote control to select clock
mode.
➜ "12 TO 24 HOUR" or "24 TO 12 HOUR"
scrolls once. Then, the clock digits for the hours
continue to flash.
3 Adjust VOLUME -/+ (or press VOL +/- on the
remote control) to set the hours.
4 Press CLOCK again.
➜ The clock digits for the minutes flash.
5 Adjust VOLUME -/+ (or press VOL +/- on the
remote control) to set the minutes.
6 Press CLOCK to confirm the time.
Timer setting
● The system can be used as an alarm clock,
whereby the CD, TUNER or USB is switched on
at a set time (one time operation). The clock
time needs to be set first before the timer can
be used.
● During setting, if no button is pressed within 90
seconds, the system will exit timer setting mode
automatically.
1 In standby mode, press TIMER on the remote
control for more than two seconds.
2 Press SOURCE repeatedly to select the sound
source.
➜ “SET TIME” and “SELECT SOURCE” are
displayed.
3 Press TIMER to confirm your desired mode.
➜ “SET ON TIME” is displayed and the clock
digits for the hours flash.
4 Adjust VOLUME -/+ (or press VOL +/- on the
remote control) to set the hours.
5 Press TIMER again.
➜ The clock digits for the minutes flash.
6 Adjust VOLUME -/+ (or press VOL +/- on the
remote control) to set the minutes.
7 Press TIMER to confirm the time.
➜ The timer is now set and activated.
Activating and deactivating timer
● In standby or during playback, press TIMER
once on the remote control.
➜ Display shows if activated, and disappears if
deactivated.
pg 001-025_MCM393_22-Eng 2006.12.25, 9:1321