
User Manual


Follow these steps to erase the memory:
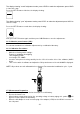
* Press and hold the “REC”-button and turn on the unit.
* “CLA” (for Clear) appears in the display
* The internal memory is now erased and free for further measurements
In order to avoid data error, please don’t power it off under REC condition, when the REC function is
deleted then it can power off.
4.3. Adjusting Datalogger response
Press the button continuously before power it on, then press , to turn on the unit:
Press “LEVEL” button to adjust memory time (1-59 seconds), press “HOLD” button to hold the setup.
Download the saved data from the internal memory (Datalogger)
* Connect the unit with help of the USB-cable to the PC
* start the application software
* choose the correct COM-Port in the main menu “COM-Port”
* Press the “SETUP”-button at the unit
* The “ -Symbol” disappears in the display. The USB-interface is now ready to transmit the
measuring values
* choose “Datalogger” in the main menu of the software
* The internal saved values will be transmit and in the display of the unit appears “Out”
* dependent to the recorded values and amount of data the transmission could take some time
until it is completed
-26-