
Operating Instructions

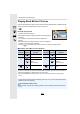


Table Of Contents
- Finding the information you need
- How to use this manual
- Quick Start Guide
- Contents
- Contents by Function
- Before Use
- Getting Started/Basic Operations
- Changing the Lens
- Attaching the Shoulder Strap
- Charging the Battery
- Inserting/Removing the Battery
- Inserting/Removing the Card (Optional)
- Opening the Monitor/Adjusting the Monitor
- Setting Date/Time (Clock Set)
- Basic Operations
- Diopter adjustment
- Tips for taking good pictures
- Shutter button (Taking pictures)
- Motion picture button (Recording motion pictures)
- Mode dial (Selecting a Recording Mode)
- Rear Dial/Front Dial
- Control Dial
- Cursor buttons/[MENU/SET] button
- [DISP.] button (Switching the displayed information)
- [LVF] button (Switching the Monitor/Viewfinder)
- Touch panel (Touch operations)
- Optical Image Stabiliser
- Calling frequently-used menus instantly (Quick Menu)
- Setting menu items
- Configuring basic settings of this unit (Setup Menu)
- Easy Recording
- Focus and Shutter (Drive Mode) Settings
- Taking Pictures with Auto Focus
- Taking Pictures with Manual Focus
- Select a Drive Mode
- Taking Pictures using Burst Mode
- Taking Pictures using Auto Bracket
- Taking Pictures with the Self-timer
- Taking Pictures Automatically at Set Intervals ([Time Lapse Shot])
- Creating Stop Motion Pictures ([Stop Motion Animation])
- Picture Quality and Colour Tone Settings
- Recording Suited for the Subject and Scene
- Taking Pictures with Your Favourite Settings (Programme AE Mode)
- Taking Pictures by Specifying the Aperture/ Shutter Speed
- Compensating the Exposure
- Fixing the Focus and the Exposure (AF/AE Lock)
- Selecting the Method for Measuring Brightness ([Metering Mode])
- Taking Pictures with the Zoom
- Making Multiple Exposures on One Picture ([Multi Exp.])
- Disabling Operational Sounds and the Output of Light at once ([Silent Mode])
- Taking Pictures with No Shutter Sound ([Electronic Shutter])
- Minimising vibration of the shutter
- Taking Clear Pictures by Registering Faces ([Face Recog.])
- Recording Profiles of Babies and Pets on Images
- Flash
- Recording Motion Pictures
- Recording Motion Picture
- Recording still pictures while recording motion pictures
- Recording motion pictures with manually set aperture value/shutter speed (Creative Video Mode)
- Using Advanced Settings and Recording Functions for Motion Pictures
- Setting the luminance level for images
- Adjusting the sound settings/monitoring the sound while recording
- Using screens and displays suitable for motion picture recording
- Recording while monitoring camera images
- Setting the recording method of time code
- Recording in Slow or Fast Motion ([Variable Frame Rate])
- Reducing flickering and horizontal stripes on images ([Synchro Scan])
- Displaying colour bars/Outputting a test tone
- Changing the system frequency
- Playing Back and Editing Images
- Playing Back Pictures
- Playing Back Motion Pictures
- Switching the Playback Method
- Deleting Pictures
- Using the [Playback] Menu
- [2D/3D Settings]
- [Slide Show]
- [Playback Mode]
- [Location Logging]
- [RAW Processing]
- Removing unnecessary parts ([Clear Retouch])
- [Title Edit]
- [Text Stamp]
- [Video Divide]
- [Time Lapse Video]
- [Stop Motion Video]
- [Resize]
- [Cropping]
- [Rotate]/[Rotate Disp.]
- [Favorite]
- [Print Set]
- [Protect]
- [Face Rec Edit]
- [Picture Sort]
- [Delete Confirmation]
- Using the Wi-Fi/NFC Function
- Wi-Fi function/NFC function
- What you can do with the Wi-Fi function
- Controlling with a Smartphone/Tablet
- Installing the smartphone/tablet app “ Image App ”
- Connecting to a smartphone/tablet
- Taking images via a smartphone/tablet (remote recording)
- Playing back images in the camera
- Saving images stored in the camera
- Sending images in the camera to an SNS
- Adding location information to images stored in the camera from a smartphone/tablet
- Sending images to a smartphone/tablet by controlling the camera
- Displaying pictures on a TV
- Printing Wirelessly
- When sending images to AV device
- When sending images to PC
- Using Web services
- Registering to the “LUMIX CLUB”
- About Connections
- [Wi-Fi Setup] Menu
- Customising the Camera’s Settings
- Connecting to other equipment
- Others

9. Playing Back and Editing Images
224
Switching the Playback Method
Rotate the rear dial right.
1k 2k 4k 8k 16k
•
If the rear dial is rotated to the left after the image is enlarged,
the magnification will be reduced.
• When you change the magnification, the zoom position
indication A appears for about 1 second.
• The more a picture is enlarged, the more its quality deteriorates.
• You can move the enlarged part by pressing 3/4/2/1 of the
cursor button or dragging the screen. (P49)
• You can also enlarge (2k) the image by double-touching the
part you want to enlarge. If you double-touch the enlarged image, the magnification is reset to
1k.
• You can also enlarge/reduce the image by pinching out/pinching in (P49) on the part you want
to enlarge/reduce.
• You can forward or rewind the image while maintaining the same zoom magnification and zoom
position for the Playback Zoom by rotating the control dial during Playback Zoom.
Rotate the rear dial left.
1 screen 12 screens 30 screens Calendar screen
display
•
If the rear dial is rotated to the right, the previous playback
screen will be displayed.
• It is possible to switch the playback screen by touching the
following icons.
– [ ]: 1 screen
– [ ]: 12 screens
– [ ]: 30 screens
– [ ]: Calendar screen display
• The screen can be switched gradually by dragging the screen up or down.
• Pictures displayed using [ ] cannot be played back.
∫ To return to Normal Playback
Press 3/4/2/1 to select a picture and then press [MENU/SET].
Using the Playback Zoom
Displaying multiple screens (Multi Playback)
2.0X2.0X
2.0X
2.0X
A
1/98
CAL