
User Guide


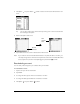
Table Of Contents
- Treo™ 90 Handheld User Guide
- Macintosh Edition
- Contents
- Introduction to Your Treo™ 90 Handheld
- Getting to know your handheld
- Charging the battery
- Using the stylus to get things done
- Elements of the handheld interface
- Customizing your handheld
- Connecting the HotSync cable
- Using desktop software
- Entering Data in Your Handheld
- Managing Your Applications
- Using the Applications Launcher
- Choosing preferences
- Installing and removing applications
- Working with expansion cards
- Security
- Applications Overview
- Common Tasks
- Application-Specific Tasks
- Date Book Plus
- Working in Day View
- Scheduling an event
- Rescheduling an event
- Setting an alarm for an event
- Scheduling repeating or continuous events
- Changing the Date Book Plus view
- Working in Week View
- Working in Week View with Text
- Working in Month View
- Working in Year View
- Working in List View
- Spotting event conflicts
- Working with floating events
- Working with To Do items
- Using the Daily Journal
- Using templates
- Date Book Plus menus
- Contacts
- To Do List
- Memo Pad
- CityTime
- Calculator
- Expense
- Date Book Plus
- Setting Preferences for Your Handheld
- In the Preferences screens, you can do the following:
- Viewing Preferences
- Buttons Preferences
- Connection Preferences
- Date & Time Preferences
- Digitizer Preferences
- Formats Preferences
- General Preferences
- Network Preferences and TCP/IP software
- Selecting a service
- Entering a user name
- Entering a password
- Selecting a connection
- Adding telephone settings
- Connecting to your service
- Creating additional service templates
- Adding detailed information to a service template
- Creating a login script
- Deleting a service template
- Network Preferences menu commands
- TCP/IP troubleshooting
- Owner Preferences
- Phone Preferences
- ShortCuts Preferences
- Advanced HotSync® Operations
- Selecting HotSync setup options
- Customizing HotSync application settings
- IR HotSync operations
- Conducting a modem HotSync operation
- Creating a user profile
- Synchronizing with your desktop e-mail application
- In Palm Mail, you can do the following:
- Setting up Mail on the desktop
- Synchronizing Palm Mail with your E-Mail application
- Using Palm Mail on your handheld
- Viewing e-mail items
- Creating e-mail items
- Looking up an address
- Adding details to e-mail items
- Storing e-mail to be sent later
- Filing e-mail
- Deleting e-mail
- Message list options
- Sorting the Message list
- Palm Mail HotSync options
- Palm Mail menus
- Using the Wireless Application Suite
- To install the Wireless Application Suite:
- Preparing for mobile communications
- Blazer Web Browser
- Palm™ SMS
- One-Touch Mail
- Maintaining Your Handheld
- Troubleshooting Tips
- Non-ASCII Characters for Login Scripts
- Warranty and Other Product Information
- Index

Page 72 Common Tasks
Choosing fonts
In all PIM applications except Expense, you can change the font style to make text easier to read.
You can choose a different font style for each application.
To change the font style:
1. Open an application.
2. Press Menu .
3. Under Options, select Font (/F).
4. Use the scroll buttons to select the font style you want to use.
5. Hold Option and press Return to finish.
Exchanging and updating data:
HotSync operations
The HotSync process automatically synchronizes — that is, exchanges and updates — data
between your handheld and desktop software. Changes you make on your handheld or desktop
software appear in both places after a HotSync operation. HotSync technology synchronizes only
the needed portions of files, thus reducing synchronization time. You can synchronize your data
directly by connecting your handheld to your computer with the HotSync cable or by beaming the
data from the IR port on your handheld to the IR port on your computer, or indirectly with a modem
or network. See Chapter 8 for information about performing HotSync operations via the IR port,
a modem, or a network.
Small font Large fontBold font
Small font
Large font
Bold font