
Product Guide


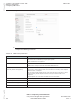


Table Of Contents
- XS-2426G-A Product Guide
- Legal notice
- Contents
- List of tables
- List of figures
- About this document
- 1 What’s new
- 2 ETSI ONT safety guidelines
- 3 ETSI environmental and CRoHS guidelines
- 4 ANSI ONT safety guidelines
- 5 XS-2426G-A unit data sheet
- 5.1 Overview
- 5.2 XS-2426G-A part numbers and identification
- 5.3 XS-2426G-A general description
- 5.4 XS-2426G-A software and installation feature support
- 5.5 XS-2426G-A interfaces and interface capacity
- 5.6 XS-2426G-A LEDs
- 5.7 XS-2426G-A detailed specifications
- 5.8 XS-2426G-A GEM ports and T-CONTs
- 5.9 XS-2426G-A performance monitoring statistics
- 5.10 XS-2426G-A functional blocks
- 5.11 XS-2426G-A standards compliance
- 5.12 XS-2426G-A special considerations
- 6 Install a XS-2426G-A indoor ONT
- 7 Replace a XS-2426G-A indoor ONT
- 8 Configure a XS-2426G-A indoor ONT
- 8.1 Overview
- GUI configuration
- Viewing device information and connection status
- 8.5 Overview
- 8.6 Viewing device information
- 8.7 Viewing LAN status
- 8.8 Viewing WAN status
- 8.9 Viewing WAN IPv6 status
- 8.10 Viewing STA information
- 8.11 Viewing Neighboring Access Points
- 8.12 Viewing home networking information
- 8.13 Viewing optics module status
- 8.14 Viewing statistics
- 8.15 Viewing voice information
- Network configuration
- 8.16 Overview
- 8.17 Configuring LAN
- 8.18 Configuring LAN IPv6
- 8.19 Configuring WAN
- 8.20 Configuring WAN DHCP
- 8.21 Configuring Wireless 2.4GHz
- 8.22 Configuring Wireless 5GHz
- 8.23 Configuring wireless scheduling
- 8.24 Configuring IP routing
- 8.25 Configuring DNS
- 8.26 Configuring TR-069
- 8.27 Configuring GRE tunnel
- 8.28 Configuring Upstream (US) Classifier
- 8.29 Configuring QoS
- Security configuration
- Configuring the Application
- Maintenance
- 8.46 Overview
- 8.47 Configuring the password
- 8.48 Configuring LOID
- 8.49 Configuring SLID
- 8.50 Managing the device
- 8.51 Backing up the configuration
- 8.52 Restoring the configuration
- 8.53 Upgrading firmware
- 8.54 Rebooting the device
- 8.55 Resetting to factory defaults
- 8.56 Diagnosing WAN connections
- 8.57 Viewing log files
- RG Troubleshooting Counters
- 9 ONT configuration file over OMCI

3
Click Save.
You can click Delete to delete the entries.
END OF STEPS
8.28 Configuring Upstream (US) Classifier
The US Classifier feature is used to create policies, classifiers, and classifier rules for upstream
traffic handling. This feature is available to admin users (super users) only.
A policy defines an action to be performed on a set of LAN or WAN packets. A policy can be created
at any time and then subsequently assigned to one or more classifiers.
A classifier is used to select key fields for which the classifier rules will be written. A classifier can be
created at any time and then subsequently assigned to one or more classifier rules.
A classifier rule is used to assign actions to a group of packets based on a set of parameters. A
classification rule must be created against a pre-defined classifier.
Up to 16 policies can be created, with up to 8 classifiers and 32 classifier rules.
1
Click Network→US Classifier from the left pane in the 10G PON Home Gateway page, and
select the Policy tab.
All classifier policies are displayed in the policy table in the page.
Figure 8-25 US Classifier Policy page
Configure a XS-2426G-A indoor ONT
Network configuration
Configuring Upstream (US) Classifier
Nokia ONT
Draft Draft
December 2020
Issue 1 117
Nokia – Proprietary and Confidential
Use pursuant to applicable agreements
3FE-49348-AAAA-TCZZA