Digital Camera User's Manual
Table Of Contents
- Q&A Index
- For Your Safety
- Notices
- Quick Start Guide
- Introduction
- Tutorial
- Live View Photography
- Movie Live View
- Image Recording Options
- Focus
- Release Mode
- ISO Sensitivity
- Exposure
- White Balance
- Image Enhancement
- Flash Photography
- Other Shooting Options
- More About Playback
- Voice Memos
- Connections
- Menu Guide
- The Playback Menu: Managing Images
- The Shooting Menu: Shooting Options
- Custom Settings: Fine-Tuning Camera Settings
- Custom Settings Bank
- a: Autofocus
- b: Metering/Exposure
- c: Timers/AE Lock
- d: Shooting/Display
- e: Bracketing/Flash
- f: Controls
- f1: Multi Selector Center Button
- f2: Multi Selector
- f3: Assign Fn Button
- f4: Assign Preview Button
- f5: Assign Sub-selector
- f6: Assign Sub-selector Center
- f7: Assign Fn Button (Vert.)
- f8: Shutter Spd & Aperture Lock
- f9: Assign BKT Button
- f10: Customize Command Dials
- f11: Release Button to Use Dial
- f12: Slot Empty Release Lock
- f13: Reverse Indicators
- f14: Assign Multi Selector (Vert.)
- f15: Playback Zoom
- f16: Assign Movie Record Button
- g: Movie
- The Setup Menu: Camera Setup
- The Retouch Menu: Creating Retouched Copies
- My Menu/Recent Settings
- Technical Notes

274
Q
4 Start printing.
Select Start printing and press
J to start printing.
To cancel
before all copies have been
printed, press J.
Border
This option is available only if supported by the printer.
Highlight Printer default (use current printer settings),
Print with border (print photo with white border), or No
border and press J to select and exit to the previous
menu.
Time stamp
Highlight Printer default (use current printer settings),
Print time stamp (print times and dates of recording on
photos), or No time stamp and press J to select and
exit to the previous menu.
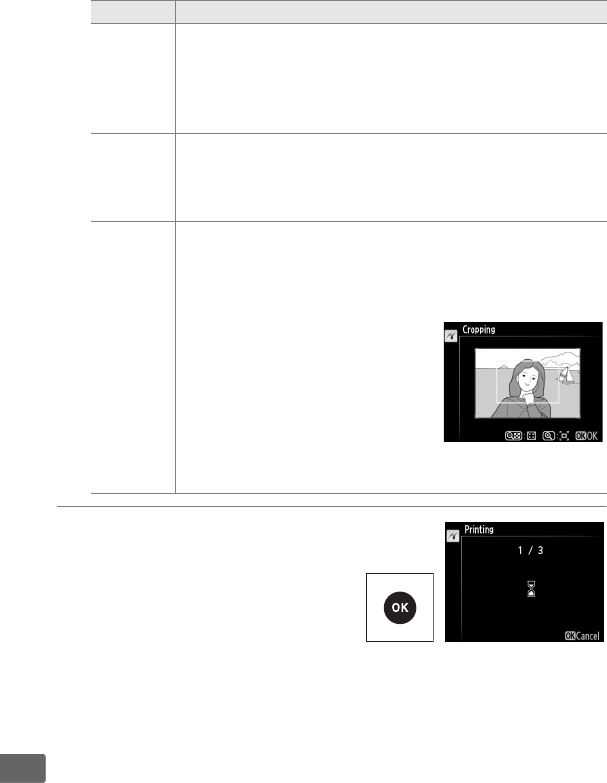
Cropping
This option is available only if supported by the printer.
To exit without cropping, highlight No cropping and
press J.
To crop the current picture, highlight Crop and
press 2.
Selecting Crop displays the
dialog shown at right.
Press X to
increase the size of the crop, W
to decrease.
Position the crop
using the multi selector and press
J.
Note that print quality may
drop if small crops are printed at
large sizes.
Option Description


