
User Manual


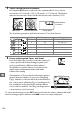


Table Of Contents
- Q&A Index
- Quick Start Guide
- Menu Options
- Table of Contents
- For Your Safety
- Notices
- Introduction
- Basic Photography and Playback
- P, S, A, and M Modes
- User Settings: U1 and U2 Modes
- Release Mode
- Image Recording Options
- Focus
- ISO Sensitivity
- Exposure
- White Balance
- Image Enhancement
- Flash Photography
- Remote Control Photography
- Other Shooting Options
- Live View Photography
- Movie Live View
- Special Effects
- More on Playback
- Connections
- Menu Guide
- The Playback Menu: Managing Images
- The Shooting Menu: Shooting Options
- Custom Settings: Fine-Tuning Camera Settings
- The Setup Menu: Camera Setup
- The Retouch Menu: Creating Retouched Copies
- My Menu/Recent Settings
- Technical Notes

139
t
❚❚ ADL Bracketing
The camera varies Active D-Lighting over a series of exposures.
For more information
on Active D-Lighting, see page 113.
1 Select ADL bracketing.
Choose ADL bracketing for Custom Setting e6 Auto
bracketing set.
2 Choose the number of shots.
Pressing the D button, rotate the main command dial to choose the number
of shots in the bracketing sequence.
Choose two shots to take one photograph
with Active D-Lighting off and another at the value currently selected for Active
D-Lighting in the shooting menu (if Active D-Lighting is off, the second shot
will be taken with Active D-Lighting set to Auto).
Choose three shots to take a
series of photographs with Active D-Lighting set to Off, Normal, and High.
D will be displayed in the viewfinder (see right); the
control panel will show d.
Number of shots
Bracketing progress
indicator
D button Main command dial Control panel