
Notification Manual


14
Network Remote Access Setup
Port Forwarding must be enabled on your router. See your routers user’s manual on how to setup
port forwarding.
NexPump Internet Screens
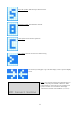
Status Page
Bright Green – System OK
Dark Green – Setting is Off
Red – Alert Condition or Red Flag that Setting is On
Amber – Amber Flag that Setting is On
Purple – Manual Mode is On
Blue – Pump Activated or In Backup Mode
Cyan – In Primary Mode
Command Page
Run Commands, Set Configuration Parameters or Turn Functions On/Off from this screen.
IP Configuration Page
This screen can be used to manually configure IP Information when DHCP disabled HTTP Port and Web Password can
also be changed here.
WIFI Configuration Page (Wireless Version)
Once your wireless is configured, you can see your configuration or make changes from this screen.
Email Configuration Page
The Email screen is used to configure where and how Status Emails are sent. An Email_To, Email_Host, Email_User
and Email_Password are required.
(Note: The Email settings are not dependent for the Notification System. The Notification System relies ONLY on an
Internet Connection. These settings are ONLY for the Status Emails.)
Enter EMail_To with a valid Email Address.
Enter EMail_Host with a valid domain name or valid IP Address of the Email Host server
If your account requires a login and password then enter those in the E-Mail User and Password fields.
The Email Port can be set to 25,587.
TLS is supported. (Use Port 587 for TLS)
Recurring time can be set to 0 – 28. This represents a multiple of the 12 Hour Self-Tests. 0 will disable Status Email. A
setting of 1 will send Status Emails every 12 Hours, 2 every 24 hours, etc.
Time Configuration Screen
Set Time Configuration to the format you prefer and the Time Zone you are in.