
Installation Sheet


18
Troubleshooting
If faucet does not appear to be functioning
properly, repeat the faucet startup process
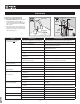
* Startup process denition: Disconnect the battery
holder cable (T) and leave disconnected for 10
seconds. Reinsert battery holder cable (T) and ensure
cable is pushed all the way into the control box (N)
(Refer to step 18).
** Ensure that no people or objects are within 3 feet of
the faucet before startup. These could interfere with
the startup process. Wait 30 seconds for the faucet to
complete the startup process.
Symptom Probable Cause(s) Recommended Action(s)
Water does not ow and Blue LED on the
front of the spout does not blink.
1. Data cable is not plugged into control box all the way. Push data cable rmly into control box (Step 9) and repeat faucet startup process.*
2. Power cable is not plugged into control box all the way. Perform faucet startup process.*
3. Batteries not installed properly. Unplug battery holder cable. Install the batteries in proper orientation into the battery
holder (Step 14). Repeat faucet startup process.*
4. Batteries are dead in the battery holder. Unplug battery holder cable. Replace batteries with new AA alkaline batteries (Step
14).Repeat faucet startup process.*
5a. If using AC adapter only and electricity is out. Temporarily use the battery holder supplied with the faucet.
5b. If using AC adapter with power splitter and electricity
is out.
Faucet will function normally until battery power is depleted.
6a. If using AC adapter only and the wall switch for power
outlet is OFF.
Turn the wall switch ON to ensure power at outlet. Clear area for proper startup.**
6b. If using AC adapter with power splitter and the wall
switch for power outlet is OFF.
Turn the wall switch ON to ensure power at outlet. If the wall switch remains OFF, the
faucet will function normally until battery power is depleted.
Water does not ow and Blue LED on the
front of the spout does blink.
1. Water supplies are not turned ON. Turn ON the water supplies (Step 16).
Low ow in HOT/COLD/BOTH.
OR
Only HOT or COLD ow.
1. HOT/COLD/BOTH water supplies are not turned ON. Turn ON the water supplies (Step 16).
2. Pinched or kinked hoses. Make sure all hoses are not pinched or kinked.
3. Clogged lters. Clean both lters (See pages 16-17).
Sensors not functioning.
OR
Sensor range too short.
1. Protective labels were left on the sensors during faucet
startup process.
Remove the labels from the sensors and repeat faucet startup process.*
2. Sensors are deactivated. Reactivate sensors (page 15).
3. Person or object within 3 feet of faucet during faucet
startup process.
Repeat faucet startup process.*
4. Handle slightly open. Close the handle fully.
Handle position for HOT and COLD water
ow is reversed (COLD forward).
1. HOT and COLD hoses are installed in reversed order at
wall stops.
Turn OFF supplies. Connect the HOT supply hose to the HOT stop and COLD supply hose
to the COLD stop.
2. HOT and COLD hoses are installed in reversed order at
control box.
Turn OFF supplies. Connect the HOT supply hose to the HOT side of the control box and
COLD supply hose to the COLD side of the control box (see step A2 for hose removal).
Water keeps owing and does not turn o. 1. Battery holder cable unplugged while faucet running. Unplug the battery holder cable fully and perform faucet startup process.*
2. Data cable unplugged while faucet running. Plug the data cable and perform faucet startup process.*
3. Handle in open position. Close the handle.
Slow blinking Blue LED on front of spout. 1. Low battery voltage. Replace batteries with new AA alkaline batteries (Step 14).
Fast blinking Blue LED on front of spout. 1. Dead batteries. Replace batteries with new AA alkaline batteries (Step 14).
2. Rechargeable batteries being used.
Replace with and only use AA alkaline batteries for proper faucet functionality (Step 14).
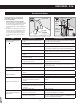
Data
Hot Side
Filter
Inside
Fitting x2
Power
Wave Sensor
Ready Sensor
with Blue LED