
Installation Instructions


Quantum® Pressure-Assist
1.6 Gpf (6.0 Lpf) Two-Piece Toilet
Quantum® 1.28 Pressure-Assist
1.28 Gpf (4.8 Lpf) Two-Piece Toilet
QuantumOne™ Pressure-Assist
1.0 Gpf (3.8 Lpf) Two-Piece Toilet
NOTE: Installation Instructions apply to both models
unless indicated.
Removing Old Toilet
1. Turn off the water supply, then flush to empty tank.
Use a sponge and basin to pick up any water left in
the tank or bowl.
2. Disconnect the supply line from the toilet tank.
3. Disassemble tank from bowl by removing lock
nuts from the underside of the tank.
4. Pry off the bolt caps, remove nuts that secure the
toilet to the floor. Use a rocking motion to remove
the old toilet.
5. Scrape the old wax gasket from the floor flange.
Aaching Toilet Bowl to Floor Flange
1. Ensure flange is level and flat with finished floor.
2. The floor flange must be properly installed. It
must be the correct distance from the wall. It
must be flush with the surface of the floor.
3. The correct distance, measured from the wall
to the centerline of the floor flange should be 12”
(30.5 cm).
4. The top surface of the floor flange must be flush
and level with the surface of the finished floor.
Check the distance and the level with a straight
edge ruler.
Seing the Bowl
1. Clean any
debris out of
the flange.
2. Install the
mounting
bolts into the
side slots
of the floor flange. The bolts should be inserted
into the slots, bolt heads down, threaded shank
pointing upward.
3.
Remove the toilet bowl from the carton. Sit the bowl
upright on the floor, away from the floor flange.
4. Put the wax seal ring in
place, centered on top of
the floor flange. Push the
wax ring down into place
(the mounting bolts will
protrude upward at the
side of the ring).
5. Alternate way is to place
wax ring on the ‘Horn”
of the bowl (bowl shown
upside down).
6. Straddle the toilet bowl,
lift it and carry it over
the flange. Lower it
straight down onto
the wax seal ring.
Make sure the bolts
emerge up through
the holes in the base
of the toilet bowl.
7. Push down all around
bowl to seal onto wax ring.
8. Apply your weight to push
the toilet bowl onto the
wax seal ring. Press down
evenly, all the way around
the bowl rim.
9. Make sure the toilet bowl is
aligned perpendicular to
the wall with a carpenter’s
square. Adjust alignment if
necessary.
10. Install the bolt cover
retainer plates, washers
and nuts. Tighten finger
tight, then use a wrench to snug the nuts. DO
NOT OVERTIGHTEN with the wrench–damage or
fracturing of the base of the toilet may occur.
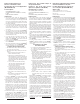
Aaching the Vitreous China Toilet Tank to the
Toilet Bowl for Two Piece Models
1. Place the tank-to-bowl rubber gasket onto the
locknut on the flush valve shank against the
boom of the tank
(Be sure the locknut is
tight).
2. Place the tank in
position on the bowl.
Be sure to align holes
in the boom of the
tank with the holes
in the bowl.
3. Screw the rubber
washers onto the
mounting bolts and
insert these bolts
through the holes
inside the tank and
down through the
holes in the bowl.
4. Assemble the washers
and nuts in pairs and
screw onto bolts
protruding from the
underside of toilet bowl
ledge.
5. Tighten all the nuts
finger tight. Carefully
tighten them with a
wrench to make leak
proof seal. DO NOT
OVERTIGHTEN with the wrench–damage or
fracturing of the toilet may occur.
6. Align tank with floor or wall by tightening or loos-
ening one or the other of the front bolts. You can
tilt tank forward or backward by adjusting back
bolt. After aligning tank, check to be sure all three
nuts are tight.
7. After the toilet tank is aached to the toilet bowl,
check the floor flange nuts for tightness. The
additional weight of
the tank has added to
the assembled toilet
and may require
careful tightening of
the floor flange nuts.
8. Snap the bolt cap
covers onto the
retainer plates to
finish the job.
Care and Maintenance
The outside surface of your china fixture can be
cleaned with mild soap and warm water using a soft
cloth or sponge. Do not use an abrasive cleaner or
solvent of any kind. A toilet bowl cleaner can be used
to clean the surfaces of the toilet bowl.
WARNING: Do not use an in-tank type bowl cleaner
in your toilet. In-tank cleansers containing chlorine
(calcium hypochlorite) can seriously damage fiings
in the tank. Mansfield Plumbing will not be responsi-
ble for any tank fiing damage caused by the use of
cleaners containing chlorine (calcium hypochlorite).
Winterizing Tip
If you choose to “winterize” the bowl, first follow
the winterizing instructions for the pressure vessel
found in the “Owner’s Service Manual – 503 and
504 Series.” If not found, go to www.flushmate.com
under document library/service manuals. After the
pressure vessel has been winterized, slowly induce
3 quarts of anti-freeze to the bowl (be careful not to
cause the bowl to flush). Be sure to reconnect all the
fiings when puing the toilet back in service.
FLUSH ACTUATOR ADJUSTMENT
(Tank 122)
NOTE: The tank is factory-adjusted for consistent,
safe seal depth in the bowl after flushing. Field
readjustment is not required. The refill is preset
and locked.
1. Flush actuator height may be adjusted to assure
positive operation of the actuator buon.
2. Be sure tank cover is in place.
3. Lightly press actuator buon down until resis-
tance is felt when contact is made with the top of
the flush actuator. Travel should be approximately
1/8” (3 mm) for normal operation.
4. When necessary remove cover, loosen setscrew
in actuator cap and turn cap to increase gap
(clockwise) or decrease gap (counterclockwise).
5. Tighten setscrew securely after adjustment.
Replace tank cover and recheck.
BOLTS
RUBBER
WASHERS
TOILET TANK
TOILET BOWL
WASHERS/NUTS
TANK-TO-BOWL GASKET
INSTALLATION INSTRUCTIONS
2