
User's Manual


Tile Mode
The Tile mode allows you to connect more than one display and play a single media file
simultaneously from these connected displays.
Creating a tile mode
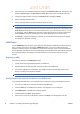
1. Select the Tile tab. The Tile Mode Wizard appears as shown below.
2. To create a new tile mode, select Create Tile Mode. To modify a previous tile mode, select
Adjust Tile Mode.
3. Select the number of columns and rows to create for the tile mode.
4. Select a display group to apply the tile matrix, and then click Set. The Set button is enabled only
when a display group is selected. Click Next.
NOTE: The tile size cannot exceed the maximum number of displays connected. A group of
displays must be properly configured in advance. The maximum size of tile mode supported is 5
x 5.
5. Assign a tile ID to each display of the group that you chose for the tile mode. This tile ID helps
you to identify the displays within the group. The display tile IDs are numbered from top-left (1 -
25). Click Next.
6. Set an input signal to use for each display within the group. The input signal type for each
display can be different within the same group.
7. Check whether the the display ID, tile ID, input signal type, and tile size are set correctly, and
then click Apply.
8. Click OK to confirm and exit the Tile Mode Wizard.
Modifying a tile mode
The following describes how to modify the previous tile mode.
1. Select the Tile tab. The Tile Mode Wizard appears.
2. To modify a previous tile mode, select Adjust Tile Mode. The Tile Mode Summary dialog
appears.
3. Modify the tile mode as necessary.
ENWW
Tile Mode
69
2
n
d
D
r
aft