
Projector Instruction Manual


Chapter 3 Service Adjustments
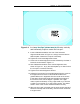
Figure 3-6.
RGB Electronic Focus adjustments.
3.8 ILA
®
Overlap
This adjustment positions the ILA
®
assemblies in their sockets.
Adjustment should only be made once or whenever an ILA
®
is
replaced.
To determine if this adjustment is necessary:
1. Note the value of the ILA
®
bias for Red, Green and Blue so
they can be returned to these levels when this procedure is
complete.
2. Hide all three colors.
3. Increase the ILA
®
biases to maximum for all 3 colors. With all 3
colors at maximum, the image on the screen should be a white
screen with some colors at the edges.
4. Observe the right, left, top, and bottom of the screen. Normally,
green is the reference to which blue and red will be matched.
(NOTE: If the green ILA
®
was replaced, the blue or red image
should be used as the reference to which green is matched.) If
a red or blue border is present on either side or at the top or
bottom the ILA
®
overlap needs adjustment. If both red and blue
overlap, the border will be yellow. In either case, proceed with
the adjustment below. If there is no overlap, reset the ILA
®
biases to their previous levels from Step 2.
To perform an ILA
®
Overlap adjustment:
Remove the rear cover (Section 4.2) and tilt the electronic module
up (Sections 3.3).
1. Continue with all three colors hidden.
2. Loosen the 2 wing nuts at the top of the ILA
®
assembly to be
adjusted (Figure 4-12).
3. If the overlap is at the left or right, grasp the ILA
®
assembly and
slide it to the right or left so that the edges coincide with the
edges of the other two ILA
®
assemblies. CAUTION! To avoid
3-10 Model 200 Service Manual