ENGLISH CONTENTS SAFETY PRECAUTIONS 2–3 AUTOMATIC DEMONSTRATION 4 PROVIDED ACCESSORIES 4 GETTING STARTED COMPACT VHS CAMCORDER GR-SXM330 GR-SX960 GR-AXM230 GR-AX760 RECORDING 6 – 13 14 – 29 Basic Recording .......................... 14 Basic Features ........................... 16 Zooming, Picture Stabilizer, 5-Sec. Recording, Quick Review, Retake, Video Light Advanced Features ......................
EN Dear Customer, Thank you for purchasing the JVC Compact VHS camcorder. Before use, please read the safety information and precautions contained in the following pages to ensure safe use of this product. Using This Instruction Manual • All major sections and subsections are listed in the Table Of Contents on the cover. • Notes appear after most subsections. Be sure to read these as well. • Basic and advanced features/operation are separated for easier reference. It is recommended that you . . . ....
EN The EPA certified RBRC® Battery Recycling Seal on the nickel-cadmium (Ni-Cd) battery indicates JVC is voluntarily participating in an industry program to collect and recycle these batteries at the end of their useful life, when taken out of service in the United States. The RBRC® program provides a convenient alternative to placing used Ni-Cd batteries into the trash or the municipal waste stream, which may be illegal in your area.
EN AUTOMATIC DEMONSTRATION Automatic Demonstration takes place when “DEMO MODE” is set to “ON” (factory-preset). n Available when the Power Switch is set to “ ” or “ ”. n Operating the Power Zoom Lever during the demonstration stops the demonstration temporarily. If the Power Zoom Lever is not moved for more than 1 minute after that, the demonstration will resume. n “DEMO MODE” remains “ON” even if the camcorder power is turned off.
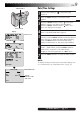
EN How To Attach The Lens Cap To protect the lens, attach the provided lens cap to the camcorder as shown in the illustration.
GETTING STARTED EN Power Hook on. 1 This camcorder’s 2-way power supply system lets you choose the most appropriate source of power. Do not use provided power supply units with other equipment. 2 Push in. CHARGING THE BATTERY PACK 1 Make sure the battery pack is attached to the camcorder. Hook its end to the camcorder 1 and push the battery in until it locks in place 2. •If the battery pack is attached in the wrong position, a malfunction may occur. 2 3 Set the Power Switch to “OFF”.
EN USING THE BATTERY PACK ATTENTION: Before detaching the power source, make sure that the camcorder’s power is turned off. Failure to do so can result in a camcorder malfunction. Perform step 1 of “CHARGING THE BATTERY PACK” (Z pg. 6). Approximate recording time (unit: min.) Battery pack Charge marker A charge marker is provided on the battery pack to help you remember whether it has been charged or not.
GETTING STARTED (cont.) EN Grip Adjustment Power Zoom Lever Recording Start/Stop Button 3 2 1 2 3 1 OFF AY M A Set to “ “ ”. Separate the Velcro strip. Pass your right hand through the loop and grasp the grip. Adjust so that your thumb and fingers can easily operate the Recording Start/Stop Button and Power Zoom Lever. Refasten the Velcro strip. Set the Power Switch to “ ” or “ ”. Adjust the viewfinder manually for best viewability.
EN Date/Time Settings MENU Wheel 1 2 3 Power Switch Display CAME RA ME NU © T O S Y S T EM ME NU F OCU S AU T O E X POS UR E AU T O M . W. B . AU T O Menu Screen S Y S TEM ME NU © NE X T R E C MOD E SP D . Z OOM 50x S Y S T EM ME NU © T O CAME RA ME NU R E C T I ME OF F I N T . T I ME OF F T E L E MACRO OF F T I T L E L ANG . E NG L I SH DA T E / T I ME D EMO MOD E OF F DATE / T I ME 2001 J UN 28 PM 8 : 2 0 ”. The power lamp Press the MENU Wheel in. The Menu Screen appears.
GETTING STARTED (cont.) EN Recording Format Setting MENU Wheel (GR-SXM330/SX960 only) Set the recording format according to the format of the tape used or type of recording you wish to perform. 1 2 3 Power Switch Display: when a VHS cassette is loaded. S Y S T EM ME NU © NE X T R E C MOD E SP 50x D . Z OOM W I DE OF F S – VHS E T ON T A P E L E NG T H T 3 0 D I S P L AY FUL L © R E T URN Menu Screen When an S-VHS cassette is loaded: S-VHS S Y S T EM ME NU © NE X T R E C MOD E SP 50x D .
EN NOTES about S-VHS and S-VHS ET n JVC EHG (Extra High Grade) tapes are recommended for superior results. Use S-VHS tape for storing recordings for an extended period or for recording important scenes, as it enables higher-quality recording and playback. n With some tapes, better picture quality may not be obtained even with S-VHS ET recording. It is recommended that you do test record beforehand to make sure whether better results can be obtained.
GETTING STARTED (cont.) EN Recording Mode Setting MENU Wheel Set the tape recording mode depending on your preference. 1 2 3 4 Power Switch Display REC MODE REC MODE Menu SP EP Set the Power Switch to “ comes on. ”. The power lamp Press the MENU Wheel in. The Menu Screen appears. Rotate the MENU Wheel to select “ TO SYSTEM MENU” and press it to display SYSTEM MENU. Rotate the MENU Wheel to select “REC MODE” and press it. The REC MODE Menu appears.
EN EJECT Switch Cassette holder 1 2 3 4 5 Close Button EJECT Switch Close Button Turn to take up slack. Gear Open the LCD monitor fully (models equipped with LCD monitor only). Slide EJECT until the cassette holder opens. Do not use force to open. Insert or remove a cassette. When inserting, make sure the label is facing outward. Press the Close button to close the cassette holder until it locks into place. Close the LCD monitor (models equipped with LCD monitor only).
RECORDING Basic Recording EN NOTE: You should already have performed the procedures listed below. If not, do so before continuing. ● Power ( Z pg. 6) ● Load A Cassette ( Z pg. 13) ● Recording Mode Setting ( Z pg. 12) ● Tape Length Setting ( Z pg. 12) ● Grip Adjustment ( Z pg. 8) ● Viewfinder Adjustment ( Z pg. 8) During shooting Power Switch Shooting While Watching The Viewfinder 1 Make sure the LCD monitor is closed and locked (models equipped with LCD monitor only).
EN NOTES: ● If the Record-Standby mode continues for 5 minutes without performing Zoom or any other operations, the camcorder’s power shuts off automatically. Set the Power Switch to “OFF”, and then back to “ ” or “ ” to turn the camcorder on again. ● If you are recording on a cassette from the middle (such as when a tape is removed and re-inserted during recording), use the Retake function ( Z pg. 17) to find the end of the last recording so you do not erase any of it.
RECORDING Basic Features EN Zooming: Zoom in (T: Telephoto) Zoom out (W: Wide angle) RETAKE (2/3) Button LIGHT OFF/AUTO/ON Switch (GR-SXM330/ SX960/AXM230 only) 5 SEC. REC Button (GR-SX960/ AXM230/AX760 only) Power Zoom Lever P. STABILIZER Button Display Zoom indicator bar 1x Zoom level indicator Approximate zoom ratio Picture Stabilizer indicator PAUSE 5S 5 Sec.
EN 5Sec. Rec (5-Sec. Recording) (GR-SX960/AXM230/AX760 only): To record a scene for 5 seconds, providing quick scene transitions like those seen in TV programs. 1) Make sure the recording mode is set to “SP”. 2) During Record–Standby, press 5SEC. REC. “ 5S” appears and 5Sec. Rec is reserved. 3) Press the Recording Start/Stop Button. Recording starts, and after 5-second recording is finished, the camcorder reenters the Record–Standby mode automatically. 4) To cancel the 5Sec. Rec. function, press 5SEC.
RECORDING Advanced Features EN SNAPSHOT Button (GR-SXM330 only) Snapshot (GR-SXM330 only) Use your camcorder like a regular camera and take a snapshot, or several of them in succession. 1 2 Power Switch NOTES: ● After SNAPSHOT is pressed, there is a momentary camera shutter-type blackout together with the sound effect of a shutter closing, which is recorded together with the image. ● Snapshot is available during playback as well. However, the shutter sound is not heard.
EN FADE/WIPE Button Fade/Wipe Effects These effects let you make pro-style scene transitions. Fade- or wipe-in works at recording start, and fade- or wipe-out works at recording end. 1 2 Power Switch Recording Start/Stop Button 3 4 Set the Power Switch to “ ”. Press FADE/WIPE repeatedly until the desired mode’s name and indication appear. They are displayed for approx. 2 seconds, then the name disappears so that only the indication remains. The effect is reserved.
RECORDING Advanced Features (cont.) EN P.AE Button Program AE With Special Effects 1 2 Set the Power Switch to “ 3 To cancel the effect, press P.AE repeatedly until “OFF” appears. “OFF” is displayed for approx. 2 seconds. ”. Press P.AE repeatedly until the desired mode’s name and indication appear. They are displayed for approx. 2 seconds, then the name disappears so that only the indication remains. The mode is activated.
EN DIGIFECT Button Digital Effects 1 2 Set the Power Switch to “ 3 To cancel the effect, press DIGIFECT repeatedly until “OFF” appears. “OFF” is displayed for approx. 2 seconds. ”. Press DIGIFECT repeatedly until the desired mode’s name and indication appear. They are displayed for approx. 2 seconds, then the name disappears so that only the indication remains. The mode is activated. Power Switch SEPIA Recorded scenes have a brownish tint like old photos. Combine this with the WIDE mode (Z pg.
RECORDING Advanced Features (cont.) EN Using Menus For Detailed Adjustment This camcorder is equipped with an easy-to-use, on-screen menu system that simplifies many of the more detailed camcorder settings. MENU Wheel Power Switch Display CAME RA ME NU © T O S Y S T EM ME NU F OCU S AU T O E X POS UR E AU T O Menu Screen S Y S T EM ME NU © NE X T SP R E C MOD E D .
EN MENU SCREEN EXPLANATIONS CAMERA MENU FOCUS Refer to “Focusing” (Z pg. 28). EXPOSURE Refer to “Exposure Control” (Z pg. 27). M.W.B. Refer to “White Balance Adjustment” and “Manual White Balance Operation” (Z pg. 29). S.LX MAX To record a subject in a darkly lit environment, when it is more convenient to shoot the subject with a brighter image even if the picture becomes slightly coarse.
EN SYSTEM MENU (cont.) S-VHS* (S-VHS ET*) (GR-SXM330/ SX960 only) RECORDING Advanced Features (cont.) ON Records in S-VHS on a VHS or S-VHS cassette (Z pg. 10). OFF Records in VHS on a VHS or S-VHS cassette (Z pg. 10). TAPE LENGTH Allows you to set the tape length depending on the tape used (Z pg. 12). DISPLAY FULL Make all of the indications appear on the LCD monitor**/ viewfinder during playback or recording.
EN Date/Time Insert Allows you to display the date and time in the camcorder or on a connected color monitor, as well as to record them manually or automatically. You should have already performed the Date/ Time Setting procedure (Z pg. 9). MENU Wheel Power Switch DEC 2 5 . 0 1 AUTO DATE DEC 25. 01 (DATE) AM 10 : 25 : 00 (TIME) 1 2 3 4 5 Set the Power Switch to “ ”. Press the MENU Wheel in. The Menu Screen appears. Rotate the MENU Wheel to select “DATE/TIME DISP.” and press it.
RECORDING Advanced Features (cont.) EN NOTE: Before performing the following steps, make sure that: ● The Power Switch is set to “ ”. ● The camcorder is in the Record-Standby mode. ● The recording mode is set to “SP”. MENU Wheel Recording Start/Stop Button Animation You can shoot a series of pictures, each slightly different, of the same object for a brief period of time.
EN Exposure Control MENU Wheel Power Switch Manual Exposure Screen 00 Exposure control level counter To brighten the image –06 –06 This feature automatically adjusts the iris for the best available picture quality, but you can override it and make the adjustment manually. Manual exposure adjustment is recommended in the following situations: • When shooting using reverse lighting or when the background is too bright.
RECORDING Advanced Features (cont.) EN Focusing Focus detection zone AUTO FOCUS NOTES: ● If the lens is smeared or blurred, accurate focusing is not possible. Keep the lens clean, wiping with a piece of soft cloth if it gets dirty. When condensation occurs, wipe with a soft cloth or wait for it to dry naturally. ● When shooting a subject close to the lens, zoom out first ( Z pg. 16).
EN White Balance Adjustment Manual White Balance Operation A term that refers to the correctness of color reproduction under various lighting. If the white balance is correct, all other colors will be accurately reproduced. The white balance is usually adjusted automatically. However, more advanced camcorder operators control this function manually to achieve a more professional color/tint reproduction. Perform Manual White Balance when shooting under various types of lighting.
PLAYBACK Basic Playback EN Stop (5) Button Rewind (2) Button Play/Pause (4/6) Button Fast-Forward (3) Button BRIGHT* Wheel Power Zoom Lever (VOL.*) Speaker* Set to “ ”. * Models equipped with LCD monitor only. 1 2 Load a tape (Z pg. 13). Set the Power Switch to “ ”. To start playback, press 4/6. •To stop playback, press 5. •Press 2 to rewind, or 3 to fast-forward the tape during Stop mode. NOTES: ● The camcorder shuts off automatically after about 5 minutes in Stop mode.
PLAYBACK Features COUNTER R/M Button Stop (5) Button Rewind (2) Button Play/Pause (4/6) Button Fast-Forward (3) Button TRACKING Wheel TBC Button Set to “ ”. EN Tracking: Eliminates noise bars that appear on-screen during playback. Factory-preset is Auto Tracking. To activate Manual Tracking: 1) Press the TRACKING Wheel for approx. 2 seconds. “MT” appears. 2) Rotate the TRACKING Wheel so that the noise bars disappear. ● To return to Auto Tracking, press the TRACKING Wheel for approx.
PLAYBACK Connections And Tape Dubbing EN These are some basic types of connections. When making the connections, refer also to your VCR and TV instruction manuals. A. Connection to a TV or VCR equipped with an S-VIDEO IN and A/V input connectors (GR-SXM330/SX960 only) Use optional S-Video and Audio cables.
EN Basic Connections Tape Dubbing 1 2 1 2 3 4 5 Make sure all units are turned off. Connect the camcorder to a TV or VCR as shown in the illustration (Z pg. 32). If using a VCR . . . go to step 3. If not . . . go to step 4. Connect the VCR output to the TV input, referring to your VCR’s instruction manual. Turn on the camcorder, the VCR and the TV. Set the VCR to its AUX input mode, and set the TV to its VIDEO mode.
PLAYBACK Using The Cassette Adapter EN Cassette Adapter (VHS Playpak) Use this to play back an S-VHS-C/VHS-C video cassette recorded with this camcorder on a VHS VCR. It is fully compatible with any S-VHS/VHS video cassette recorder. The cassette adapter is battery powered and automatically performs tape loading and unloading.
USING THE REMOTE CONTROL UNIT (GR-SXM330 only) EN The Full-Function Remote Control Unit can operate this camcorder from a distance as well as the basic operations (Playback, Stop, Pause, Fast-Forward and Rewind) of your VCR. 1 2 8 3 4 5 6 9 0 ! @ 7 Functions Buttons With the camcorder’s Power Switch set to “ ” or “ ”. 1 Infrared beam Transmits the beam signal. With the camcorder’s Power Switch ”. set to “ transmitting window 2 ZOOM (T/W) Buttons Zoom in/out (Z pg.
EN USING THE REMOTE CONTROL UNIT (GR-SXM330 only) (cont.) Installing The Batteries The remote control uses two ”AAA (R03)” size batteries. See “General Battery Precautions” (Z pg. 48). 1 3 1 2 3 2 Remote sensor Transmitted beam effective area 5m (16 ft) Open the battery compartment cover as illustrated. Insert two ”AAA (R03)” size batteries in the correct direction. Replace the battery compartment cover. When using the remote control, be sure to point it at the remote sensor.
EN Remote sensor Playback Zoom To magnify the recorded image up to 10X at any time during playback. NOTES: ● Use the remote control unit to perform this procedure. ● Make sure that the TBC mode is activated ( Z pg. 31). 1) Press PLAY to find the scene of interest. 2) Press the ZOOM Buttons (T/W) on the remote control. Make sure the remote control is pointed at the camcorder’s remote sensor. Pressing T zooms in. To End Zoom . . . .... press and hold W until magnification returns to normal.
EN USING THE REMOTE CONTROL UNIT (GR-SXM330 only) (cont.) COUNTER R/M Button Insert Editing You can record a new scene onto a previously recorded tape, replacing a section of the original recording with minimal picture distortion at the in- and out-points. The original audio remains unchanged. NOTE: Use the remote control unit to perform this procedure.
EN Audio Dubbing Display e4 M– 0 : 0 5 : 2 0 Audio dubbing indicator During Audio Dubbing Remote sensor Microphone PLAY REW STOP START/STOP PAUSE A.DUB You can record a new soundtrack on a prerecorded tape. The existing original sound is erased and replaced by the sound from the built-in microphone. Perform steps 1, 2 and 3 of the Insert Editing procedure (Z pg. 38) before continuing. NOTE: Use the remote control unit to perform the following procedures.
TROUBLESHOOTING EN If, after following the steps in the chart below, the problem still exists, please consult your JVC dealer. The camcorder is a microcomputer-controlled device. External noise and interference (from a TV, a radio, etc.) might prevent it from functioning properly. In such cases, first disconnect its power supply unit (battery pack, AC Adapter, etc.); and then re-connect it and proceed as usual from the beginning. SYMPTOM POSSIBLE CAUSE(S) POWER No power is supplied.
EN SYMPTOM POSSIBLE CAUSE(S) OTHER During recording, the indications do not appear. ● Set “DISPLAY” to “FULL” in SYSTEM MENU (Z pg. 24). The tape will not eject. ● The battery pack is running low. ● If the LCD monitor is not open over 60 degrees, the EJECT Switch does not function. Some functions are not available. ● The Power Switch is set to “ ”. ● Certain combinations of modes or effects are not possible to use. Vertical white lines appear when shooting a very bright object.
DETAILS EN ITEMS NOTES ➪ Power (Z pg. 6) ❍ Perform charging where the temperature is between 10°C and 35°C (50°F and 95°F). 20°C to 25°C (68°F to 77°F) is the ideal temperature range for charging. If the environment is too cold, charging may be incomplete. ❍ Charging times are for a fully discharged battery pack. ❍ Charging time varies according to the ambient temperature and the status of the battery pack. ❍ To avoid interference with reception, do not use the AC Adapter near a radio.
INDEX Terms EN A N AC Adapter ............................................................. pg. 6, 7 Animation Recording .......................................... pg. 26, 37 Audio Dubbing ......................................................... pg. 39 Auto Date Record ..................................................... pg. 25 Auto Focus ................................................................ pg. 28 Auto Shut Off ...................................................... pg.
INDEX Controls, Connectors And Indicators EN 1 2 3 4 5 t y 6 7 8 9 0! @ i u o # $ % ^ @ p q w e ) Q W E ( r * & R T Y U
EN Controls Connectors 1 Video Light Switch [LIGHT OFF/AUTO/ON] The connectors q to r are located beneath the cover. q S-Video Output Connector [S] (GR-SXM330/SX960 only) .................... Z pg. 32 w Audio Output Connector [A] ................ Z pg. 32 e Video Output Connector [V] ................ Z pg. 32 r DC IN Connector ............................... Z pg. 6, 7 2 3 4 5 6 7 8 9 0 ! @ # $ % ^ & * ( ) (GR-SXM330/SX960/AXM230 only) ..... Z pg. 17 Stop Button [STOP] .........................
INDEX Indications EN Indications During Recording 1 7 8 9 0 ! @ # % $ 2 3 5 4 S–ET 1 2 0M I N REC S P 444 1 N I GH T 1 0 x S – VHS REC P AU S E T40 +0 2 Blinks when a tape is about to reach its end. 2 Recording Mode Indicator (SP/EP) ........ Z pg. 12 3, 8 Digital Effect Indicator ..................... Z pg. 21 Displayed at 3 for approx. 2 seconds when the Digital Effect is switched from one mode to another by pressing DIGIFECT, then only the indicator remains at 8.
EN Indications During Playback 1 23 1• 4 5 6 7 8 S–ET T BC MONO T ON E 2 3 SP 4 –1 : 23 : 45 AT 4 5 6 7 M– 0 : 1 2 : 3 4 VO L UME – – – – – –6– – – – – + 0 9 8 9 0 Warning Indications Indications : Cassette Indicator Displayed when a tape is loaded. • w: Insert Editing Indicator (GR-SXM330 only) ............................ Z pg. 38 Displayed during Insert Editing. TBC Indicator ...................................... Z pg. 31 Playback Special Effect Indicator (GR-SXM330 only) ............
CAUTIONS EN When using the AC Adapter in areas other than the USA n The provided AC Adapter features automatic voltage selection in the AC range from 110 V to 240 V. USING HOUSEHOLD AC PLUG ADAPTER In case of connecting the unit’s AC Adapter to an AC wall outlet other than American National Standard C73 series type use an AC plug adapter, called a “Siemens Plug”, as shown. For this AC plug adapter, consult your nearest JVC dealer.
EN 2. Store cassettes . . . ... away from heaters or other heat sources. ... out of direct sunlight. ... where they won’t be subject to unnecessary shock or vibration. ... where they won’t be exposed to strong magnetic fields (such as those generated by motors, transformers or magnets). ... vertically, in their original cases. Main Unit 1. For safety, DO NOT . . . .... open the camcorder’s chassis. .... disassemble or modify the unit. .... short-circuit the terminals of the battery pack.
EN For Your Maintenance 1. After Use 1 Set the Power Switch to “OFF” to turn off the camcorder. 2 Open the LCD monitor to an angle of over 60 degrees. Slide EJECT to open the cassette holder, then remove the cassette. 3 Close and lock the cassette holder by pressing the Close button. 4 Close and lock the LCD monitor. 5 Slide BATTERY RELEASE to remove the battery pack. 6 Attach the provided lens cap to the camcorder’s lens. 2. Cleaning The Camcorder 1 CLEAN EXTERIOR Wipe gently with a soft cloth.
SPECIFICATIONS Camcorder EN Viewfinder : Electronic viewfinder with 0.55" color LCD (GR-SX960 only) Electronic viewfinder with 0.5" black/white CRT (GR-SXM330/AXM230/AX760 only) General Format Power source : S-VHS (GR-SXM330/SX960 only)/VHS NTSC standard : DC 11 V (Using AC Adapter) DC 6 V (Using battery pack) Power consumption Viewfinder on : 4.0 W (GR-SXM330/AXM230 only) 3.7 W (GR-SX960/AX760 only) LCD monitor* on : 4.5 W (GR-SXM330/AXM230 only) Video light** : 3.
ESPAÑOL EN 1 Enganche. 2 Empuje. Conmutador BATTERY RELEASE Batería Conmutador de alimentación 3 4 Adaptador de CA A la toma de corriente alterna Batería Al jack de entrada de CC (DC IN) Tiempo de carga Alimentación Esta videocámara posee un sistema de alimentación de 2 vías que le permite seleccionar la fuente de alimentación más apropiada. No utilice las unidades de alimentación suministradas con otro equipo.
GUIA PARA OPERACION RAPIDA EN Si la unidad comienza a funcionar mal, deje de usarla inmediatamente y consulte a su concesionario local de JVC. ALIMENTACION INSERCION DEL CASSETTE DE VIDEO Conmutador EJECT 1 Enganche. 2 Empuje. Conmutador BATTERY RELEASE Utilización de la batería Enganche el lado extremo de la batería en la cámara de video 1 y empuje la batería hasta que se bloquee en el lugar 2. (Procedimiento para carga, Z p.
FOR SERVICING (Only in U.S.A.) EN HOW TO LOCATE YOUR JVC SERVICE CENTER TOLL FREE: 1-800-252-5722 Dear customer: In order to receive the most satisfaction from your purchase, read the instruction booklet before operating the unit. In the event that repair is necessary, or for the address nearest your location, please refer to the factory service center list below or within the Continental United States, call 1-800252-5722 for your authorized servicer.
WARRANTY (Only in U.S.A.) EN LIMITED WARRANTY CONSUMER VIDEO 1-90 JVC COMPANY OF AMERICA warrants this product and all parts thereof, except as set forth below ONLY TO THE ORIGINAL PURCHASER AT RETAIL to be FREE FROM DEFECTIVE MATERIALS AND WORKMANSHIP from the date of original retail purchase for the period as shown below.
EN GR-SXM330 GR-SX960 GR-AXM230 GR-AX760 VICTOR COMPANY OF JAPAN, LIMITED COPYRIGHT© 2000 VICTOR COMPANY OF JAPAN, LTD.