
Camcorder User Manual


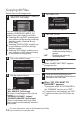


Table Of Contents
- Safety Precautions
- Model Differences
- Precautions on Playing Back 3D Images (for GZ-HM960)
- Verifying the Accessories
- Names of Parts and Functions
- Names of Buttons and Functions on the LCD Monitor
- Using the Touch Screen
- Getting Started
- Recording
- Playback
- Copying
- Further Information
- LYT2313-001A-M_SP_web.pdf
- Precauciones de seguridad
- Diferencias del modelo
- Precauciones sobre la reproducción de imágenes en 3D (para GZ-HM960)
- Comprobación de los accesorios
- Nombres de piezas y funciones
- Nombres de los botones y funciones en el monitor LCD
- Utilizar la pantalla táctil
- Introducción
- Grabación
- Reproducción
- Copia
- Más información
- LYT2313-001A-M_FR_web.pdf
- Précautions de sécurité
- Différences des modèles
- Précautions pour la lecture d’images 3D (pour GZ-HM960)
- Vérifier les accessoires
- Noms des pièces et des fonctions
- Noms des touches et fonctions sur l’écran LCD
- Utiliser l’écran tactile
- Démarrer
- Enregistrement
- Lecture
- Copier
- Informations supplémentaires
NOTE
0
For questions about the TV or method of connection, contact your TV’s manufacturer.
0
Use a High Speed HDMI mini cable as the HDMI mini cable when not using the provided one.
0
When playing back in HD quality, set “COMPONENT OUTPUT” in the “COMMON” menu to “1080i”.
The video is output in standard quality if the setting remains at “480i”.
0
When 3D images are played back on a 3D compatible TV, the display on the LCD monitor is in 2D.
(for GZ-HM960)
0
When this unit is connected to a 3D compatible TV via an HDMI cable and set to the recording mode
while in 3D mode, 3D images will appear on the TV. (for GZ-HM960)
0
If you experience fatigue or discomfort while viewing 3D images, it is recommended to play back in 2D mode. (for
GZ-HM960)
o
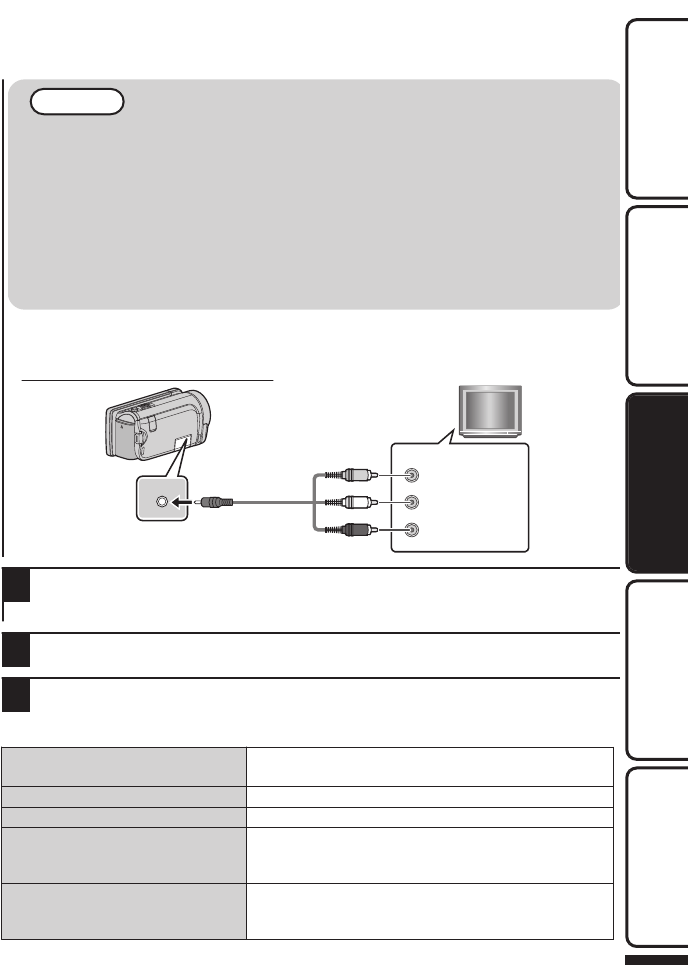
Playing back in standard quality
If you are using a conventional TV, you can play back in standard quality by connecting to the AV connector.
Connecting to the AV connector
.
AV
Red
White
Ye l low
TV
Audio Input (R)
Audio Input (L)
Video Input
Video Input
AV Cable
(Provided)
To AV Connector
2
Connect the AC adapter. (p. 10)
0
This unit powers on automatically when the AC adapter is connected.
3
Select the TV input switch.
4
Play back a file. (p. 18)
o
When images look unnatural on the TV
Images do not appear on the TV properly.
0
Disconnect the cable and connect again.
0
Turn off and on this unit again.
Images are projected vertically on the TV.
0
Set “VIDEO OUTPUT” in the “COMMON” menu to “4:3”.
Images are projected horizontally on the TV.
0
Adjust the TV’s screen accordingly.
The color of images looks strange.
0
If the video was recorded with “x.v.Color” set to “ON”, set the
“x.v.Color” setting of the TV to “ON”.
0
Adjust the TV’s screen accordingly.
3D images are not displayed in 3D. (for GZ-
HM960)
0
Set “HDMI OUTPUT” in the “COMMON” menu to “CERTAIN
TV TYPES”.
0
Set to 3D mode on the TV.
For more information, refer to the Detailed User Guide
http://manual.jvc.co.jp/index.html/
21
Getting StartedRecordingPlaybackCopying
Further
Information