
User's Manual


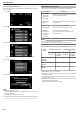


Table Of Contents
- Beginner's Guide
- Holiday Season/Christmas
- Wedding
- Travel
- Amusement Park
- Getting Started
- Key Features
- Model Differences
- Verifying the Accessories
- Charging the Battery Pack
- Grip Adjustment
- Inserting an SD Card (GZ-HM450/GZ-HM650/GZ-HM670/GZ-HM690)
- Inserting an SD Card (GZ-HM440)
- Using the Touch Screen
- Clock Setting
- Changing the Display Language
- Holding this Unit
- Tripod Mounting
- Using this Unit Overseas
- Optional Accessories
- Recording
- Taking Videos in Intelligent Auto Mode
- Taking Still Images in Intelligent Auto Mode
- Manual Recording
- Creating Animation Effects (ANIMATION EFFECT)
- Registering Human Face Personal Authentication Information
- Capturing Subjects Clearly (TOUCH PRIORITY AE/AF)
- Capturing Smiles Automatically (SMILE SHOT)
- Recording while Displaying a Magnified View of a Selected Face (FACE SUB-WINDOW)
- Reducing Camera Shake
- Recording at Intervals (TIME-LAPSE RECORDING)
- Recording Automatically by Sensing Movements (AUTO REC)
- Taking Group Shots (Self-timer)
- Setting the USER Button
- Remaining Recording Time/Battery Power
- Playback
- Editing
- Copying
- Menu Settings
- Operating the Menu
- Main Menu for Video Recording
- SCENE SELECT
- FOCUS
- BRIGHTNESS ADJUST
- WHITE BALANCE
- BACKLIGHT COMP.
- TELE MACRO
- TOUCH PRIORITY AE/AF
- LIGHT (GZ-HM650/GZ-HM670/GZHM690)
- DIS
- GAIN UP
- WIND CUT
- ANIMATION EFFECT
- TIME-LAPSE RECORDING
- AUTO REC
- FACE SUB-WINDOW
- SMILE SHOT
- SMILE%/NAME DISPLAY
- FACE REGISTRATION
- VIDEO QUALITY
- ZOOM
- SEAMLESS RECORDING
- x.v.Color
- USER BUTTON SETTING
- Main Menu for Still Image Recording
- Main Menu for Video Playback
- Main Menu for Still Image Playback
- Common Menu
- CLOCK ADJUST
- DATE DISPLAY STYLE
- LANGUAGE
- MONITOR BRIGHTNESS
- REC MEDIA FOR VIDEO (GZ-HM450/GZ-HM650/GZ-HM670/GZ-HM690)
- REC MEDIA FOR IMAGE (GZ-HM450/GZ-HM650/GZ-HM670/GZ-HM690)
- REC VIDEO TO SLOTS (GZ-HM440)
- REC STILLS TO SLOTS (GZ-HM440)
- OPERATION SOUND
- AUTO POWER OFF
- QUICK RESTART
- DEMO MODE
- TOUCH SCREEN ADJUST
- DISPLAY ON TV
- VIDEO OUTPUT
- COMPONENT OUTPUT
- HDMI OUTPUT
- HDMI CONTROL
- FACTORY PRESET
- UPDATE
- PC SOFTWARE UPDATE
- FORMAT BUILT-IN MEM. (GZ-HM450/GZ-HM650/GZ-HM670/GZ-HM690)
- FORMAT SD CARD
- ERASE ALL DATA (GZ-HM450/GZ-HM650/GZ-HM670/GZ-HM690)
- Names of Parts
- Indications on the LCD monitor
- Troubleshooting
- Battery Pack
- Recording
- Recording cannot be performed.
- Recording stops automatically.
- The continuous shooting speed of still images is slow.
- The focus is not adjusted automatically.
- Zoom does not work.
- Mosaic-type noise occurs when recording scenes with fast movements or extreme changes in brightness.
- Vertical lines appear on recorded images.
- Card
- Playback
- Sound or video is interrupted.
- The same image is displayed for a long time.
- The motion is choppy.
- Cannot find a recorded file.
- Images do not appear on the TV properly.
- Images are projected vertically on the TV.
- The image displayed on TV is too small.
- When connected to the TV via the HDMI mini cable, proper images and sounds are not output.
- Editing/Copying
- Computer
- Screen/Image
- Other Problems
- The image is grainy.
- This unit heats up.
- The language on the display changed.
- HDMI-CEC functions do not work properly, and the TV does not work in conjunction with this unit.
- The unit operates slowly when switching between video mode and still image mode, or when switching the power on or off.
- This unit does not function properly and error messages appear.
- Make a backup of important recorded data.
- Error Message?
- CHECK LENS COVER
- SET DATE/TIME!
- COMMUNICATION ERROR
- FORMAT ERROR!
- DATA DELETION ERROR
- ERROR IN BUILT-IN MEMORY!
- MEMORY CARD ERROR!
- NOT FORMATTED
- RECORDING FAILURE
- CANNOT TAKE MORE STILL IMAGES AT THE MOMENT
- PLAYBACK FAILED
- VIDEO MANAGEMENT FILE IS DAMAGED, RECOVERY IS REQUIRED TO RECORD/PLAYBACK, RECOVER?
- UNSUPPORTED FILE!
- UNSUPPORTED SCENE!
- THIS FILE IS PROTECTED
- CHECK CARD'S WRITE PROTECTION SWITCH
- INSUFFICIENT AVAILABLE SPACE
- MAXIMUM QUANTITY RECORDING FOLDERS/ FILES HAS BEEN REACHED
- SCENE QUANTITY EXCEEDED LIMIT
- NUMBER OF FOLDERS OVERFLOW
- FILE QUANTITY LIMIT EXCEEDED
- CAMERA TEMPERATURE IS TOO COLD KEEP CAMERA POWER ON PLEASE WAIT
- NO FILES
- RECORDING CANCELLED
- Maintenance
- Specifications

Taking Videos in Intelligent Auto Mode
You can record without worrying about the setting details by using the
Intelligent Auto mode. Settings such as exposure and focus will be adjusted
automatically to suit the shooting conditions.
0
In case of specific shooting scenes such as night view (B), person (A)
etc., its icon is displayed on the screen.
0
Before recording an important scene, it is recommended to conduct a trial
recording.
1
Open the lens cover.
.
2
Open the LCD monitor and select the video mode.
.
0
The video mode icon appears.
3
Check if the recording mode is Intelligent Auto.
.
0
If the mode is H Manual, press the i.AUTO button to switch.
The mode changes between Intelligent Auto and Manual with every
press.
4
Start recording.
.
0
Press again to stop.
0
Some displays disappear after approximately 3 seconds.
Use the n button to change the displays.
“Operation Buttons for Video Recording” (A p. 26)
Indications During Video Recording
.
Display Icon Description
Time Displays the current time.
“Clock Setting” (A p. 20)
Touch Priority AE/
AF
Displays the setting of “TOUCH PRIORITY AE/AF”
. By default, it is set to “FACE TRACKING”.
“Capturing Subjects Clearly (TOUCH PRIORITY
AE/AF)” (A p. 39)
Video Quality Displays the icon of the “VIDEO QUALITY” setting
selected in the recording menu.
“VIDEO QUALITY” (A p. 81)
Image Stabilizer Sets whether to reduce camera shake.
“Reducing Camera Shake” (A p. 42)
Scene Counter
(Recorded Time)
Displays the elapsed time of the video that is
currently being recorded.
Remaining
Recording Time
Displays the remaining time for video recording.
Recording Mode Press the i.AUTO button to switch the recording
mode between P (Intelligent Auto) and H
(Manual).
Battery Indicator Displays the approximate remaining battery
power.
Details of the battery power can be displayed by
pressing the INFO button.
“Remaining Recording Time/Battery Power”
(A p. 48)
Recording Media Displays the icon of the media where videos are
recorded to.
The recording media can be changed.
“REC MEDIA FOR VIDEO (GZ-HM450/GZ-
HM650/GZ-HM670/GZ-HM690)” (A p. 95)
“REC VIDEO TO SLOTS (GZ-HM440)”
(A p. 96)
o
Scenes of Intelligent Auto
Display Icon
Description
E
Captures one’s skin beautifully.
A
Allows people to be captured naturally.
D
Focuses at a far distance and captures a sharp
image with vivid colors.
I
Records with minimal noise in the overall image.
B
Allows night scenes to be captured accurately with
minimal noise in the overall image.
J
Prevents colors from fading even when recording
in a bright environment.
G
Records while focusing on a near object.
H
Reproduces the green color of trees vividly.
F
Reproduces the colors of sunset naturally.
C
Adjusts settings so that the subject does not
appear too dark due to backlight.
Recording
25